CircuitPython in a small factor with CircuitBrains Deluxe

CB-Deluxe-Front
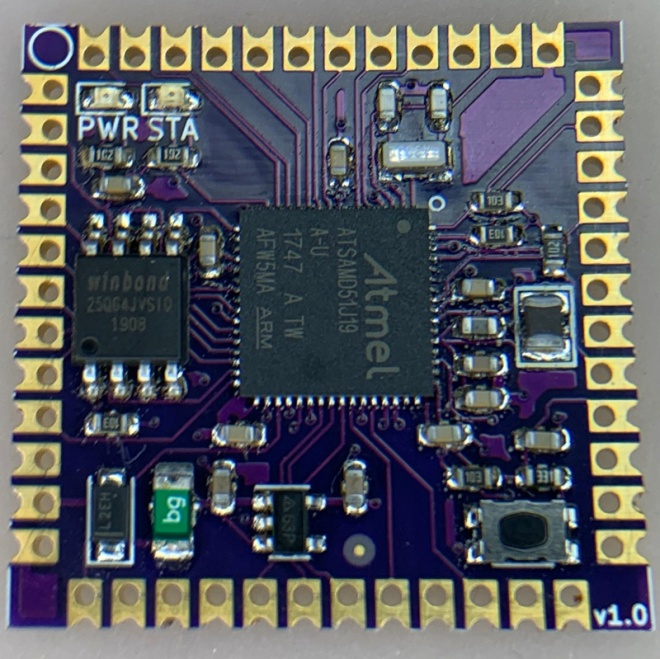
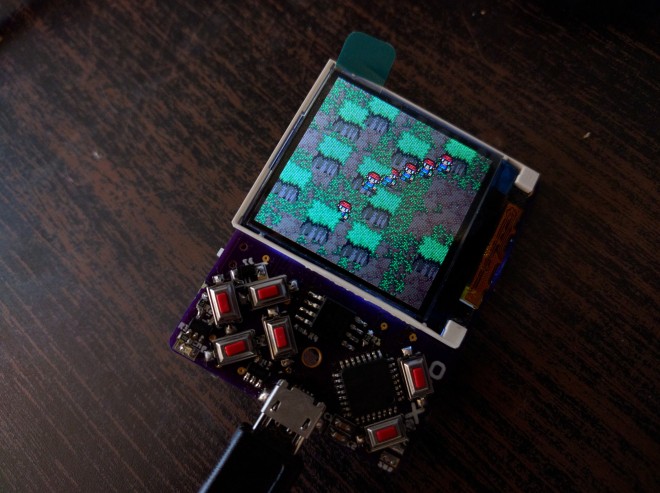
Kevin Neubauer has designed a System-on-Module (SoM) to make it easy to embed Circuit Python in project:

CircuitBrains Deluxe

I love Adafruit’s CircuitPython product line. The ability to just plug your board into USB, make code changes, and see them take effect in real-time is amazing. However, when it comes to finishing up a CircuitPython project, I felt limited in choice for a small form-factor, streamlined board. I always ended up creating my own boards. The overhead in doing this was huge though. You have to make sure your design has proper power, decoupling, and clock. Then you source all of the parts. After that you lay out the PCB and have it fabricated. When the PCB and parts arrive, you have to deal with finicky small-pitch surface mount assembly. Finally, you need to download the sources for the UF2 bootloader and CircuitPython and define your board, compile, and flash. This makes what should be a small project pretty time consuming and tedious!

https://twitter.com/kevinneubauer/status/1204808844293095424
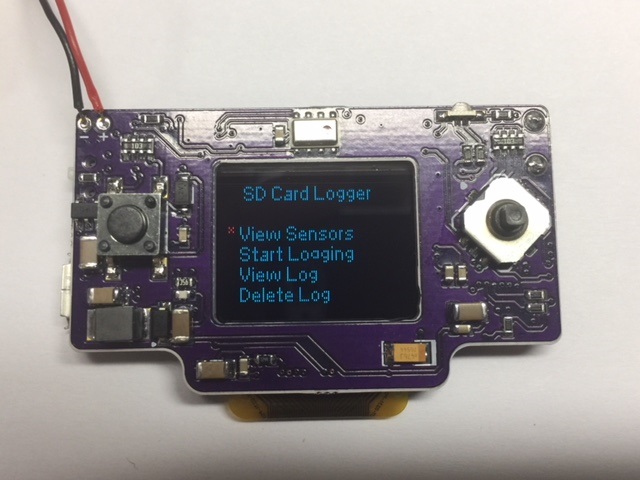
Goals:

  1. Reduce barriers to entry for custom CircuitPython-based boards & badges
  2. Package CircuitPython into a small form-factor module that will add minimal dimensions to a parent project
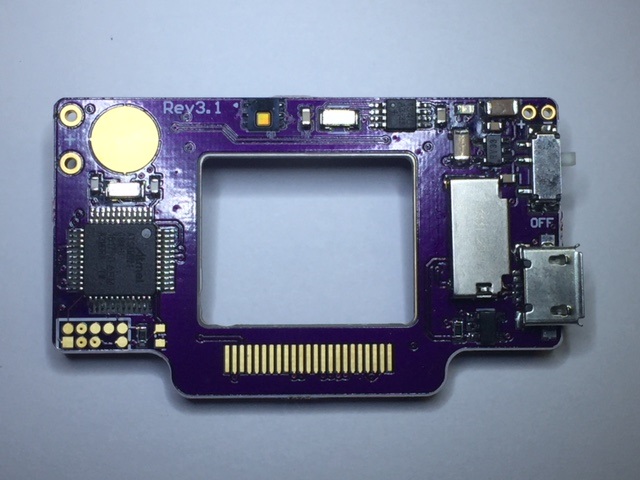
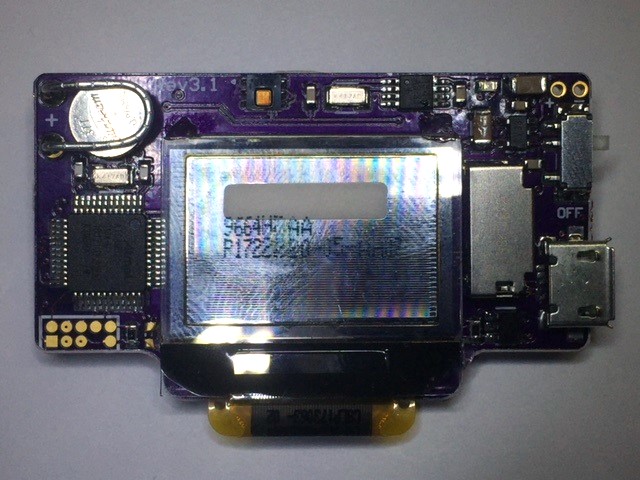
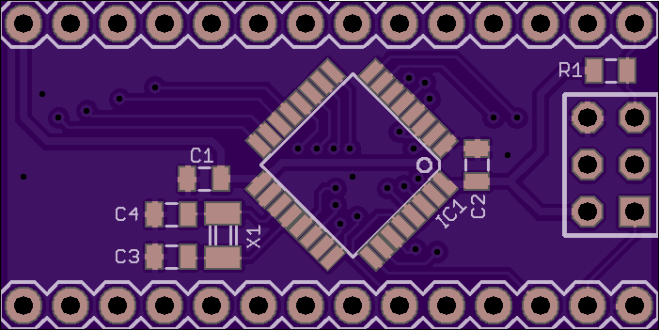
Specs:

  1. Dimensions: 29 x 29 x 3.5 millimeters / 1.15 x 1.15 x 0.15 inches
  2. Atmel ATSAMD51J19A Microcontroller (32-bit ARM Cortex M4)
    • 120 MHz
    • 192 KB SRAM
    • 512 KB Flash
  3. 8 MB SPI Flash
  4. Onboard 3.3V LDO Regulator
  5. Power and Status LEDs
  6. Breakouts for SPI and I2C
  7. Breakouts for 14 Analog and 19 Digital Inputs/Outputs

Links: https://github.com/neubauek/CircuitBrains

CircuitPython in a small factor with CircuitBrains Deluxe

Reflowduino: Put That Toaster Oven To Good Use

From  on the Hackaday blog:

Reflowduino: Put That Toaster Oven To Good Use

There are few scenes in life more moving than the moment the solder paste melts as the component slides smoothly into place. We’re willing to bet the only reason you don’t have a reflow oven is the cost. Why wouldn’t you want one? Fortunately, the vastly cheaper DIY route has become a whole lot easier since the birth of the Reflowduino – an open source controller for reflow ovens.

This Hackaday Prize entry by [Timothy Woo] provides a super quick way to create your own reflow setup, using any cheap means of heating you have lying around. [Tim] uses a toaster oven he paid $21 for, but anything with a suitable thermal mass will do. The hardware of the Reflowduino is all open source and has been very well documented – both on the main hackaday.io page and over on the project’s GitHub.

sidekick-e1525981389910

The board itself is built around the ATMega32u4 and sports an integrated MAX31855 thermocouple interface (for the all-important PID control), LiPo battery charging, a buzzer for alerting you when input is needed, and Bluetooth. Why Bluetooth? An Android app has been developed for easy control of the Reflowduino, and will even graph the temperature profile.

When it comes to controlling the toaster oven/miscellaneous heat source, a “sidekick” board is available, with a solid state relay hooked up to a mains plug. This makes it a breeze to setup any mains appliance for Arduino control.


Reflowduino: Put That Toaster Oven To Good Use

LED ring

Jens Hauke designed this charlieplexed 20 LED blinker controlled by an ATTiny45 for the Hackaday Coin Cell Challenge:

156251514462780263

LED Ring

This is a small blinky with 20 LEDs powered by one CR2032 coin cell
and with an ATTiny45 brain. The firmware is written in plain C and
compiled with the avr-gcc toolchain. The PCB is a two layer design made
with KiCad.
Space efficient daisychained LED placing with shared anode/cathode soldering pads.

Firmware and gerbers are available on GitHub:

jensh/attiny-20led-ring


Jens has shared the board on OSH Park:

LED 20 Ring ATTiny

65a7204f0dcd3a7d1b3f36c7370cb7af

Order from OSH Park

Here is a video of the LED in action:

LED ring

µGame by Radomir Dopieralski

Radomir Dopieralski has created handheld game console programmable with (Micro/Circuit)Python:

2179411509287391232.jpg

µGame

A small game console directly programmable in Python. I always wanted to make this, and after my work on #PewPew FeatherWing I finally decided that I’m ready.

The first version may be a bit of a stretch — I tried to make it as small as possible, fitting in the 5x5cm limit of PCB manufacturers, so that it will be cheap to make the PCBs. Using the cheap ST7735 TFT display, and a cheap ATSAMD21E chip. I also tried to put all the components on one side of the board, but failed with that — the power and reset switch had to go on the back, as well as the buzzer.


µGame by Radomir Dopieralski

SAMD21G Sensor Board with Color OLED

Assembly instructions on Mike Rankin’s blog:

SAMD21G Sensor Board with Color Oled

samd_front

Design files and source are available on GitHub:

mike-rankin/SAMD21G18A_Sensor_Board_with_Color_Oled

components1

This Sensor Board is yet another variation of another one on my site. It is not for sale with no real purpose in mind but the design files to make your own are here. The project was created as design challenge. My full time job is pcb design work and as a hobby I enjoy experimenting with new design ideas.

glued

This was one of the more challenging designs I’ve worked on in a while. A few times I’d given up on routing it. Evan using four routing layers I found it tough. The idea was to hide the bezel of the display behind the board but have sensor components on that same board. It would look something like a little tiny television with all the components around the edges.

oled_display.jpg

This latest revision has fixed a few issues I found on previous versions but the design idea can possibly help others in some way. Full credit goes to Adafruit for publishing the Feather M0 design files along with the bootloader. I used the Feather design to create the schematic for my board.

SAMD21G Sensor Board with Color OLED

Workshop: Assembling the Tinusaur Kit in Varna, Bulgaria

This Saturday, September 2nd, we will have one day workshop for assembling the Tinusaur kits for those who supported our Indiegogo crowdfunding campaign. It will take place in Varna, Bulgaria, our host will be VarnaLab – the local hackerspace. We will learn the basics of electronic components, microcontrollers – ATtiny85 in particular and, of course, […]

via Workshop: Assembling the Tinusaur Kit in Varna, Bulgaria — The Tinusaur Project

Workshop: Assembling the Tinusaur Kit in Varna, Bulgaria

pockeTETRIS: compact Tetris clone using ATtiny85 and OLED

[dombeef] originally built pocketTETRIS as a Father’s Day gift for his Tetris-loving pops. However, having finished the project he’s decided to share it with the universe, and it’s looking rather sweet. He made the game the smallest he could make, with size limitations imposed by a 0.96” OLED display, the coin-cell battery pack, and his desire…

via Mini Tetris Game Packs a Tiny85 — Hackaday

pockeTETRIS: compact Tetris clone using ATtiny85 and OLED

ATXMega32E5 adapted for a breadboard

2017-07-04T23:35:25.015Z-IMG_8570.jpg.855x570_q85_pad_rcrop.jpg

ATXMega32E5 breakout board

The ATXMega32E5 is the next step up for those experienced with the AVR series of microcontrollers from Microchip (formerly Atmel). They use the same compilers and libraries as the rest of the AVR 8- and 16-bit families, but they can run at 32 MHz and have an amazingly powerful set of internal peripherals that can take your projects to the next level and beyond.

2017-07-04T23:35:25.015Z-IMG_8571.jpg.855x570_q85_pad_rcrop.jpg

For prototyping, however, the disadvantage is that the XMega chips are not available as through-hole parts. That’s where this breakout board comes into play.

nsayer has shared the board on OSH Park:

ATXMega_E5 breakout v1.0

9ccb24bd9f9b447019c3a97cfa9dd06b.png
Order from OSH Park

ATXMega32E5 adapted for a breadboard

Orthrus: secure two-card storage

From Nick Sayer on Hackaday.io:

3464311493930554576.jpg

Orthrus: SD card secure RAID USB storage

This project is a hardware mechanism to provide secure “two man control” over a data store. It is a USB microSD card reader, but it requires two cards. The data is striped in the style of RAID 0, but the data is also encrypted with a key that is stored in a key storage block on each card. In essence, each card is useless without the other. With possession of both cards, the data is available without restriction, but with only one, the remaining data is completely opaque.

This allows you to securely transport a data set by writing it onto a pair of cards and separately transporting them to a destination for recombination.

The intent is that only the pairing of two cards becomes in any way special. A card pair could be inserted in any Orthrus device and the data would be made available. But with only one card, all you get is half of the data encrypted with a key which you only half-possess.

The firmware source code is available on GitHub:

githubnsayer/Orthrus

white

The assembled board is available on Tindie:

Screenshot from 2017-05-05 18-25-42

Orthrus: secure two-card storage

EEEmu SPI

Blecky’s latest project on Hackaday.io is an EEPROM/Flash emulator with a fun name:

unnamed

EEEmu SPI

The EEEmu SPI emulates any Serial Peripheral Interface Bus EEPROM or Flash memory chipsets up to an interface speed of 25MHz. It also supports any supply and interface voltage between 1.8 to 5 Volts and can be configured to support even the largest of memory sizes.

7435141492517315886

This repository contains configurations for all the currently supported EEPROM and Flash chips for the EEEmu SPI:

github
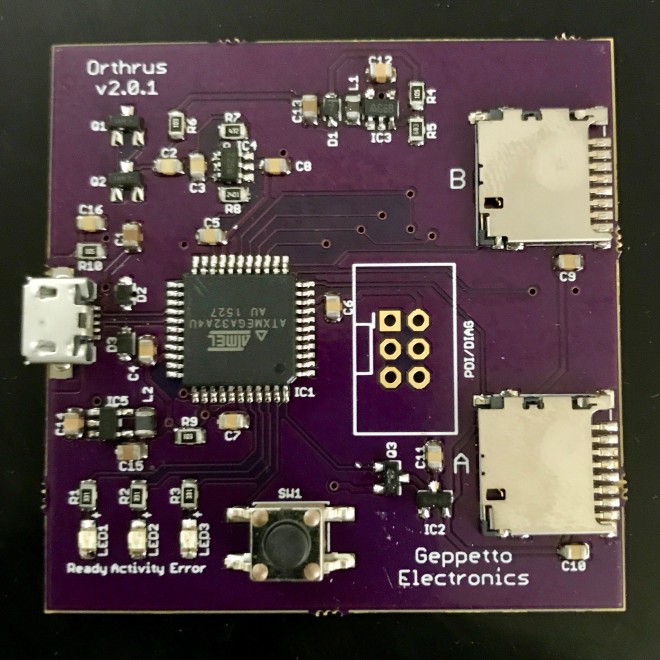
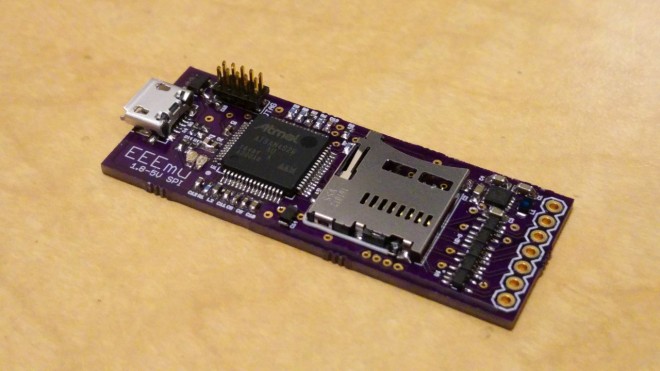
EEEmu/Supported-Devices

white

EEEmu SPI