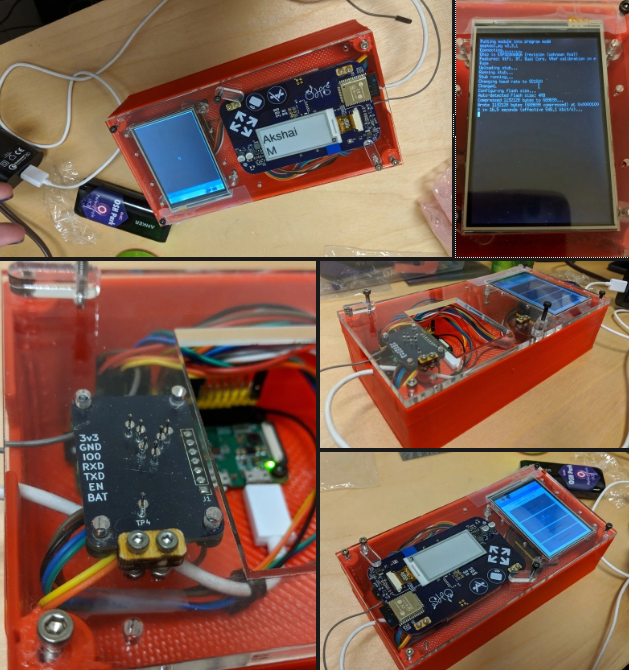
Bring your Open Hardware Summit badge to Hackaday Supercon

Bring your Open Hardware Summit badge to Hackaday Supercon in Pasadena this weekend!

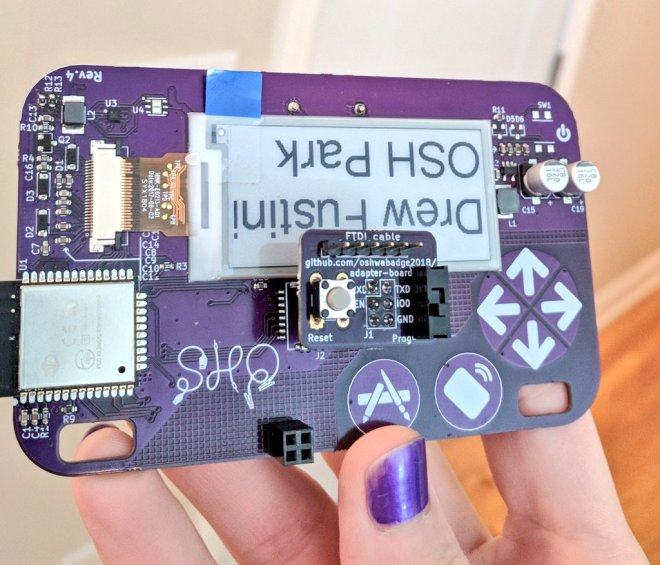
Drew Fustini will have the badge programming jig with updated firmware featuring like the MicroPython WebREPL, accelerometer demo, and Magic 8-Ball app by Steve Pomeroy

Screenshot from 2018-10-30 11-48-13.png

Drew Fustini will also have USB-to-serial adapter boards for badge to share!

dpuljnbw0aab7st1


Bring your Open Hardware Summit badge to Hackaday Supercon

MicroPython WebREPL on the Open Hardware Summit badge

The 2018 Open Hardware Summit badge runs MicroPython firmware which allows for an interactive programming experience known as the REPL:

Getting a MicroPython REPL prompt

REPL stands for Read Evaluate Print Loop, and is the name given to the interactive MicroPython prompt that you can access on the ESP8266. Using the REPL is by far the easiest way to test out your code and run commands.

There is an USB-to-serial adapter board which be used to access the REPL on the badge via the serial port.  However, a simpler option is to use the WebREPL:

WebREPL – a prompt over WiFi

WebREPL allows you to use the Python prompt over WiFi, connecting through a browser. The latest versions of Firefox and Chrome are supported.

For your convenience, WebREPL client is hosted at http://micropython.org/webrepl . Alternatively, you can install it locally from the the GitHub repository https://github.com/micropython/webrepl

Before connecting to WebREPL, you should set a password and enable it via a normal serial connection. Initial versions of MicroPython for ESP8266 came with WebREPL automatically enabled on the boot and with the ability to set a password via WiFi on the first connection, but as WebREPL was becoming more widely known and popular, the initial setup has switched to a wired connection for improved security:

import webrepl_setup

Follow the on-screen instructions and prompts. To make any changes active, you will need to reboot your device.

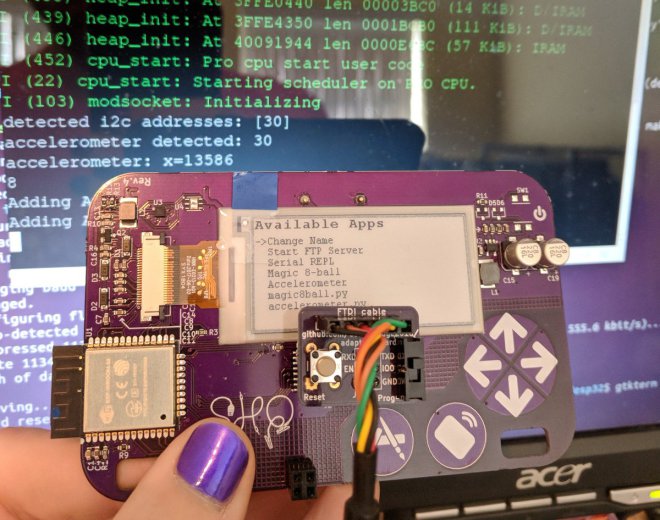
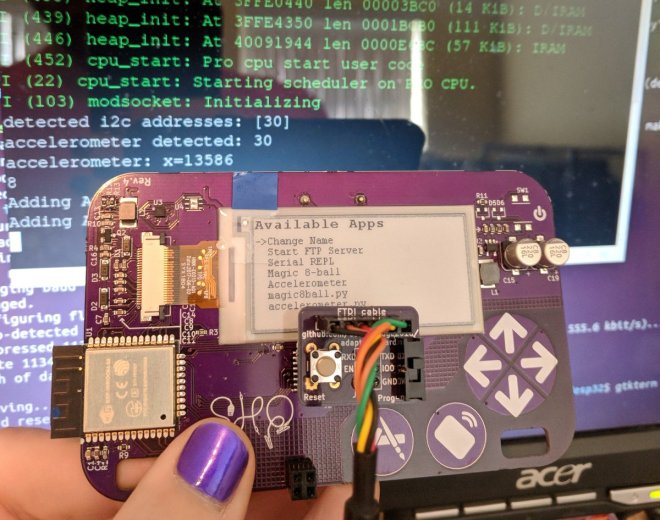
The MicroPython firmware for the badge has been updated to add WebREPL in the list of available apps.

You can order this USB to serial adapter board for the badge and then follow the instructions to build and flash the new firmware.  The WebREPL option will turn on WiFi and put the badge into AP mode.  Connect to it from your device, such as a laptop, and then connect to the badge using the WebREPL browser-based client.

Resources:

MicroPython WebREPL on the Open Hardware Summit badge

OHS18 badge: accelerometer demo, adapter board, Tindie listing

Updates for the 2018 Open Hardware Summit badge project:

MicroPython demo app for the Accelerometer

Want to use the KX122-1037 Accelerometer (datasheet) on the 2018 Open Hardware Summit badge?

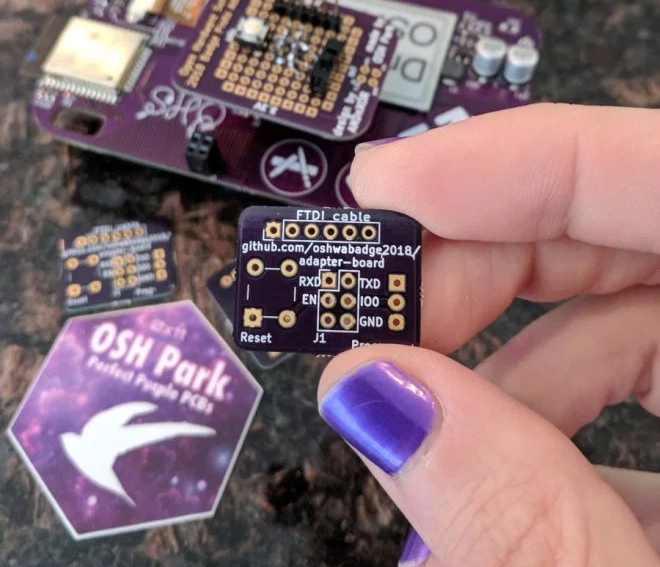
USB-to-Serial adapter board

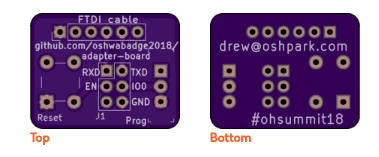
This adapter board to connects a USB-to-serial cable to the 2018 Open Hardware Summit badge.

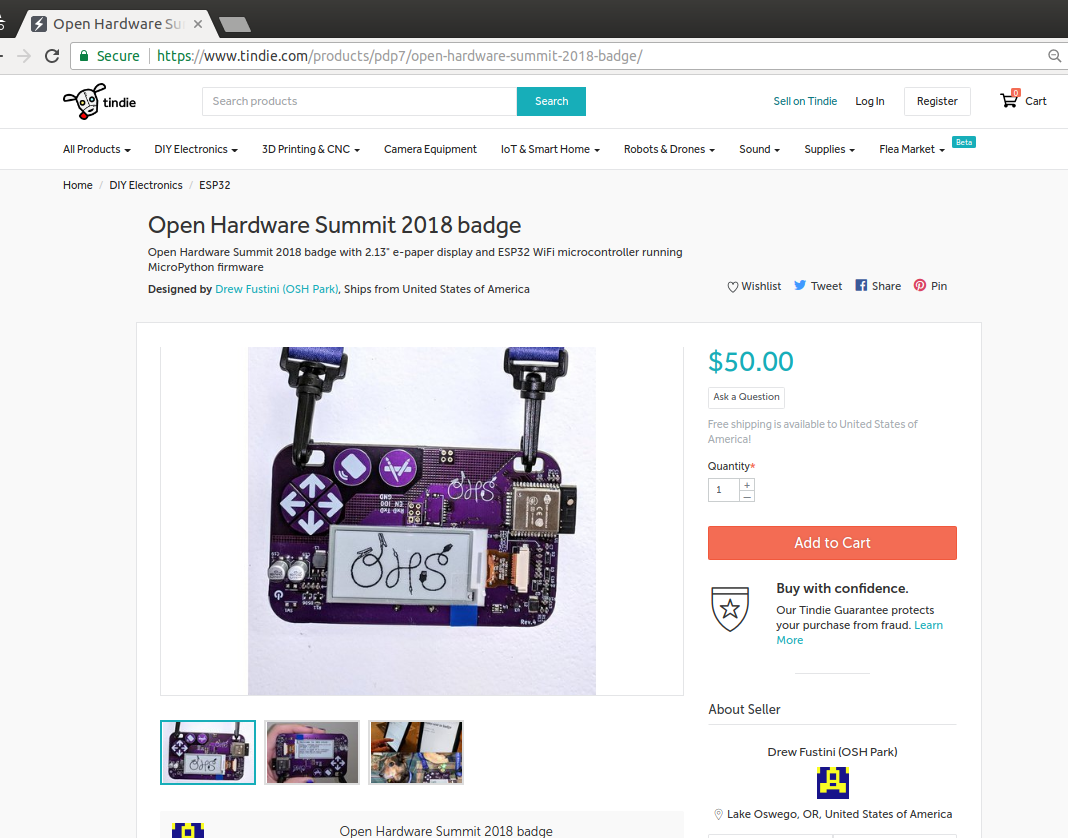
Extra badges being sold on Tindie

The extra badges from the Summit are being sold here on Tindie as a fundraiser for the Ada Lovelace Fellowship which provides travel assistance to the Open Hardware Summit. All sales revenue will be 100% donated to the Open Source Hardware Association (OSHWA) for this purpose.

OHS18 badge: accelerometer demo, adapter board, Tindie listing

USB-to-serial adapter board for Open Hardware Summit badge

This adapter board to connects a USB-to-serial cable to the 2018 Open Hardware Summit badge.

DpulizcW0AABn7E

The badge features an ESP32 microcontroller running MicroPython firmware.  The firmware provides a Python interpreter prompt (REPL) on the serial port which allows interactive programming of the badge!

DpuljnbW0AAb7st

A previous blog post describes how to build and flash new MicroPython firmware to the badge:


The KiCad design files are shared on GitHub:

oshwabadge2018/adapter-board

Screenshot from 2018-10-20 02-25-11.pngThe board has been shared on OSH Park:

OSH Park: adapter board for USB-to-serial cable

Screenshot from 2018-10-18 00-02-21

Order from OSH Park

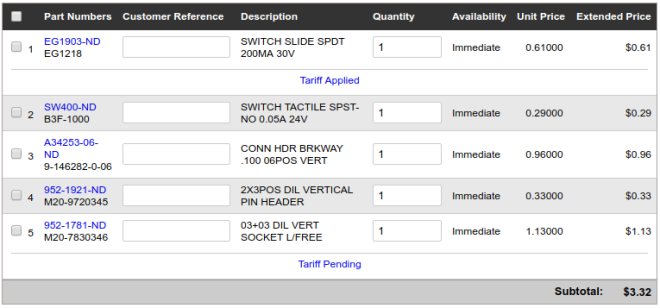
Bill of Materials (BoM)

  • Switch for programming mode
    • E-Switch EG1218
    • Slide Switch SPDT
    • Digi-Key: EG1903-ND
  • Pushbutton for reset
    • Omron B3F-1000
    • Tactile Switch SPST-NO
    • Digi-Key: SW400-ND
  • Header for FTDI usb-to-serial cable
    • TE AMP 9-146282-0-06
    • 1×6 Pin Header 0.1″ pitch
    • Digi-Key: A34253-06-ND
  • Header to connect J1 socket on badge
    • Harwin M20-9720345
    • 2×3 Pin Header 0.1″ pitch
    • Digi-Key: 952-1921-ND
  • J1 header socket on the badge
    • Harwin 952-1781-ND
    • 2×3 Header Socket 0.1″ pitch
    • Digi-Key: M20-7830346

Digi-Key shopping cart

Screenshot from 2018-10-20 02-28-43

Resources:

USB-to-serial adapter board for Open Hardware Summit badge

Open Hardware Summit badge: accelerometer demo

IMG_20181016_084030

Want to use the KX122-1037 Accelerometer (datasheet) on the 2018 Open Hardware Summit badge?

Step 1:

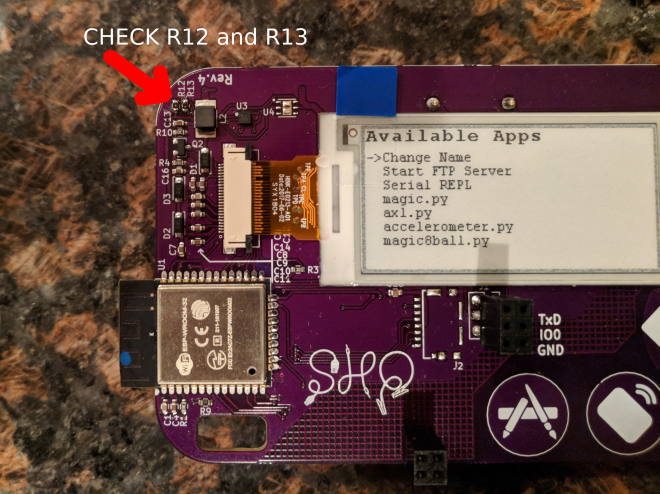
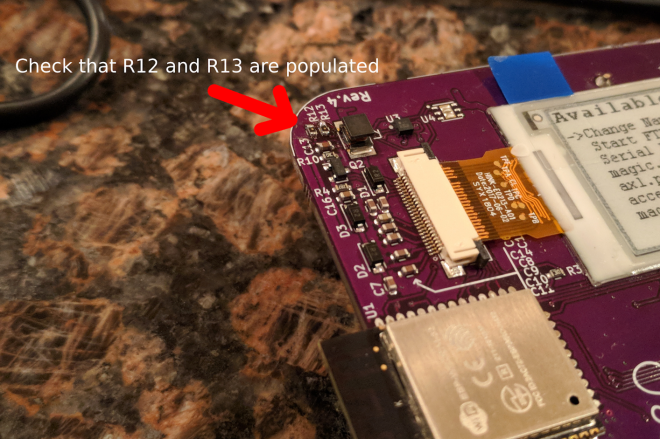
Make sure that R12 and R13 are populated.

IMG_20181004_202602 (1)

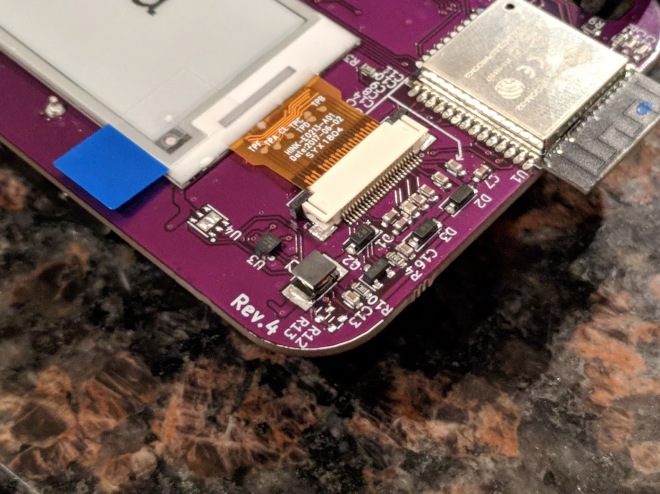
R12 and R13 are 2.2K Ohm resistors for the I2C bus.  This is needed for the accelerometer to work.  We mistakenly had DNP (do not place) on the BoM (Bill of Materials) for R12 and R13.

IMG_20181004_202414 (1)

Awesome people at Artisan’s Asylum makerspace helped to solder these resistors on the badges right before Open Hardware Summit! 💜✨

It is possible that some badges were not reworked.  Please email [email protected] if they are missing from your badge.

This photo shows what is will look like when R12 and R13 are missing:

IMG_20181004_213549

Step 2:

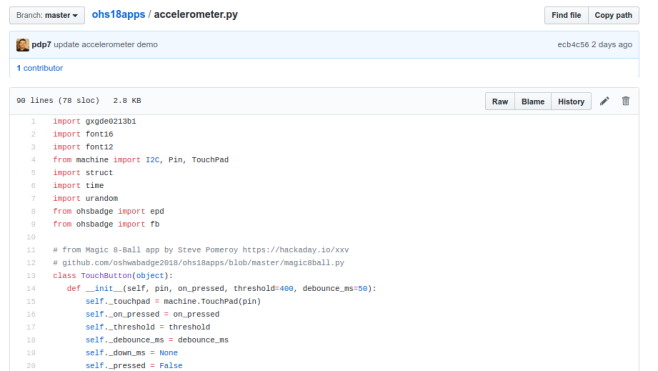
Download the Python file named accelerometer.py from the ohs18apps repository on GitHub:Screenshot from 2018-10-17 23-35-18.png

Start the FTP server and connect to the SSID listed on the badge:

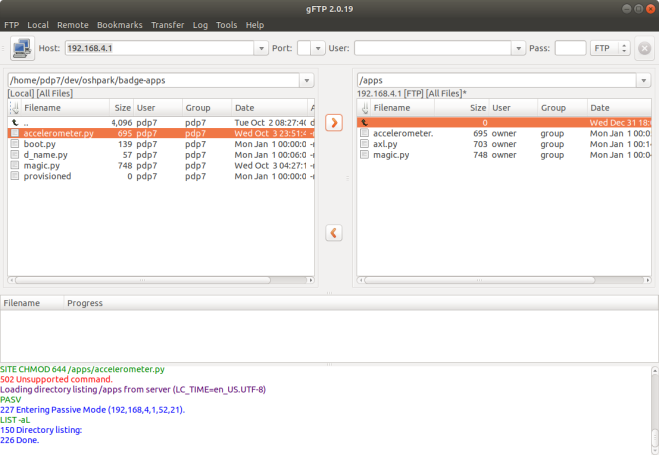
Open your FTP client application and connect to 192.168.4.1:
Screenshot from 2018-10-03 23-58-59

After the transfer completes, power cycle the badge by removing the batteries and reinserting.

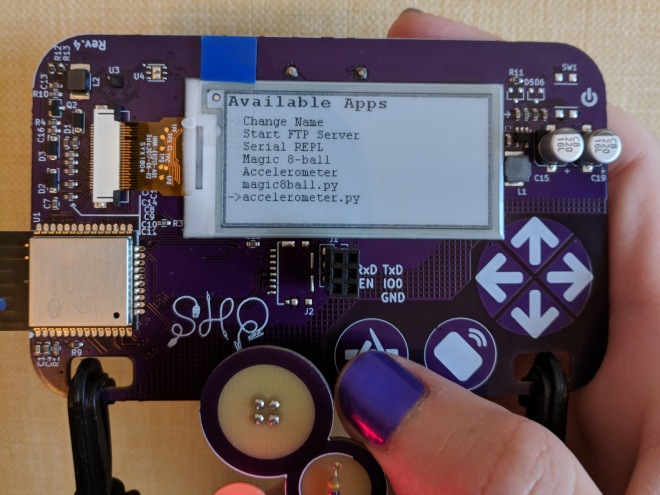
Press the left application button (with the paintbrush and pencil icons) to enter the menu.  accelerometer.py should then be listed under Available Apps menu.  Press the down cursor until accelerometer.py is selected and then press the application button again.

IMG_20181016_083924

Step 3:

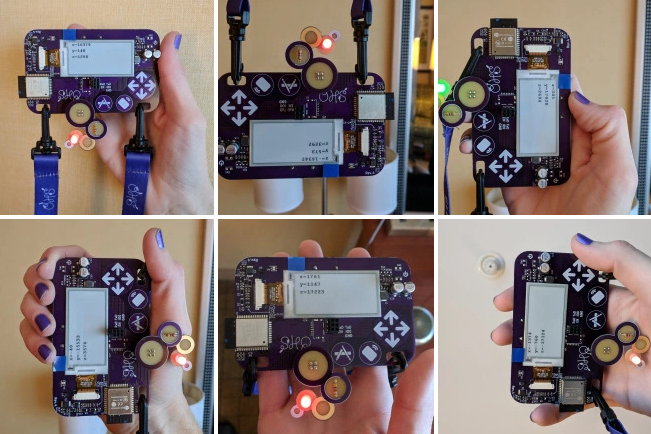
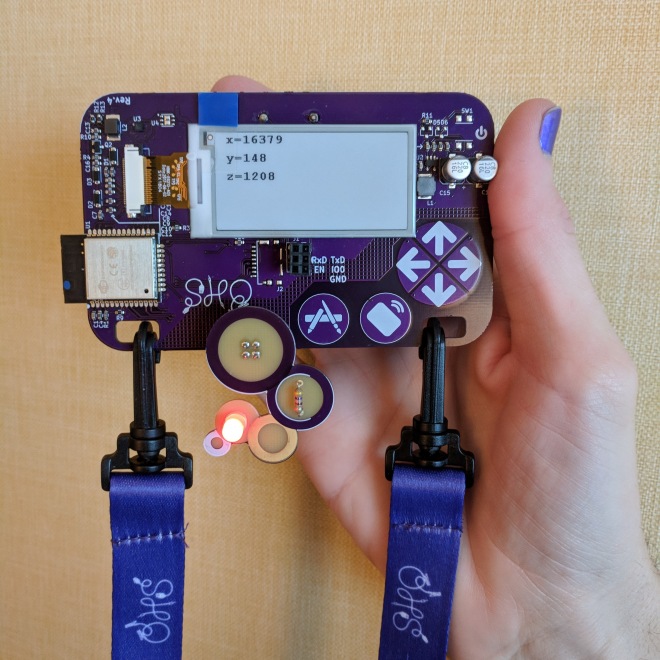
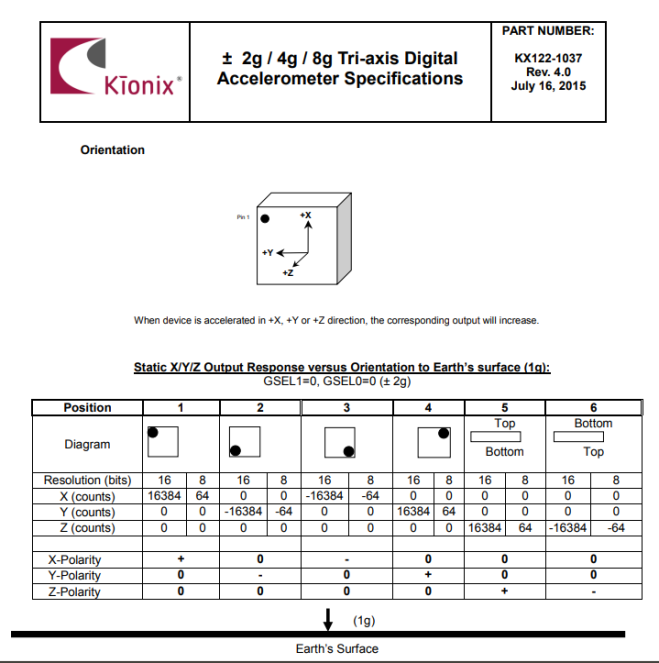
The KX122-1037 Accelerometer datasheet describes the 3 different axis:

Screenshot from 2018-10-17 21-25-45

Here are examples of the X, Y and Z axis of the accelerometer for reference:

Resources:

Open Hardware Summit badge: accelerometer demo

Open Hardware Summit badge: adapter board for USB-to-serial cable

DosSfNPWwAE-ldB.jpg

UPDATE: this PCB design replaces the perf board version

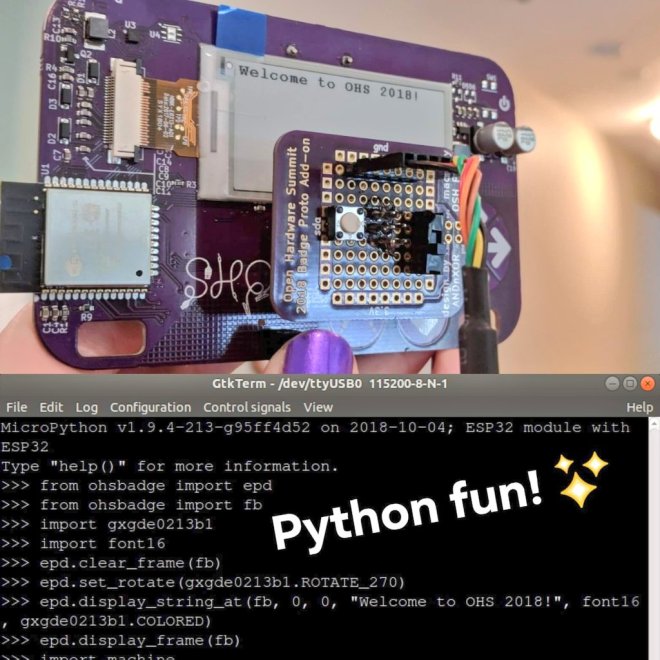
The 2018 Open Hardware Summit badge features an ESP32 microcontroller running MicroPython firmware.  The firmware provides a Python interpreter prompt (REPL) on the serial port which allows interactive programming of the badge!

This post describes how to connect an FTDI 3.3V USB to serial cable to the J1 header on the badge.  In addition to the serial console, this adapter board for the J1 header enable new MicroPython firmware to be flashed on to the badge.
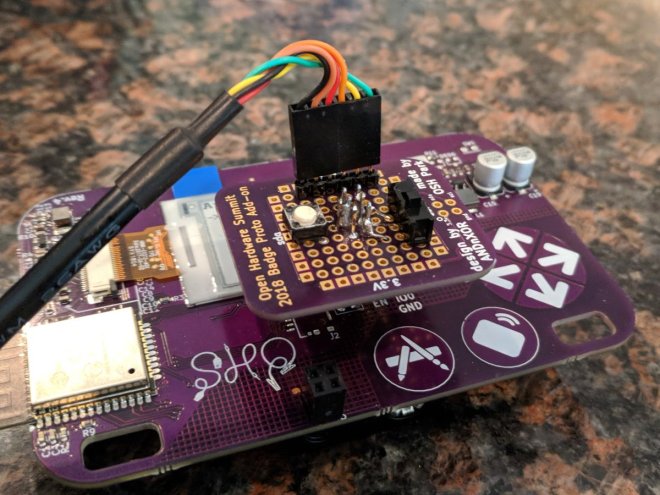
DorWBnpX4AAqRR_

First, solder a 2×3 pin header socket on to the badge at the J1.  Alternatively, a strip of 0.1″ header sockets could be cut into two 1×3 pieces.
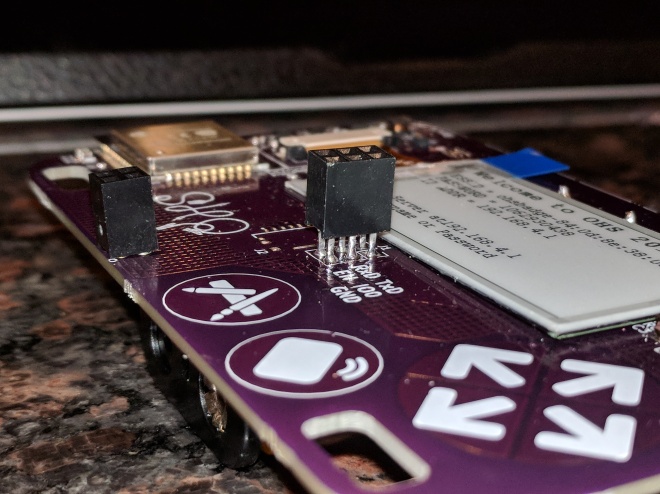
IMG_20181003_235654

Here is a Fritzing diagram (PDF) of how to solder this J1 adapter board onto a perf board:
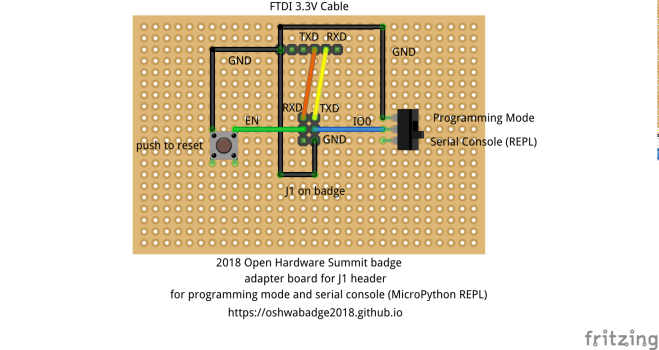
ohs18badge-j1-adapter_bb

Note: I re-purposed the OHS18 badge add-on proto dev board to act as a generic perf board.

The slide switch on the adapter board will allow the ESP32 to enter programming mode by connecting the IO0 pin on J1 to ground.  The push button on the adapter board will reset the board by connecting EN pin on J1 to ground.

If you have the serial port open in a terminal emulator, then you should see this after switching into programming mode and pressing the reset push button:
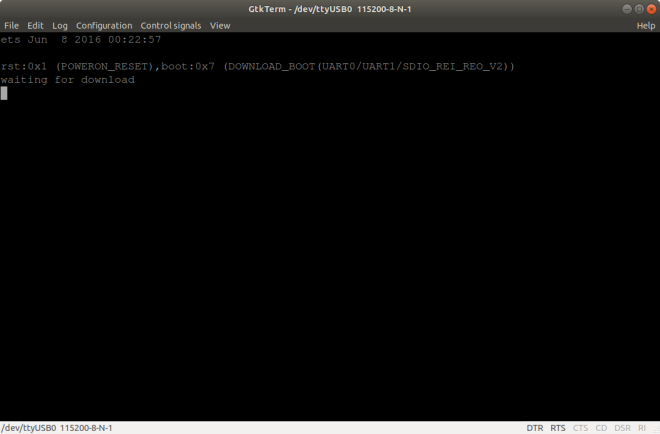
Screenshot from 2018-10-03 22-48-12

Build the MicroPython firmware for the ESP32 on the badge by following these directions in the GitHub repo README.

To flash the ESP32, close your terminal emulator program so that esptool.py can open the serial port (which is /tty/USB0 on my Linux computer):
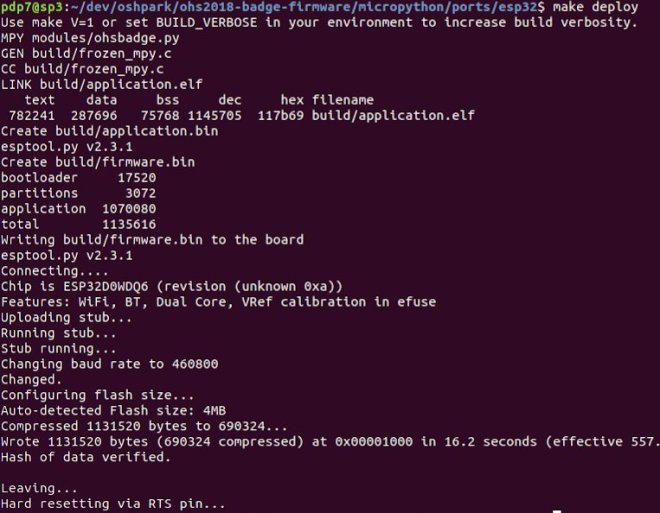
DorYWzaXUAAhTBT

Switch from programming mode to serial console mode so that IO0 pin on J1 is no longer grounded.  Then open the serial port in your terminal emulator again (115200 baud, 8-N-1) and press the reset push button:
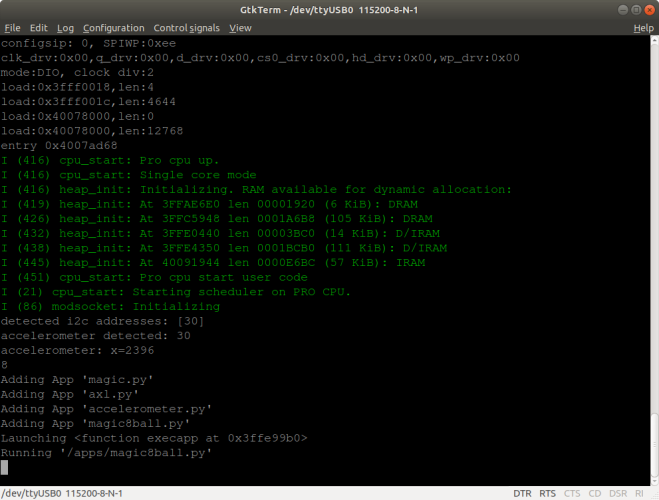
DothUWiW4AInYIN

You should see the output from MicroPython firmware running.

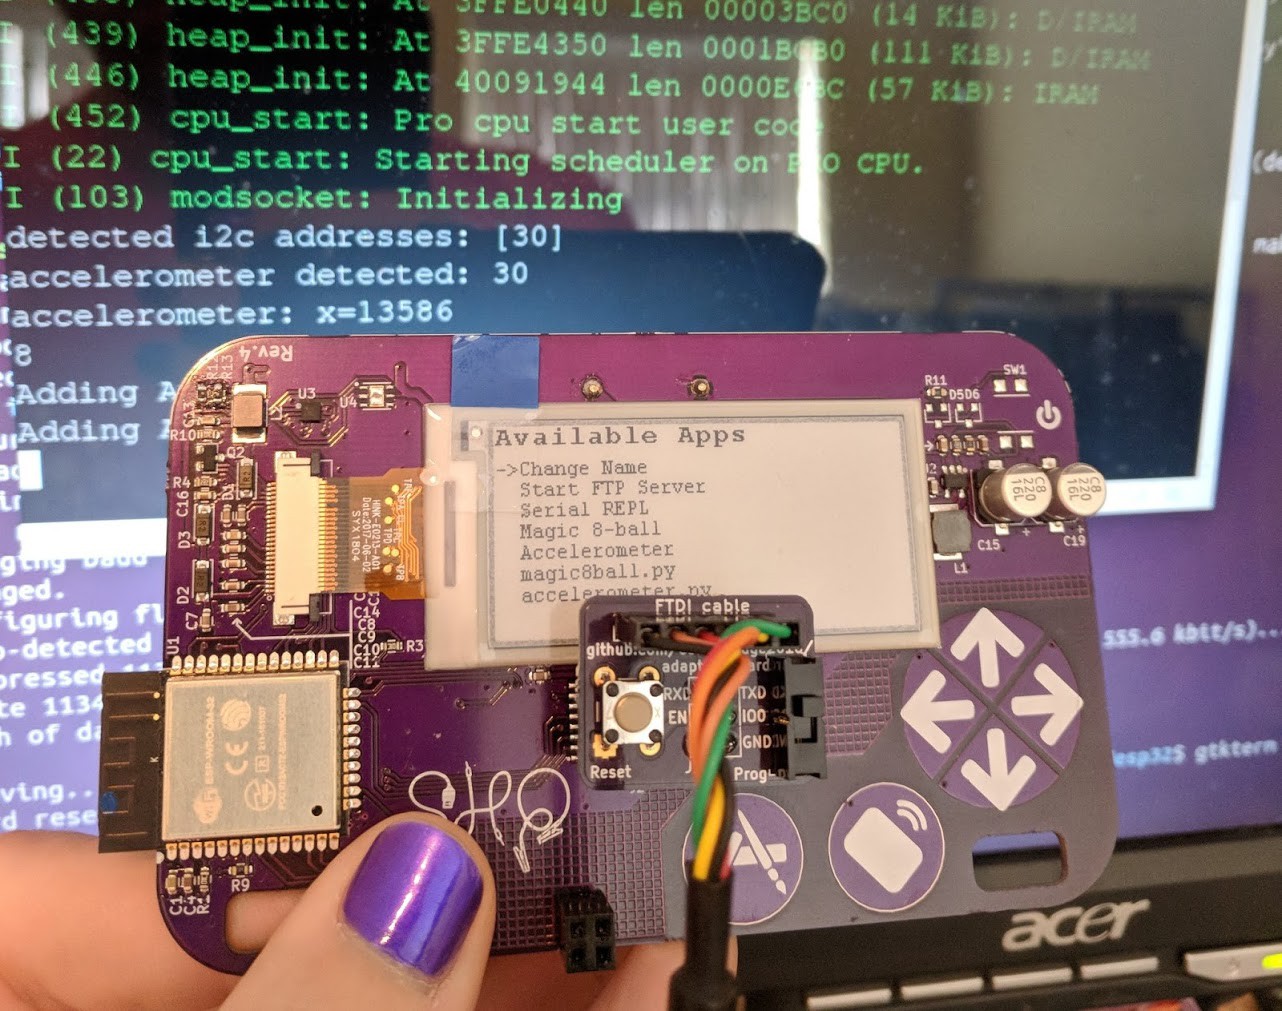
To use the interactive Python prompt (REPL), press the menu button on the badge (the icon with pencil and paintbrush) and select Serial REPL from the Available Apps menu:
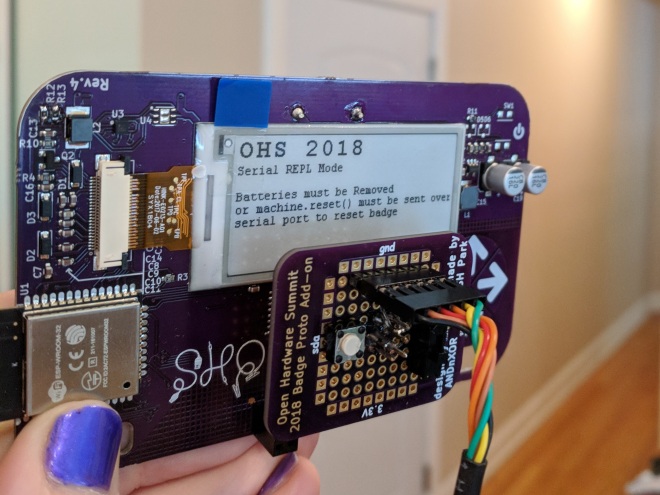
IMG_20181004_113042 (1)

The terminal emulator connected to the serial port should then display the interactive Python prompt (REPL).  You can type in MicroPython code to experiment:
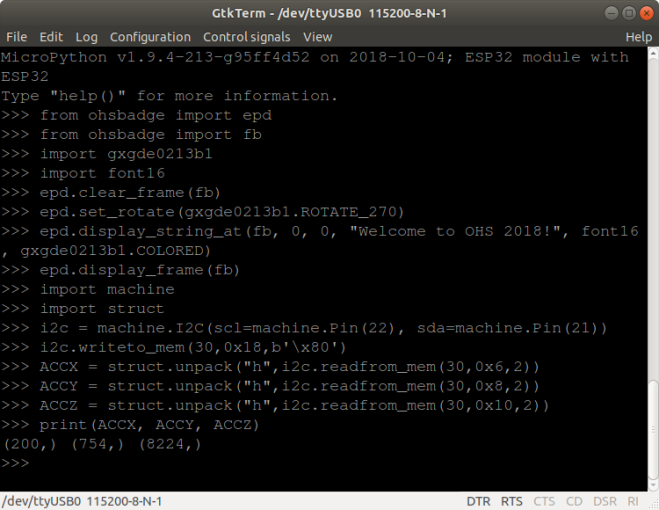
Screenshot from 2018-10-04 11-39-40 (2)

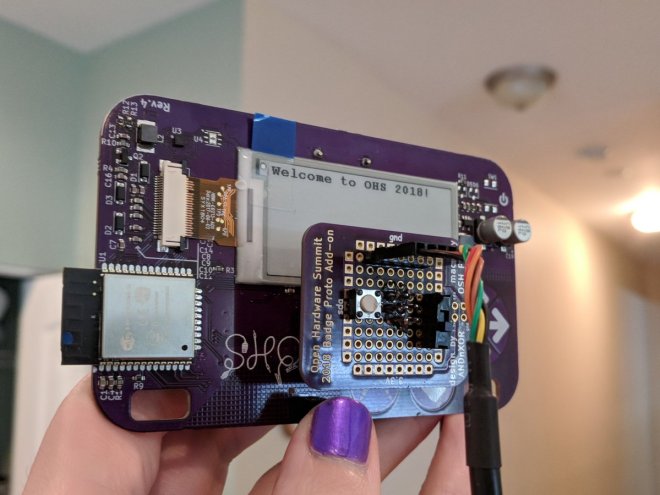
Here is an exmaple that displays text on the e-paper and prints that values from the accelerometer:

import gxgde0213b1
import font16
import machine
import struct
from ohsbadge import epd
from ohsbadge import fb

epd.clear_frame(fb)
epd.set_rotate(gxgde0213b1.ROTATE_270)
epd.display_string_at(fb, 0, 0, "Welcome to OHS 2018!", font16, gxgde0213b1.COLORED)
epd.display_frame(fb)

i2c = machine.I2C(scl=machine.Pin(22), sda=machine.Pin(21))
i2c.writeto_mem(30,0x18,b'\x80')
ACCX = struct.unpack("h",i2c.readfrom_mem(30,0x6,2))
ACCY = struct.unpack("h",i2c.readfrom_mem(30,0x8,2))
ACCZ = struct.unpack("h",i2c.readfrom_mem(30,0x10,2))
print("x={0} y={1} z={2}".format(ACCX[0], ACCY[0], ACCZ[0]))

Photo of the text displayed on the e-paper:
DorbVOzX4AUwAQ3

Resources:
Open Hardware Summit badge: adapter board for USB-to-serial cable

Open Hardware Summit badge: Magic 8-Ball app

Thanks to @Steve Pomeroy for creating this MicroPython demo app for the Open Hardware Summit badge:

ohs18apps/magic8ball.py

# created by Steve Pomeroy https://hackaday.io/xxv
# modified by Drew Fustini to run once and exit
#
# blog post:
# https://blog.oshpark.com/2018/10/04/open-hardware-summit-badge-magic-8-ball-app/
#
# photo gallery:
# https://photos.app.goo.gl/f1y8PSHfYAaa4xTu7
#
# transfer to Open Hardware Summit badge using FTP:
# https://oshwabadge2018.github.io/docs.html#uploading-over-ftp

import gxgde0213b1
import font16
import font12
from machine import I2C, Pin, TouchPad
import struct
import time
import urandom
from ohsbadge import epd
from ohsbadge import fb

class TouchButton(object):
   def __init__(self, pin, on_pressed, threshold=400, debounce_ms=50):
       self._touchpad = machine.TouchPad(pin)
       self._on_pressed = on_pressed
       self._threshold = threshold
       self._debounce_ms = debounce_ms
       self._down_ms = None
       self._pressed = False

   def read(self):
       if self._touchpad.read()  self._debounce_ms:
                       self._on_pressed()
                       self._pressed = True
       else:
           self._pressed = False
           self._down_ms = None

# from Magic 8-Ball app by Steve Pomeroy https://hackaday.io/xxv
# github.com/oshwabadge2018/ohs18apps/blob/master/magic8ball.py
class MagicBall():
   def clear_screen():
       epd.initPart()
       epd.clear_frame(fb)
       epd.display_frame(fb)

   def show_message(message):
       epd.init()
       epd.clear_frame(fb)
       epd.display_string_at(fb, 0, 52, message, font16, gxgde0213b1.COLORED)
       epd.display_frame(fb)

   def read_accel(i2c):
       i2c.writeto_mem(30, 0x18, b'\x80')
       x = struct.unpack("h", i2c.readfrom_mem(30, 0x6, 2))
       y = struct.unpack("h", i2c.readfrom_mem(30, 0x8, 2))
       z = struct.unpack("h", i2c.readfrom_mem(30, 0xA, 2))
       return (x[0], y[0], z[0])

   def get_orientation(i2c):
       new_orientation = None
       pos = MagicBall.read_accel(i2c)

       if pos[2] > 13000:
           new_orientation = "upright"
       elif pos[2] < -13000:
           new_orientation = "prone"

       return new_orientation

   def main(f):
           phrases = ["It is certain.", "It is decidedly so.", "Without a doubt.", "Yes - definitely.", "You may rely on it.", "As I see it, yes.", "Most likely.", "Outlook good.", "Yes.", "Signs point to yes.", "Reply hazy, try again", "Ask again later.", "Better not tell you now.", "Cannot predict now.", "Concentrate and ask again.", "Don't count on it.", "My reply is no.", "My sources say no.", "Outlook not so good.", "Very doubtful."]
           i2c = machine.I2C(scl=Pin(22), sda=Pin(21))
           epd.init()
           epd.set_rotate(gxgde0213b1.ROTATE_270)
           epd.clear_frame(fb)
           epd.display_frame(fb)
           prev_orientation = None

           keep_on = [True]

           def exit_loop():
               keep_on[0] = False

           exit_button = TouchButton(Pin(32), exit_loop)

           while keep_on[0]:
               exit_button.read()
               orientation = MagicBall.get_orientation(i2c)

               if orientation and orientation != prev_orientation:
                   if orientation == 'upright':
                       MagicBall.show_message(urandom.choice(phrases))
                   elif orientation == 'prone':
                       MagicBall.clear_screen()
               prev_orientation = orientation

ball = MagicBall()
ball.main()

This Python file can be transferred to Open Hardware Summit badge using the FTP server built into the MicroPython firmware.

Resources:
Open Hardware Summit badge: Magic 8-Ball app

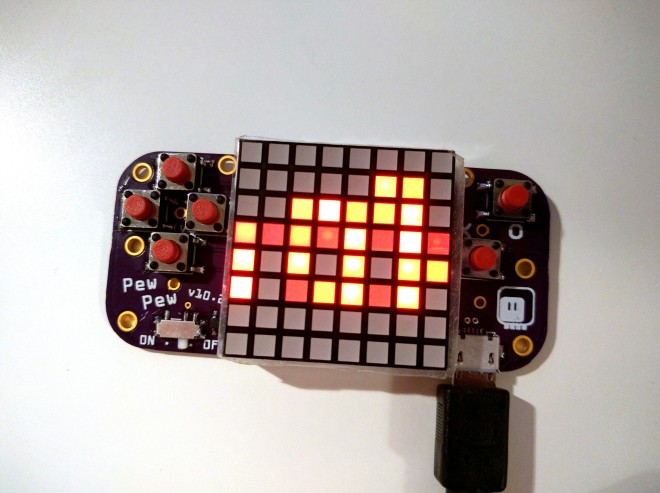
PewPew: Python-based micro game console

From Radomir Dopieralski (ꝺeshipu) on Hackaday.io:

538041535059272195 (1)

PewPew Standalone

A Python-based micro game console, optimized for game development workshops.

I really like the #PewPew FeatherWing as a platform for teaching game development, but the cost of Feather boards needed to use it makes it difficult to organize workshops for larger groups of people. I have previously tried to work around that problem by merging the FeatherWing with the schematic stolen from a Trinket M0 (with an additional flash memory), but the resulting design was complex, difficult to make and still a bit expensive. Now after having designed a few more CircuitPython boards I think I can really cut the costs and make a standalone device with all the functionality of the original shield, but optimized for workshops.

PewPew: Python-based micro game console

Open Hardware Summit 2018 badge

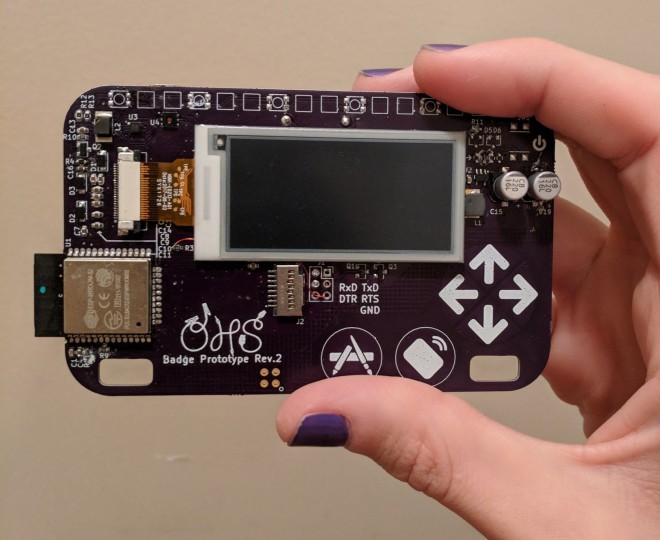
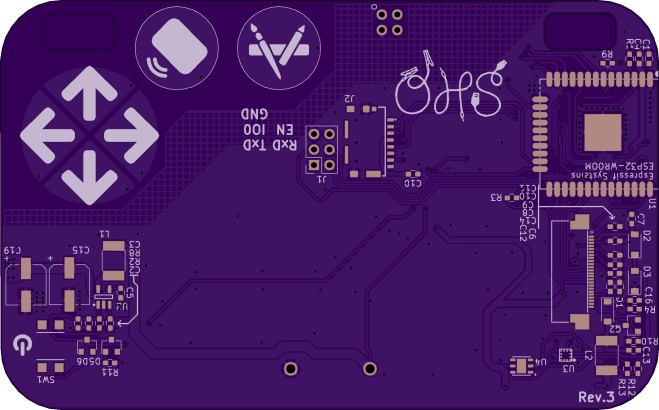
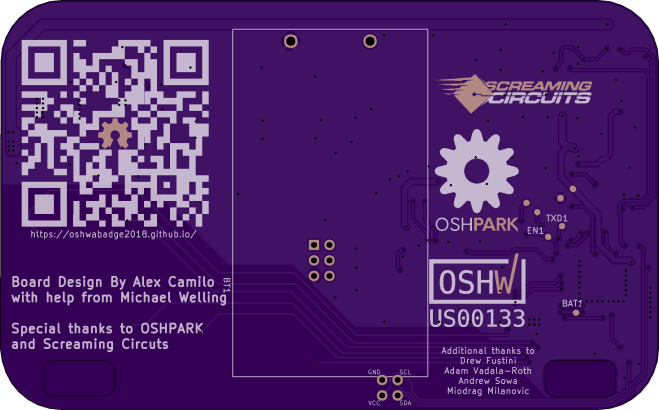
OSH Park is producing electronic conference badges for the 2018 Open Hardware Summit.  The hardware has been designed Alex Camilo, based on concepts from the ESP trINKet by Mike Rankin.  The badge features an ESP32 microcontroller and a 2.13″ E-Paper display.

6202441533283525215

OSH Park shared project for the Rev 3 by Alex Camilo :

https://oshpark.com/shared_projects/8yeLK5gd

Order from OSH Park

a

b

We expect this to be the final revision.

Timeline:

It is ordered on Super Swift today and should be validated next weekend.  This will allow us to order the full quantity PCB panels in August 13th.  Assembly is estimated to be 10 business days from the day when all components and PCBs are received.

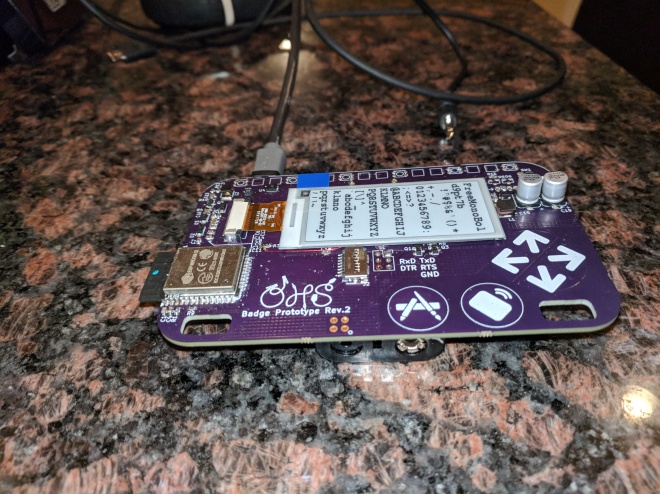
Rev 2 photos:

And for those interested, here is a link to a gallery:

https://photos.app.goo.gl/UhCUX7eRN38tAhsF7

IMG_20180805_031614

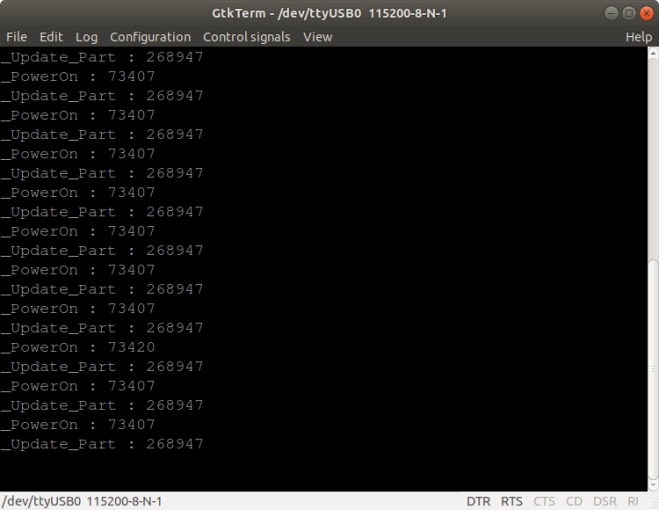
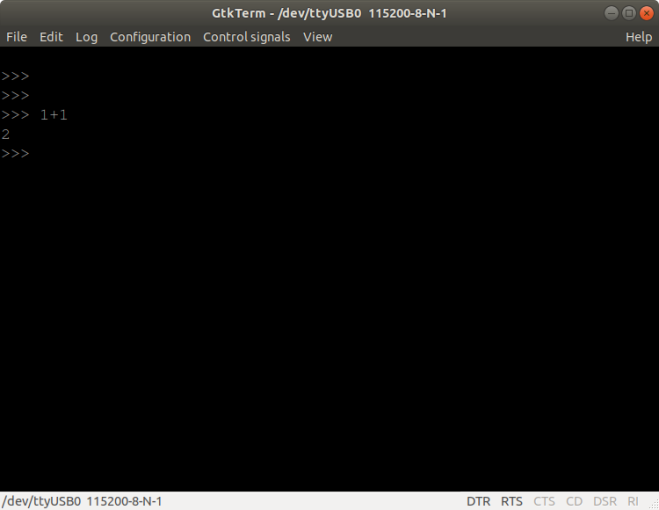
Terminal output on Rev 2 prototypes:

The Rev 2 prototypes have NodeMCU boards soldered on to the back to serve as a USB to serial adapter.

One of the Rev 2 prototype boards that Alex sent me has the default e-paper demo:

3633741533555804296

The other has MicroPython installed! 🙂

1079331533555818375

Resources for the 2018 Open Hardware Summit badge:

Open Hardware Summit 2018 badge