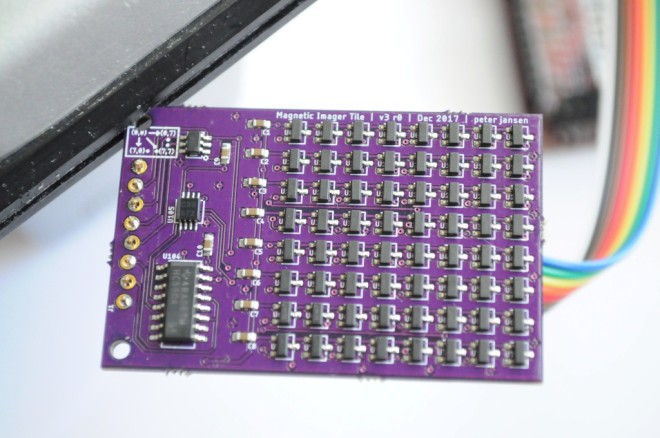
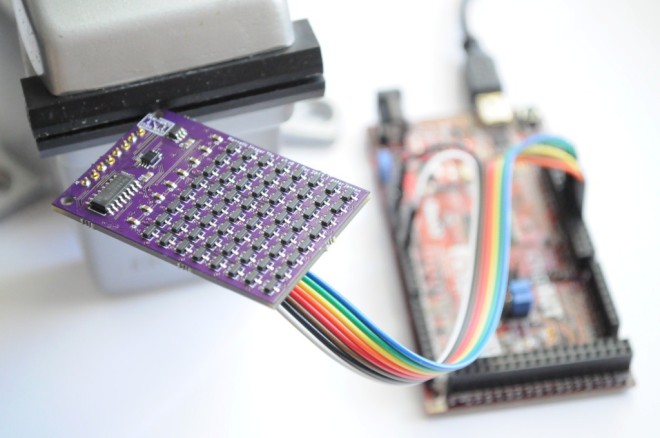
A while ago, [Peter Jansen], the guy who built a tricorder and a laser-cut CT scanner, made a magnetic camera. This Hall Effect camera is a camera for magnetism instead of light. Now, this camera has been fully built and vastly improved. He’s capturing ‘frames’ of magnetism in a spinning fan at 2000 Hz (or FPS, terminology kind of breaks down here), and it’s beautiful.
Thermal imaging has remained an interesting, if costly, technology for some time. One lower cost option is the the Grid-EYE sensor from Panasonic. While it has a resolution of only 8×8 pixels, it’s priced in the low double digit range, making it an ideal candidate for budget projects. If you’d like to add it to your build, Pesky Products has a has a breakout available that allows it to be used with the I²C protocol.
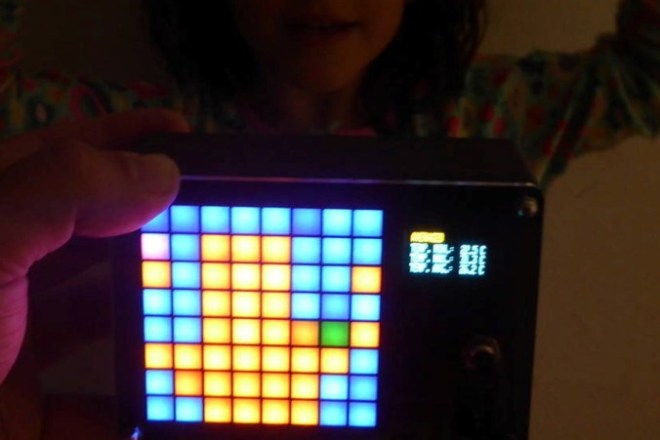
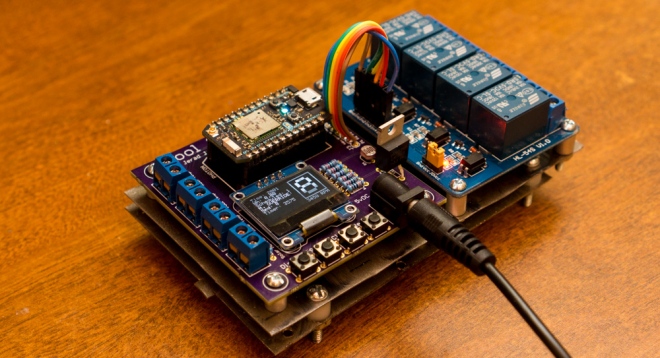
Xose Pérez, after finding this sensor and breakout on Tindie, which he (correctly) considers “a great place to find uncommon electronic components or weird/interesting boards,” decided to make his own low-resolution IR camera. At only 64 pixels of resolution, it’s not as capable as more expensive units, but it could still be very useful for getting a general idea of what is hot and cold in a room/environment. The case is made out of slices of acrylic, paper, cardboard, and MDF, giving it a very unique look. It also features a small screen to display supplemental information, and a simple button/switch interface.
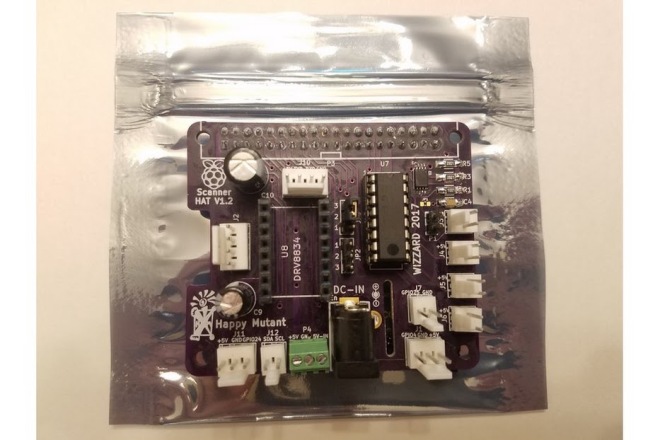
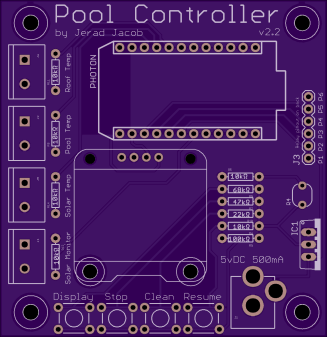
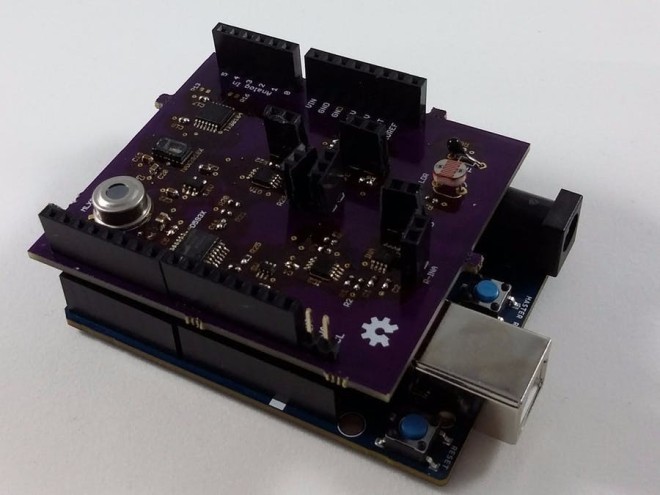
I wanted to make a custom interface for use with the open-source 3D Scanning software, FreeLSS. I was very impressed with the Arduino-based Ciclop scanner and the Raspberry Pi-based Atlas Scanner. Several FreeLSS users merged the two scanner platforms, creating the PiCLOP 3D Scanner. However, there were few changes to the basic PCB design used for the scanner. I wanted to integrate the hardware functionality into a Raspberry Pi HAT format, with the inclusion of extra features for expandability — and who knows, other uses !
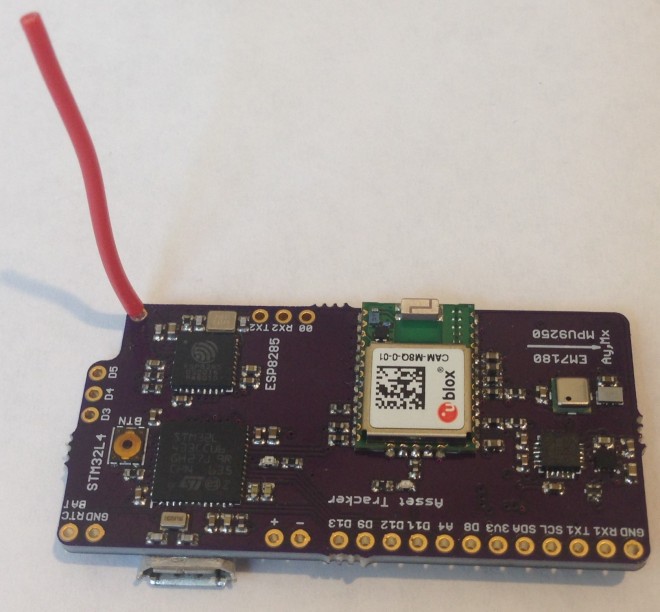
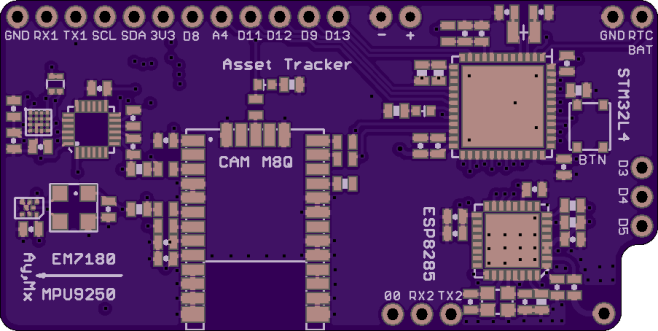
The absolute orientation engine uses the MPU9250 accel/gyro/magnetometer IMU sensor plus the MS5637 barometer as slaves to an EM7180 motion co-processor that sends quaternions and drift-stabilized altitude to the host via I2C.
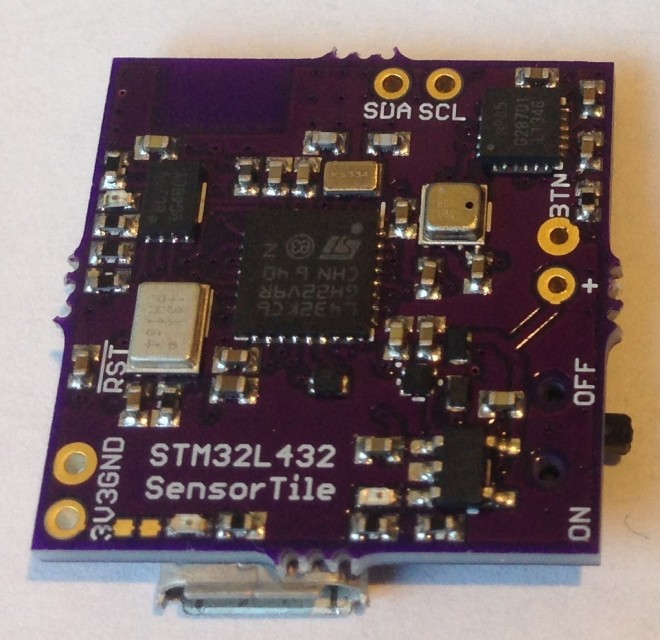
This is a 20 mm x 20 mm four-layer pcb tile full of interesting sensors (ICS43434 I2S Digital Microphone, MPU6500 acclerometer/gyro, BME280 pressure/temperature/humidity, and CCS811 air quality) with a Rigado BMD-350 UART BLE bridge for sending data to a smart phone all managed by a STM32L432 host MCU.
The STM32L432 is programmed using the Arduino IDE via the USB connector and serial data can be displayed on the serial monitor to verify performance and proper function, etc. But it is intended to be powered by a small 150 mAH LiPo battery for wireless sensing applications. The STM32L4 is a very low power MCU and with proper sensor and radio management it is possible to get the average power usage down to the ~100uA level, meaning a 150 mAH LiPo battery can run the device for two months on a charge.
A collection of sketches to run the STM32L432-based (20 mm x 20 mm) sensor tile with an MPU6500 accel/gyro, ICS43434 I2S digital microphone, BME280 temperature/pressure/humidity sensor, and CCS811 air quality sensor. The sensor tile has an on-board MAX1555 LiPo battery charger, an on/off switch, and a Rigado BMD-350 nRF52 BLE module.
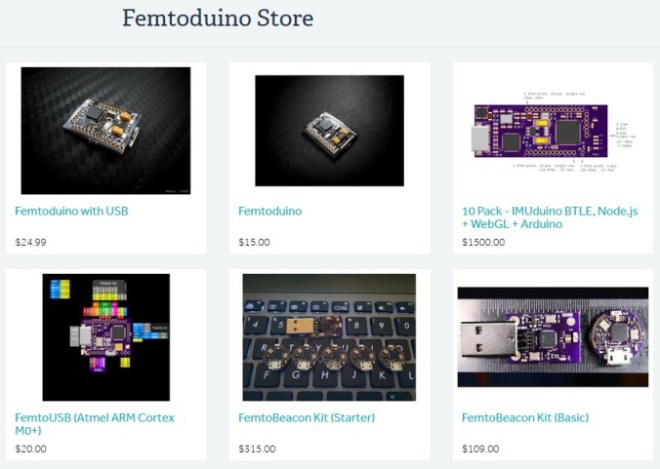
Alex Albino, of the Femtoduino Store, is one of the original sellers on Tindie, with his store officially listed as opening on November 26, 2012. During this time, he’s sold well over 300 of his custom boards, and I was glad to catch up to him to ask a few questions.
Albino, who works as a software and web developer, first got into electronics after his NES was fried in a thunderstorm in junior high, and he got to take it apart. Eventually his interests led him to the Arduino and Fabio Varesano’s work, and multiple hardware platforms over the years.
Albino’s store started with him asking Fabio Varesano if he could sell Femtoduino boards, which have the same outputs as an Arduino Uno in the size of one’s thumb. Since Varesano wasn’t interested in selling them himself, he generously gave Albino permission to run with this design. Albino then went to work assembling and selling these boards, and even made sure to give a portion of the money he made—though he didn’t have to—back to Varesano to promote his open source work.
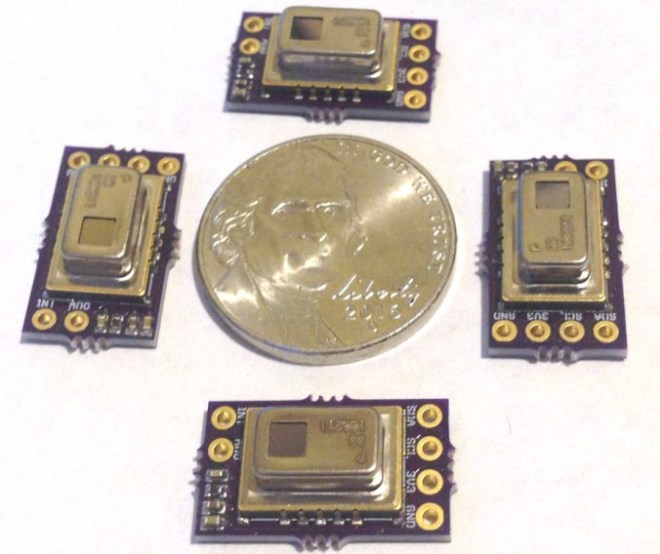
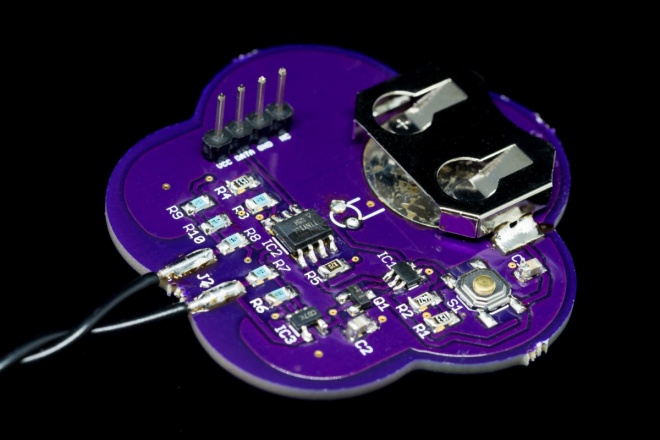
Of course, these tiny Arduino clones are still for sale, but Albino sells several other items, including the FemtoBeacon wireless IMU (inertial measurement unit) sensor. He even notes his store theme as providing the smallest open source IMU sensors in the world. You can see one in the image above next to a U.S. dime—quite small indeed. He hopes to grow the Femtobeacon business into a full-time job in the future.
Naturally, Albino has bought from other Tindarians in the past, which he says is always fun. He also notes that, “If you sell anything on Tindie, make sure to package carefully, take decent photos, and include videos of stuff in action!” As such, here’s a video of the tiny Femtoduino in action:
I made a PCB with the Si7006 on it. This post is my bumblings encountered as I successfully got temperature and humidity readings from a Si7006 using the PCB I designed. In summary, the Si7006 is easy to work with. It is relatively easy to solder and very easy to access via I2C […]
The design files and source code are available on GitHub:
This is the third part of the meta-tutorial, where I talk about designing a cheap plant watering sensor. If you did not already read the first and second part, please do it now. These parts contain a lot information which lead to this point of the tutorial. The second part ended with step 14, designing a first prototype PCB.