4 digit charlieplexed segment display

bobricius is developing this nifty four digit 7-segment display that requires only 6 GPIO pins for 30 LEDs:

4 digit charlieplexed segment display

Maybe you need ultra thin custom display, this is solution …. Why charlieplexing? because it is for my like piece of magic.

The board is a thin 0.8mm tall thanks to our 2 Layer Half-Height Double-Copper service.  bobricius has shared 7seg-micro.brd on OSH Park.  However, he is still working on Arduino code to control the board.

4 digit charlieplexed segment display

WINXI: Arduino Zero compatible stick

bobricius is developing this Arduino Zero compatible project for the Hackaday Prize 2016:

9285971458382311302.jpg

This board have unique compact design and is easy to assemblyBased on newest arduino zero board with powerfull mcu.   Native 3.3V, many sensors, modules and SD cards are working on this voltage level

Features include:

  • SD card reader
  • RGB LED
  • Touch pad
  • User button

The board uses the Atmel ATSAMD21E18 microcontroller:

  • ARM Cortex-M0+
  • 256KB of flash and 32KB of SRAM
  • Up to 48MHz operating frequency
  • 4 serial comm modules (SERCOM) configurable as UART/USART, SPI or I2C
  • Full Speed USB Device and embedded Host
  • Support for up to 60 touch channels

The EAGLE board file can be downloaded from hackaday.io:

samd21SLIM-sd-longer.brd

6231651458774220722.png

WINXI: Arduino Zero compatible stick

NeuroBytes: Build your own nervous system

Zach Fredin and Joe Burdo of NeuroTinker entered NeuroBytes in the 2015 Hackaday Prize and were named a Best Product Finalist:
 
256201456586136855

NeuroBytes are stamp-sized electronic neuron models that can be freely connected to form complex and biologically representative neural circuits. The NeuroBytes platform is currently in its fourth prototype generation with approximately 100 individual elements built to date, along with numerous accessories that help constructed networks interface with the real world.


The NeuroTinker website highlights the many iterations of NeuroBytes:


Zach spoke at the Hackaday Superconference last November about “the process of going from prototype to 100-unit production”:


NeuroBytes: Build your own nervous system

Low Cost VGA Terminal Module

K.C. Lee created this low cost module to add VGA and keyboard connectivity to retro computer, development board or embedded computer via serial port:

8594801458418481660

K.C. describes his project on Hackaday.io:

This can be used as a stamp sized VGA and keyboard interface module in an embedded design. It can be connected to a VGA monitor, PS/2 keyboard and act as a terminal via TTL serial port.

While there are a lot of ARM based VGA projects out there, this is an exercise to see what can be done with the low end STM32F030F4 that has only 4K of RAM and 16K of FLASH. It boots up instantaneously so it doesn’t miss critical boot up messages from the host.

I named it Chibi Term. (Chibi = Small in Japanese)

He posted this rendering of what a breakout board may look like:

8421731458529048791.png

FPGA-Computer shared the board on OSH Park:

Low Cost VGA Terminal Module “ChibiTerm”

7560729aa43a80be6d9c21b6b720c54c.png


Low Cost VGA Terminal Module

LiFePO4 battery power for makers

Patrick Van Oosterwijck is working to make LiFePO4 battery technology easy for makers:

3992821439830785525.JPG

LiFePO4wered/USB

LiFePO4 is a battery technology that finds wide application in power tools and electric vehicles. It is an inherently stable chemistry (which makes it safe), is environmentally friendly (no heavy metals), has very high power density and many more recharge cycles than other Lithiums.

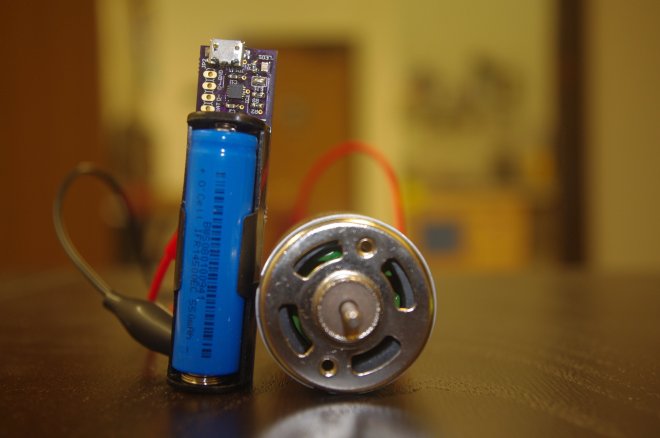
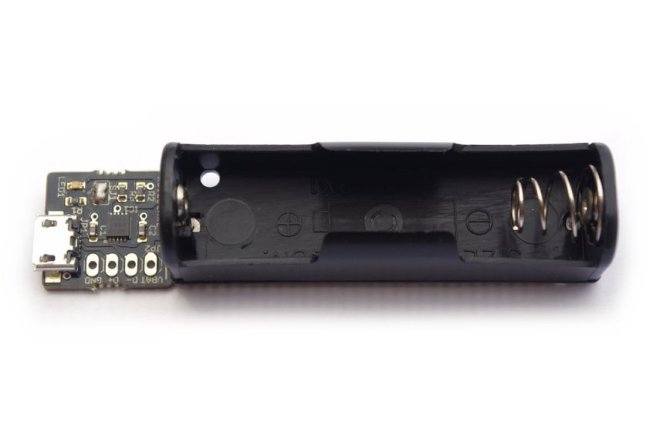
Easy to use module to get started with LiFePO4 in your own designs. It’s basically a battery with an integrated USB charger. All connections are on a 0.1″ grid for easy integration. Take power straight off the battery holder terminals, or if that doesn’t fit in your design, cut off the battery terminals and connect to the 0.1″ header footprint.


The EAGLE design files are available in this GitHub repo:

githubLiFePO4wered-USB-OSHW


The assembled board is sold on Tindie:

2015-01-05T20:04:55.558Z-lifepo4wered-usb.jpg.855x570_q85_pad_rcrop.jpg

LiFePO4wered/USB: A complete USB chargeable 3.3V power system on a module

  • LiFePO4 battery technology–made convenient for makers.
  • 3.2V 550 mAh LiFePO4 battery is included!

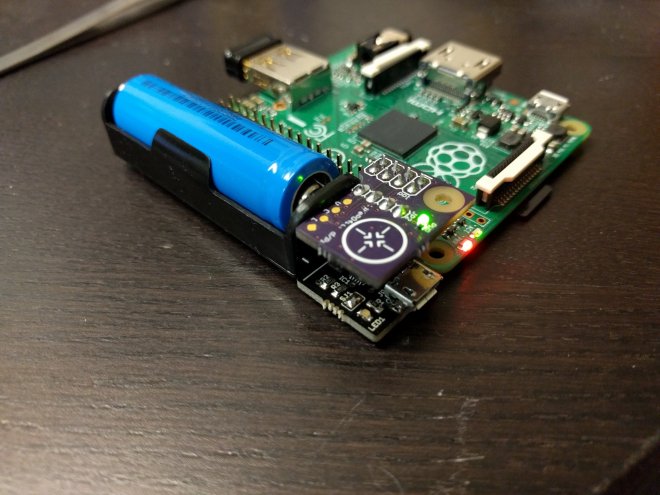
Patrick also created this LiFePO4 battery power manager for Raspberry Pi:

4853551455579281898.jpg
LiFePO4wered/Pi

The project is built on top of a LiFePO4wered/USB module. A small board is added with an MSP430G2131 microcontroller that takes care of monitoring input and output voltage, monitoring a PCB touch button, driving a power indicator LED and switching the load (the Raspberry Pi power). The microcontroller is also connected to the Pi’s I2C bus and monitors the Pi’s running state. The small board connects to 8 of the Pi’s GPIO pins but leaves the rest free to allow prototyping using fly leads.


Library, command line tool and daemon for the LiFePO4wered/Pi module:

githubLiFePO4wered-Pi


LiFePO4 battery power for makers

Teensy Super Audio Board

RF William Hollender created this professional quality 24 bit 192kHz audio breakout board for Teensy 3.x, Raspberry Pi, and more:

Teensy Super Audio Board

3005691439395112289

Professional quality audio breakout board, mainly targeted towards Teensy 3.x and Raspberry Pi 2, but also should be compatible with any boards having an I2S and I2C interface broken out (FPGA boards with enough GPIO included).


Hollender described his motivation in this forum post:

PJRC Forum: 24 bit audio boards

I mentioned a while back in the Audio Library thread that I was interested in putting together a high quality (24 bit) audio board. I finally got to a point in my projects where a higher quality audio codec board would be helpful, so I dove in and put together 2 designs. One design uses a slightly better performance codec (a Cirrus Logic CS4270) than the SGTL5000, and the second uses the highest quality codec I could find that is easily hand solderable (the CS4272).


The KiCAD board project including libraries are on GitHub:

github SuperAudioBoard


whollender has shared the board on OSH Park:

SuperAudioBoard

i
Order from OSH Park


Hollender recorded this video about his project for the Hackaday Prize SemiFinals:

Teensy Super Audio Board

Reddit DIY Electronics contests

Screenshot-3

/r/diyelectronics on Reddit currently has two electronics design contests going on:

An Unconventional Clock

Deadline is April 3rd for this beginner contest

The mission here is simple: give me a clock you won’t see in a store.

Perhaps a word clock. A lava lamp water clock. An alarm clock that slaps you in the face and eats your hair (warning: audio). I don’t care.

Buck Regulator Olympics

Deadline is April 30th for this advanced contetst

The goal is to build a switching buck DC-DC converter from discrete components that can step down a fairly common input voltage to another common output voltage–in this case, 3.3V.


Reddit DIY Electronics contests

Joe Grand’s Creaturepod

We are big fans of Joe Grand!  You may know him from his awesome designs like Emic 2 Text-to-Speech, Defcon badgesJTAGulator and many more on Grand Idea Studio.  We loved watching Joe introduce cable TV audiences to hardware hacking on the Discovery Channel show Prototype This!

Here’s a fun project from Joe Grand that he has shared on OSH Park:

Creaturepod

Screenshot-9

The Creaturepod is a portable walkie talkie system that enhances children’s interactive play. It mimics the fictional Creaturepod from the popular children’s television show, Wild Kratts.

Joe writes:  “The design features an Arduino Mini Pro 328, 2.2-inch TFT liquid crystal display (LCD), DRA818U voice transceiver module, electret condenser microphone, speaker, and buttons for channel/ frequency selection and push-to-talk capability. Bitmap images are stored on a microSD card and displayed on the LCD to indicate the currently selected channel. A 2000mAh Lithium-Polymer battery provides more than 20 hours of playtime before recharging is necessary.”

Documentation links:

Shared Project: Creaturepod

4d7acf2752051593c5221ba01f18bcc2
Order from OSH Park

Joe Grand’s Creaturepod

Self Portrait on Circuit Board

Ronald Sutherland created a PCB with a self portrait on the copper layer:

15027,Assembly (1)

Self Image on Circuit Board

I guess at some point everyone does this…

15027,Schematic.png

Ronald has shared his project on OSH Park:

OSH Park Shared Project

2 layer board of 1.86×2.36 inches (47.14×59.87 mm).
Shared on January 30th, 2015 21:48.

Order from OSH Park

Self Portrait on Circuit Board