Brew Buddy: from prototype to PCB and cloud-based control panel

Brandon Satrom writes on the Particle blog about the process of taking the Brew Buddy project from prototype to PCB and cloud-based control panel:

Screenshot-2019-03-27-08.40.58-1024x689

How to build a control panel for your Particle-powered brewing projects

A few weeks ago, I detailed my process for upcycling a Photon-based project of mine—the Brew Buddy—to the new Particle Argon. I covered creating a new breadboard prototype, adding a few new features not in the Photon version, and the process of converting the firmware to work with the Argon.

In this post, I’ll cover the second half of the project: from prototype to PCB and cloud-based control panel. As with the first part of this project, I’ve been live-streaming all my work on this project over on Twitch, so if you want to watch the replays, or join me for future projects, head over to my page and give me a follow to get notified.

DESIGNING A NEW PCB WITH EAGLE AND OSH PARK

Having the ability to breadboard a new project is amazing, but once I get everything working, I can’t wait to get rid of that rats nest of wires and replace them with a fancy, custom-designed Printed Circuit Board (PCB). My original Brew Buddy project saw several PCB revisions over its early life, so of course I had to spin another board for this Argon-based iteration.

Various iterations of the Brew Buddy board
Various iterations of the Brew Buddy custom PCB that I’ve used over the years


Brew Buddy: from prototype to PCB and cloud-based control panel

Zach Archer: Live Coding 500 Watts For ToorCamp

ToorCamp is a five-day open air tech camping event held every two years somewhere around the northwest corner of Washington state. Think of it as something like Burning Man, except you can survive for three hours without water, there aren’t a whole bunch of scenesters and Instagram celebs flying in on private planes, and everyone there can actually build something. Oh, and ToorCamp has delivery drones that will send you creme brulee. These mini creme brulees were probably made with the hot air gun hanging off a soldering station. Don’t worry, you’re getting fresh air that’ll balance out the heavy metal poisoning.

For last year’s ToorCamp, the biggest welcome sign was a 40-foot-long illuminated ToorCamp sign. This was designed, built and coded by Zach Archer, and he was at the 2018 Hackaday Superconference to give us the details on how he made it and how it was coded.

via Zach Archer: Live Coding 500 Watts For ToorCamp — Hackaday

Quote

Simple Timer Evolves into Custom Kid’s Watch

Sporting a new wristwatch to school for the first time is a great moment in a kid’s life. When it’s a custom digital-analog watch made by your dad, it’s another thing altogether.

As [Chris O’Riley] relates, the watch he built for his son [Vlad] started out as a simple timer for daily toothbrushing, a chore to which any busy lad pays short shrift unless given the proper incentive. That morphed into an idea for a general purpose analog timepiece with LEDs taking the place of hands. [Chris] decided that five-minute resolution was enough for a nine-year-old, which greatly reduced the number of LEDs needed. An ATtiny841 tells a 28-channel I2C driver which LEDs to light up, and an RTC chip keeps [Vlad] on schedule. The beautiful PCB lives inside a CNC machined aluminum case; we actually commented to [Chris] that the acrylic prototype looked great by itself, but [Vlad] wanted metal. The watch has no external buttons; rather, the slightly flexible polycarbonate crystal bears against a PCB-mounted pushbutton to control functions.

via Simple Timer Evolves into Custom Kid’s Watch — Hackaday

Quote

Piggybacking USB onto an Industrial Push Button

Here’s a fun project from Glen Atkins:

IMG_20190224_105700-1024x576

Piggybacking USB onto an Industrial Push Button

In this project, I mount the electronics from my single-key USB keyboard project to the back of an industrial mushroom push button switch. The finished big red button now activates my screensaver with a single overly-large button press. The biggest issues in this project were where to mount the USB electronics and how to connect the USB cable between the button and my computer.

dry-fitcheck out the software and schematic for the single-key keyboards on Github.

Piggybacking USB onto an Industrial Push Button

KiCad 5.1.0 Release

The KiCad project has released a new version:

kicad_logo_large

KiCad 5.1.0 Release

The KiCad project is proud to announce the release of version 5.1.0. This is the first ever minor version release of KiCad and was developed primarily to resolve compatibility issues with Linux GTK3 and long awaited support for python3.

In addition to the primary focus, there have been many important changes that make this release a substantial improvement over the 5.0 series and a worthwhile upgrade for users on all platforms. Included in the improvements are:

  • Improved 3D model library path configuration.
  • Cairo canvas is now used for printing support on all platforms.
  • Schematic and symbol library editors now use the modern canvases for rendering.
  • Symbol pin table is now editable.
  • Pcbnew scripting support for Python 3 has been added.
  • Snapping for graphical object drawing in board and footprint editors.
  • Significant user interface improvements.
  • Major dialog box improvements.
  • Both the footprint and symbol library editors now share the same user interface paradigm with a library tree view pane.
  • Symbol, footprint, and 3D model library improvements.
  • Documentation and translation improvements.
  • Less pain for Linux package maintainers, now all features should be easy to support.
KiCad 5.1.0 Release

Port MuxR: a KVM switch for electronics

SensorDots has created a “KVM switch” for electronics:

Port MuxR

8/16 channel, bi-directional, switched bus multiplexer. Easily branch out programming cables, logic analysers, debuggers and more

333a7330ca9641ad6910d5d9882b82f1_original

Have you ever been frustrated with swapping probes and cables on your device under test, or are you a hardware/testing engineer, hobbyist or developer that has had to create a test and measurement automation jig for an array of devices to program and test at once?

Ever wished that you had something like a KVM switch, but for your collection of different electronics tools, devices and sensors? Do you have complex switching automation requirements and just can’t find the right tool, or you just don’t know what you need, but want something useful in your electronics arsenal anyway?

Port MuxR: a KVM switch for electronics

Open FPGA Hardware and Tooling meetup in London on March 21st

There will be an open FPGA meetup next week in London with speakers David Shah
and Alan Wood:

FPGA Hardware and Tooling: Past, Present and Future

Date And Time: Thu, 21 March 2019, 18:00 – 20:30 GMT

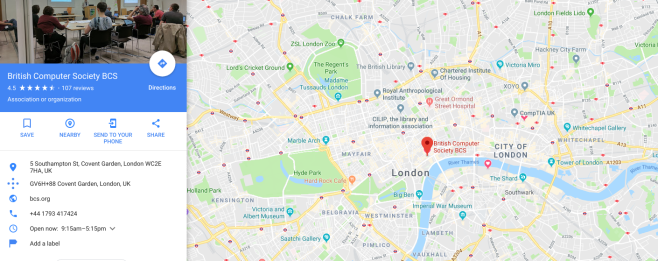
Location: BCS, The Chartered Institute for IT, 1st Floor, The Davidson Building, 5 Southampton Street, London

Screenshot from 2019-03-14 12-54-25

  • Open Source FPGA Tooling past to present

David Shah looks at where we have come from with the IceStorm tool chain, and looks at how this has developed recently and expanded Ice40 Lattice support to include new lower power, lower cost, reduced pincount FPGAs to include their Ultra & Ultra Plus range.

  • Open Source FPGA Hardware past to present

Alan Wood talks about the journey through the early history of OpenSource FPGA open hardware from IcoBoard through myStorm too recent UltraPlus offerings recently made available.

  • Open Source FPGA Tooling present to future

Icestorm was aimed at a narrow family of Ice40 FPGAS, the new Symbiflow family of tools expands the opensource tooling exponentially. David Shah takes a look at NextPNR which lies at the heart of the toolset and deals with specific FPGA family functionality, in particular he concentrates on the Lattice ECP5 family support he has developed with Project Trellis as part of NextPNR and the recent 1.0 version supporting this new family and high end FPGA features.

  • Open Source FPGA Hardware present to future

What comes next for opensource FPGA hardware, after the success of tinyFPGA and myStorm we are beginning to see ECP5 opensource hardware emerging first with Radiona’s ULX3S and being followed up by offerings from both tinyFPGA and myStorm dev board stables, with new hardware comes new features building on NextPNRs tooling like DSP, SerDES IO Gearing and DDR memory etc, Alanplots the course for these new powerful open source development boards…

Look for our Drew Fustini (@pdp7) in purple!

Open FPGA Hardware and Tooling meetup in London on March 21st

Teardown 2019 comes to Portland in June

Hardware hacking con Teardown will return to Portland this June:

download (2)

Teardown 2019

Our second annual party for hacking, discovering, and sharing hardware

Who? Anyone interested in hardware: engineers, designers, artists, students, teachers…
What? A three-day line up of talks, workshops, demos, installations, and puzzles
When? Friday – Sunday, June 21 – 23, 2019 (call for proposals open now)
Where? Beautiful Portland, Oregon on the campus of the Pacific Northwest College of Art
Why? Shipping great hardware to you is rewarding, but we miss seeing you in person
How? With lots of help from our friends, including our partner, Make+Think+Code @ PNCA

What to Expect

Teardown is about the practice of hardware: prototyping, manufacturing, testing, disassembling, and circumventing, all while having fun. Leave the marketing glitz and talk of venture capital at the door and come prepared to learn and teach.

Recap of Last Year’s Teardown

If you want to hear more about what Teardown 2018 was like, take a look back at our retrospectiveor talk to your coolest hardware friend.

Teardown 2019 comes to Portland in June

Fix The Clock Speed on Your Super Game Boy With A Simple Mod

From  on the Tindie blog:

2019-02-01T23_44_54.036Z-SGB-wCLK1 (1).png

Fix The Clock Speed on Your Super Game Boy With A Simple Mod

When you look back on retro gaming handhelds, the Game Boy is probably the first one that comes to mind. While it’s indeed a classic, it’s not without flaws. In the case of the Super Game Boy, the clock speed is about 4% faster than the original, which affects not only the audio playback, but also disqualifies it in speed-running.

To further compound the issue, it’s also the reason why this release didn’t include a link port for multiplayer. The difference in speed would have caused the devices to desync. While Japan received a Super Game Boy 2 that fixed the problem using a crystal oscillator at the proper speed, the U.S. version never received a fix.

It is possible to install a crystal oscillator of your own, and this GameBoy Clock Mod solves the problem without breaking other interesting features of the system, like the ability to change the gameplay speed using the Commander controller from Hori.

The mod avoids common issues by applying the correct clock onto the I/O chip, which is how the second iteration in Japan fixed the problem. You won’t need to lift any pins to install it either, plus the solder points are simple to attach to the board.

Fix The Clock Speed on Your Super Game Boy With A Simple Mod