Women in Hardware Dinner

Hackaday will be hosting a dinner the evening before the 2018 Open Hardware Summit:

DATE AND TIME: Wed, September 26, 2018, 7:00 PM – 9:30 PM EDT

LOCATION: 321 Massachusetts Ave, Cambridge, MA 02139

It’s Open Hardware Summit time of year again and Hackaday is holding our 2nd annual Women in Hardware dinner at The Miracle of Science Bar + Grill.

It’s the night before the Open Hardware Summit begins so you’ll have lots of opportunity to meet and chat with others pre-conference. We love it when you bring your finest blinky, flashy, IoT, hacks, wearable, or other DIY items for us to paw (er…. look at), but bringing yourself is the most important.

Dinner is sponsored by Supplyframe/ Hackaday. The Miracle of Science Bar + Grill can accommodate food allergies and preferences. They ask that you just let them know when you order.

All who identify as women are welcome!

Please RSVP so we can call the restaurant in advance to let them know how many to expect.

Women in Hardware Dinner

New Charmware PCBs by Alex Glow

Screenshot from 2018-08-29 13-45-30.png
Alex Glow from Hackster posted an update on the Charmware modular tech jewelry system:

New Charmware PCBs from OSH Park! (Pt. 1)

Sweet, a package from OSH Park! Time for an unboxing! Plus, see how to upload and order your own boards.

New Charmware PCBs from OSH Park! (Pt. 2)

Visit Hackster.io for more information on the project:

Charmware // Modular Tech Jewelry System

These mini PCB beads (PCBeads?) help you build wearable electronic circuits!

copy_of_workshop_O5TD9874Qs
New Charmware PCBs by Alex Glow

Retro CPC Dongle: advise on tented vias

Advice from the Intelligent Toasters blog on how to do tented vias in DesignSpark PCB software:

Retro CPC Dongle – Part 37

Tented Vias – who’d have thought they play such an essential role? If you have no idea what tented vias are, then you’re not alone and I’m here to enlighten you.


Quote

‘Teach Kids Coding’ with a 3D Printed ‘Code Kitty’

Jason from CodeKitty wrote the Adafruit blog to tell them what the organization is up to:


‘Teach Kids Coding’ with a #3DPrinted ‘Code Kitty’ & OSH Park PCB

Hello! We are a Twin Cities, Minnesota (USA) based technology
education 501(c)(3) tax-exempt non-profit. Our mission is to make coding
and engineering skills accessible to everyone (especially targeting girls
and underrepresented groups) by providing donation-funded (or free) coding
workshops using our extremely low cost 3D printed robot. Our workshop is a
$50 suggested donation per attendee and includes the robot, so that Every
Kid Gets a Robot. So far we have given away around 100 robots in this
fashion, and provided our workshop for both students as young as second
grade, and for teachers as Professional Development (in a meta-workshop
train-the-trainer model).

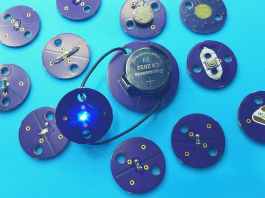
We are constantly working to simplify our robot, and the currently released
model is based around your excellent Trinket m0 board, a custom designed
(oshpark fabricated) breakout board, and 360 degree microservos). The
challenge we have as a very small non-profit is that I design and
manufacture all of the robot kits by hand myself, including reflow and hand
soldering all of the breakout boards. Although the Trinket m0 is very low
cost, the time and materials cost of self-manufacturing our trinket breakout
board raises our costs substantially, and our total cost of this model of
our robot is $27.54, not factoring in any cost or value at all for the
considerable amount of time i spend making them.

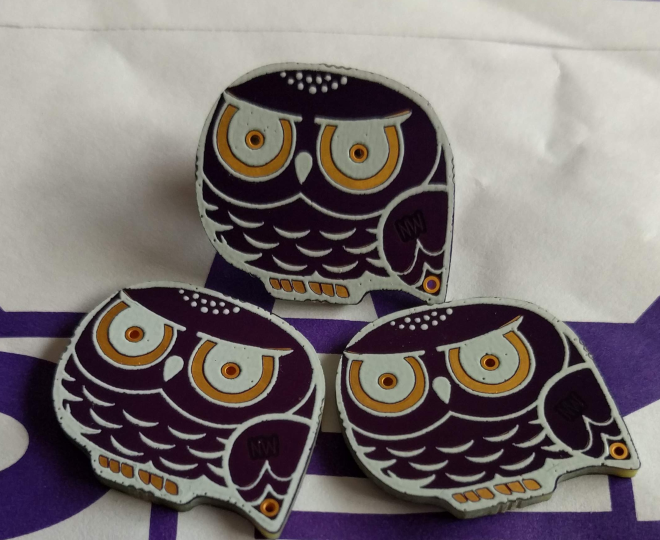
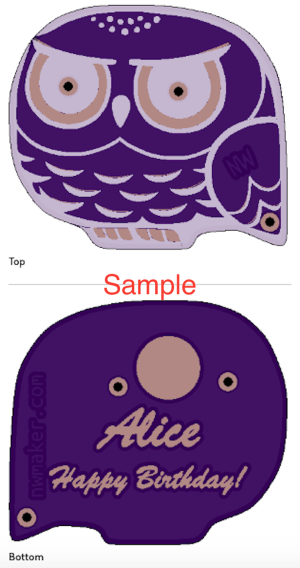
There’s a v1.0 of their ‘bot and a recently updated v2 with OSH Park purple PCBs provided here and instructions online:

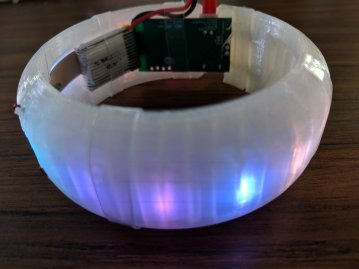
The Code Kitty robot is a 3D printed robot designed to help teach kids coding. It was developed by the Code Kitty non-profit because we wanted there to be a robot cheap enough for every kid to have one and learn the joy of engineering, coding, and robotics! We offer the robot to participants of our workshop, or sell complete robot kits under a “buy one/give one” program for $50.

Although the 3D printed parts of the robot are the same, there are two “builds” of the electronics of the robot: The “Workshop Build” and the “DIY Build”. In either case you will need to print one base, one face, one tail, two wheels and two hubcaps. We recommend combining all of the parts you want to be the same color into one print job, and the parts are small enough that the entire robot can be printed in two print jobs on most 3D printers.

They’re doing great things and you can always check out what they’re up to here.

‘Teach Kids Coding’ with a 3D Printed ‘Code Kitty’

This Is Your Last Chance To Design The Greatest Human Computer Interface

This is your last chance to get your project together for the Human Computer Interface Challenge in this year’s Hackaday Prize. We’re looking for innovative interfaces for humans to talk to machines or machines to talk to humans. These are projects that make technology more intuitive, more fun, and a more natural activity. This is your time to shine, and we’re accepting entries in the Human Computer Interface Challenge in this year’s Hackaday Prize until August 27th. This is your last weekend to work on your project, folks.

via This Is Your Last Chance To Design The Greatest Human Computer Interface

Quote

DC26: overview of the DC503 party badge

From Nisha Kumar:
DjT3Kg5VsAAS8bW
An overview of the DC503 party badge as seen at DefCon 2018

Hi! My name is Nisha, and I made a party bangle for my friend, Miki, to take with her to DefCon25. It was my first fully-formed electronics project and it posed some interesting challenges due to its unusual form factor. You can read about my experiences with that project here.

Soon after DefCon25, I was approached by r00tkillah to make over a 100 of something similar for the DC503 party at DefCon26. The plan was to combine the power of the BMD-300 SoC by Rigado used in the Wagon Badge from the previous year with my Neopixel bangle form factor. We would call it “The Banglet” and it was going to be awesome.

banglet_shell_500

In passive mode, the banglet’s LEDs light up when detecting nearby Bluetooth devices. The number of LEDs that are lit correspond to the number of BT devices detected and their colors are based on each device’s mac address.

DC26: overview of the DC503 party badge

Secrets of Making a Successful Product on Tindie

From  on the Tindie blog:

Secrets of Making a Successful Product on Tindie

Tindie has been a favorite platform for creative makers for quite some time now. Hundreds of thousands of hardware craftsmen, hackers, and enthusiasts gather here, share their ideas and create a lot of amazing products.

Three years ago Tindie published an article that used the tools of data science to look at what makes a product successful. It’s been a very popular article, providing insight to the inventors who build their communities of customers through Tindie. With so many new products and sellers since the previous article, we were inspired to dig into the numbers once again to determine if the criteria for selling a successful product on Tindie has changed over the years.

Tindie-Infographic-Final

Secrets of Making a Successful Product on Tindie

Snowy Owl PCB artwork

A purple snowy owl with customizable name and short message from NWMaker on Tindie:

2018-08-20T00_35_36.935Z-purplesnowy3.png

Snowy Owl

Look at it. This snowy owl is so cute. You can choose add custom text or not.

When you choose the option of custom text, you can customize the snowy owl as follows.

  • Add a name or nick name (less than 16 letters) like “Mary” or “James”
  • Add a short message (less than 18 letters) such as “Happy Birthday!” or “Merry Christmas!”

2018-08-21T01_01_17.348Z-happy-verticalowl.png

Owl is amazing. It has super eyesight at night. Its feather structure makes its flight silent. It can turn around its head backwards.

I’d like something to be associated with “snow” and “north”. That is why I think of the snowy owl.

Snowy Owl PCB artwork