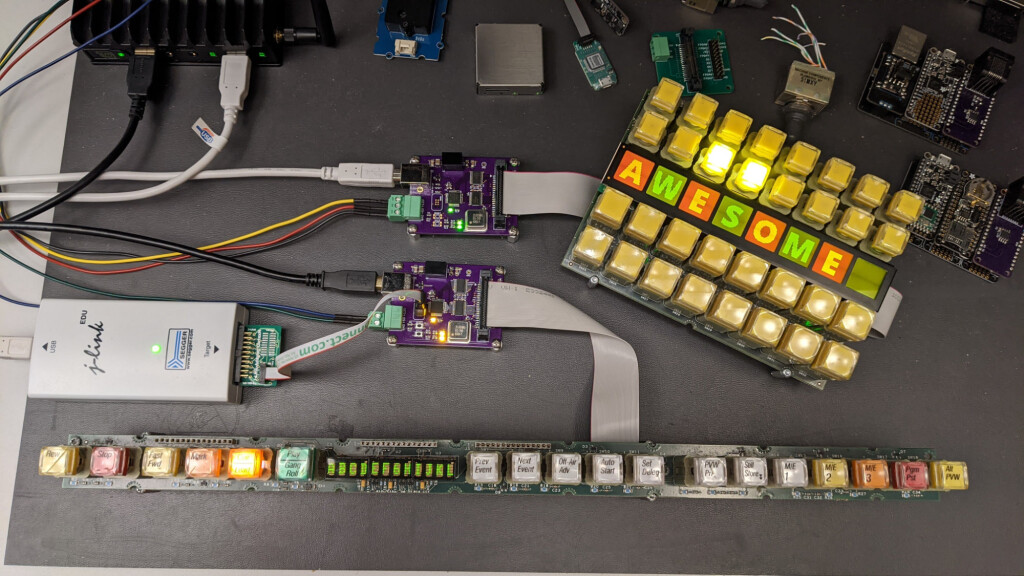
Where does he get such wonderful toys? [Glenn] snagged parts of a Grass Valley Kalypso 4-M/E video mixer switcher control surface from eBay and since been reverse engineering the button and display modules to bend them to his will. The hardware dates back to the turn of the century and the two modules would have been laid out with up to a few dozen others to complete a video switcher console.
Things kicked off casually on Friday night with the Community Bring A Hack, hosted on the Remo Conference platform. The platform attempts to recreate networking spaces common to in-person conferences, with “tables” and “sofas” where participants can double-click to “sit” — which in this virtual world initiates audio and video communications with other “seated” parties. While the technology itself worked fairly well, it seemed as though many participants were either confused as to how it worked, or unwilling to interact — I successfully engaged in two conversations throughout the event, otherwise happening mostly upon attendees whose audio and video was not enabled. And much like real-life events, the popular folks were unobtainable (in this case due to a six-person table limit), so it was mostly a case of looking out for people you knew, or trying to be brave and make new friends (both of which I was lucky enough to be able to do!).
The 11:15 (Eastern) slot had three workshops to chose from, and since attending two simultaneously was already pretty extreme, I had to sit out Sebastian Oort’s Soldering, nothing to be afraid of! — which thankfully is not a phobia I find myself afflicted with.
Given an unknown PCBA with an ARM processor, odds are good that it will have either the standard 10 pin 0.05″ or 20 pin 0.1″ debug connector. This uncommon commonality is a boon for an exploring hacker, but when designing a board such headers require board space in the design and more components to be installed to plug in. The literally-named Debug Edge standard is a new libre attempt to remedy this inconvenience
The name “Debug Edge” says it all. It’s a debug, edge connector. A connector for the edge of a PCBA to break out debug signals. Card edge connectors are nothing new but they typically either slot one PCBA perpendicularly into another (as in a PCI card) or hold them in parallel (as in a mini PCIe card or an m.2 SSD). The DebugEdge connector is more like a PCBA butt splice.
It makes use of a specific family of AVX open ended card edge connectors designed to splice together long rectangular PCBAs used for lighting end to end. These are available in single quantities starting as low as $0.85 (part number for the design shown here is 009159010061916). The vision of the DebugEdge standard is that this connector is exposed along the edge of the target device, then “spliced” into the debug connector for target power and debug.
Right now the DebugEdge exists primarily as a standard, a set of KiCAD footprints, and prototype adapter boards on OSHPark (debugger side, target side). A device making use of it would integrate the target side and the developer would use the debugger side to connect. The standard specifies 4, 6, 8, and 10 pin varieties (mapping to sizes of available connector, the ‘010’ in the number above specifies pincount) offering increasing levels of connectivity up to a complete 1:1 mapping of the standard 10 pin ARM connector. Keep in mind the connectors are double sided, so the 4 pin version is a miniscule 4mm x 4.5mm! We’re excited to see that worm its way into a tiny project or two.
The leap to self-driving cars could be as game-changing as the one from horse power to engine power. If cars prove able to drive themselves better than humans do, the safety gains could be enormous: auto accidents were the #8 cause of death worldwide in 2016. And who doesn’t want to turn travel time into something either truly restful or alternatively productive?
But getting there is a big challenge, as Alfred Jones knows all too well. The Head of Mechanical Engineering at Lyft’s level-5 self-driving division, his team is building the roof racks and other gear that gives the vehicles their sensors and computational hardware. In his keynote talk at Hackaday Remoticon, Alfred Jones walks us through what each level of self-driving means, how the problem is being approached, and where the sticking points are found between what’s being tested now and a truly steering-wheel-free future.
Check out the video below, and take a deeper dive into the details of his talk.
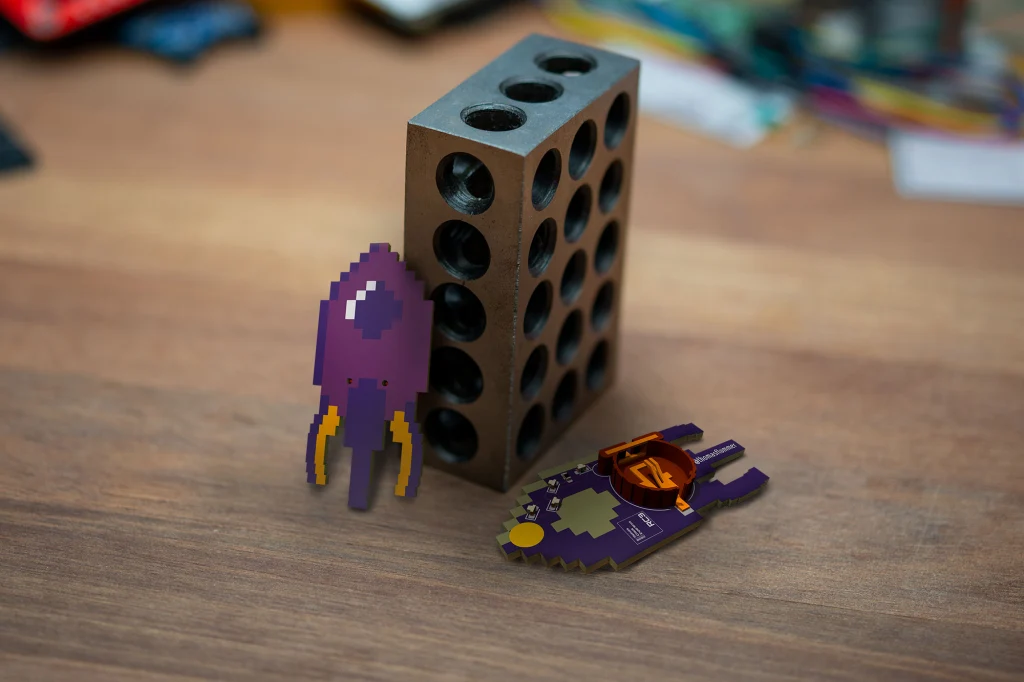
Playing a bit with the @ccc#rc3 design in @oshpark purple. I probably need to use some hot glue @mrtwinkletwink style to get an even backlighting with the side mounted LEDs. #badgelifepic.twitter.com/jp9xia7fnj
This is a small PCB pin badge, heavily inspired by the RC3 styleguide. It’s designed to be small, easy to assemble and hopefully many will manage to get some before the event, and be able to share a little bit of physical #badgelife, in this time of virtual events.
Making your own
If you want to make your own, I have included the gerbers, in case you don’t want to install the nightly version of KiCad.
There is also a shared projects at OSHPark, and this is designed for the standard purple PCBs. It’s designed to be exactly 2 square inches, so for USD 10 you get 3 pcs. shipped anywhere, though the standard shipping might take a bit to arrive.
The parts needed for this pin is simply 4 white 0603 LEDs, a series resistor, also 0603, to limit the current a bit (I’ll try with a 1K to begin with), a CR1220 coin cell holder (I’m planning on using a Q&J CR1220-2 from LCSC) and then a little round brooch clasp/tie tack pin (I got some on ebay, but a DIY/craft supply store might also have them).
Please share
If you decide to make this badge or a variant of it, please share images so we can all see it and get inspired. If sharing on social media, please use the #badgelife tag and please let me know, I would love to see what you have made!
In this project, I convert two panels from a vintage Grass Valley video switcher into general-purpose USB input and output devices without modifying the original panels. This project required both reverse engineering the hardware and deciphering the software protocols used to communicate with the panels. Because these panels required learning how to communicate with a microcontroller and a small FPGA, this project was significantly more challenging than the previous project where I converted a matrix button panel from the same mixer into a USB device.
In this write up, we’ll examine the two panels in detail and determine the hardware interface to the panels. Once the hardware interface is determined, we’ll build some boards to use to help decipher the protocols used to control the boards. Once the protocols are understood, we’ll build a second set of boards to control the panels using USB then develop the USB software and an example Linux application that controls the panels over USB. This project took about four months from start to completion.
I have USB control of everything on both of these Grass Valley Kalypso panels now! ✅Get key presses ✅Set tally lights ✅Set LED display text ✅Set LCD display text and graphics Time to take some photos and write them up! pic.twitter.com/WPeu0EMtpt
Mike and I were talking about an interesting smart-glasses hack on the podcast. This was one of those projects where, even if you don’t need a pair of glasses with LEDs on them to help you navigate around, you just couldn’t help but marvel at a lot of the little design choices made throughout.
For instance, I love the way the flex PCB is made to do double duty by wrapping around the battery and forming a battery holder. This struck me as one of those quintessential hacks that only occurs to you because you need it. Necessity is the mother of invention, and all that. There was a problem, how to fit a battery holder in the tiny space, and a set of resources that included a flex PCB substrate. Cleverly mashing that all together ended up with a novel solution. This wouldn’t occur to you if you were just sitting at the beach; you’d have to be designing something electronic, space-constrained, and on a flex PCB to come up with this.
Mike made an offhand comment about how sometimes you just need to finish a project for the good ideas and clever solutions that you’ll come up with along the way, and I think this battery holder example drives that point home. I can’t count the number of my projects that may or may not have been dumb in retrospect, but along the way I came up with a little trick that I’ll end up using in many further projects, outliving the original application.
Finishing up a project on principle is a reasonable goal just on its own. But when the process of seeing something to conclusion is the generator of new and interesting challenges and solutions, it’s even more valuable. So if you’re stuck on a project, and not sure you want to take it all the way, consider if the journey itself could be the destination, and look at it as an opportunity to come up with that next long-lasting trick.
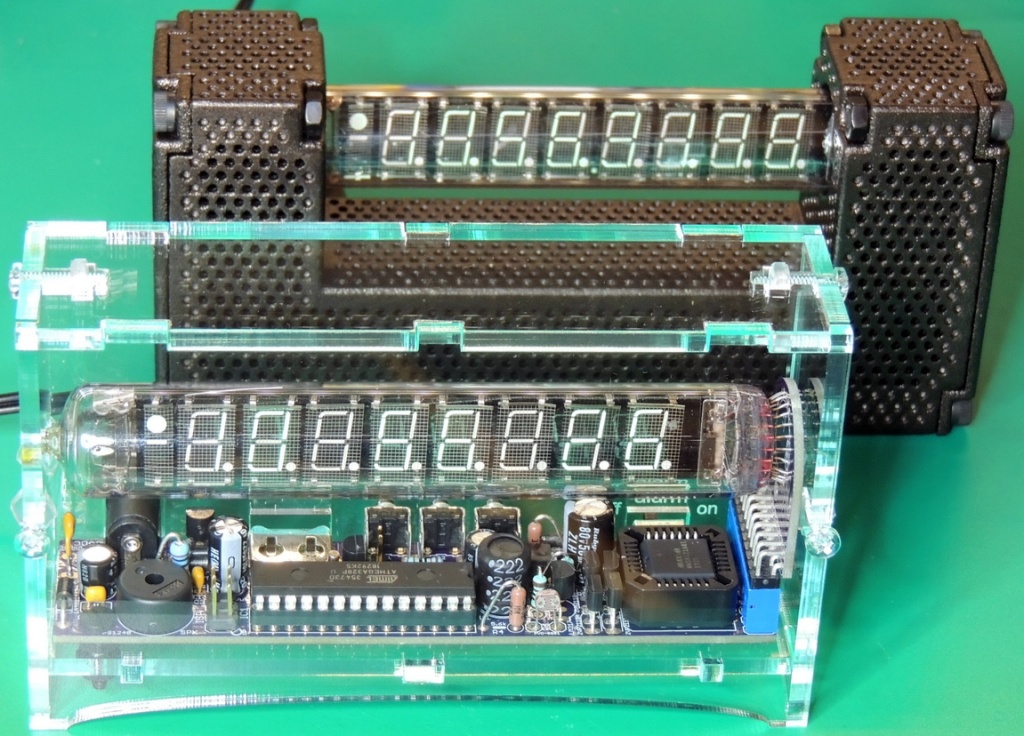
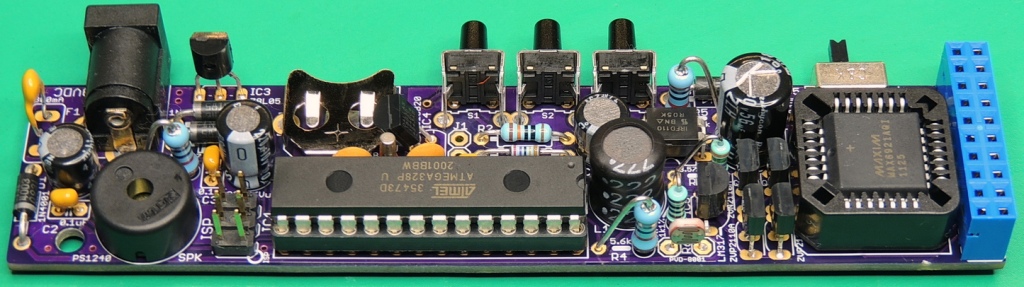
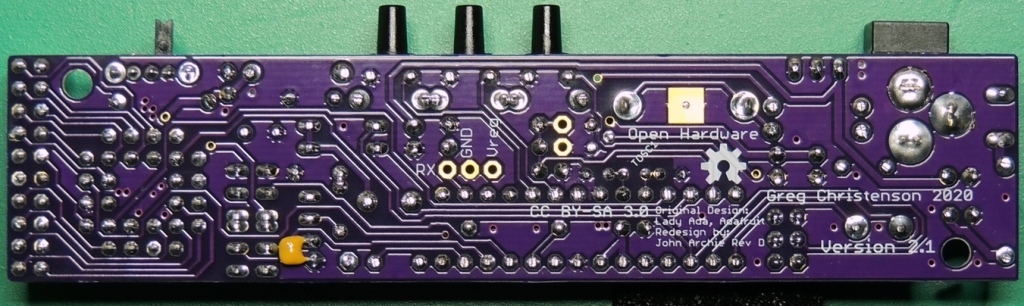
After finishing the IceTube clock version 1.31 build for myself, I was ready to work on the board design for some IceTube clocks as gifts. I could have used the existing V 1.31 boards, but I wanted to use an up to date design that incorporated all the hardware improvements over the past 10 years while still staying with a thru-hole design.
This updated design is based on jarchie’s (John Archie) xmas-icetube clock revision D board. He had incorporated most of the hardware features that I wanted for my new batch of clocks, along with a vastly improved firmware update.
One of the most important hardware improvements for me was the ability to properly drive the IV-18 tube to specifications (providing more even display illumination and preventing cathode poisoning). Some other features of the design are the inclusion of an one wire temperature sensor near the oscillator crystal to provide highly accurate temperature compensation of the crystal frequency, reset pull-up resistor, micro-controller power decoupling capacitor, GPS connection pads, along with an improved board layout while still maintaining physical compatibility with Ver. 1.X board switches and connectors.