Teensy modular add-on boards

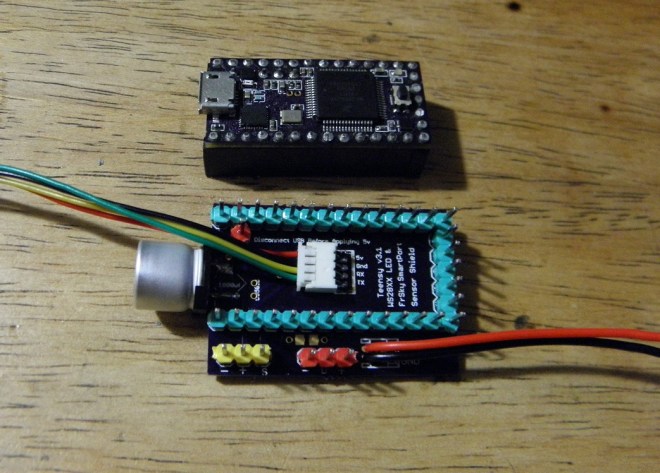
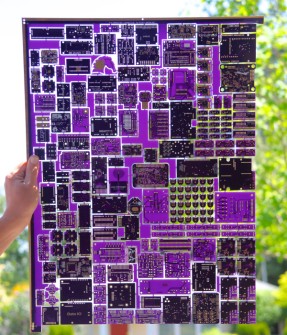
Kris Winer of Pesky Products is creating modular add-on boards for the Teensy 3.x:

cbd29d92-065e-11e4-9aec-f8d49fee508e

Modular Teensy Project

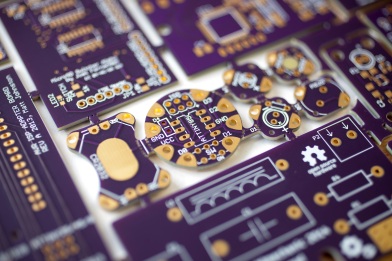
The intent is to gain 10-DoF motion sensing capability using open-source Madgwick/Mahony sensor fusion in a very small package

One of these 9-axis motion sensors:

  • Invensense’s MPU9250
  • ST Microelectronics’ LSM9DS0
  • Bosch’s BMX-055

is coupled with one of these altimeters/pressure sensors:

  • Freescale’s MPL3115A2
  • Measurement Specialties’ MS5637


Kris writes that the modular approach allows other capabilities such as Bluetooth Smart, LiPo battery charging, and motor control boards to be added to the same Teensy to provide flexible configurations tailored to specific applications.

Teensy modular add-on boards

Educational TTL

Alexander Shabarshin is designing of inexpensive boards to teach basic digital electronics like logic gates, flip-flops and registers:

Educational TTL

Alexander created a Four 4 NAND Gate board with a 7400 chip in SOIC package mounted on the bottom:

He is now trying a different approach that eliminates the need for a breadboard:

ttl2

Follow the project on Hackaday.io for further updates!

Educational TTL

Bubble Display I2C adapter

Pesky Products created this nifty breakout board:

Retro bubble displays in a convenient I2C package

2014-07-14T06:48:09.060Z-BubbleDisplay.png.2560x2560_q85

These HP QDSP-6064 bubble displays have a cool retro look right out of the seventies. More practically, they allow compact numerical displays and, coupled with the HT16K33 LED driver chip, 16 digits can be displayed with only two I2C wires, power and ground. That’s a lot of display without taking up a lot of GPIO pins.

The design offers several advantages:

  • no external current-limiting resistors with the HT16K33 chip
  • power the display board with 3.3V or 5V
  • only 4 wires to control up to 8 x 4 four-digit displays
  • 8 boards can be independently addressed via solder jumpers
  • small footprint at 1.46″ x 1.51″b

Arduino code to display integer and floating point numbers on the bubble display:

git
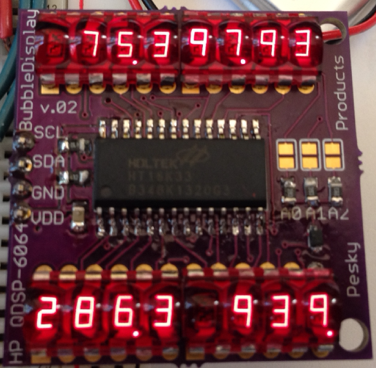
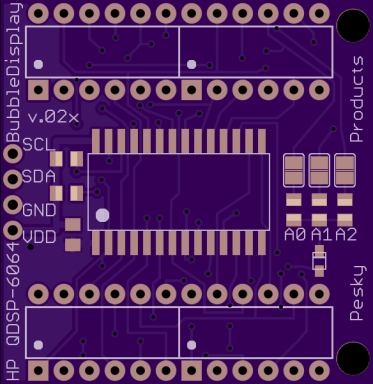
kriswiner/HT16K33_Display_Driver
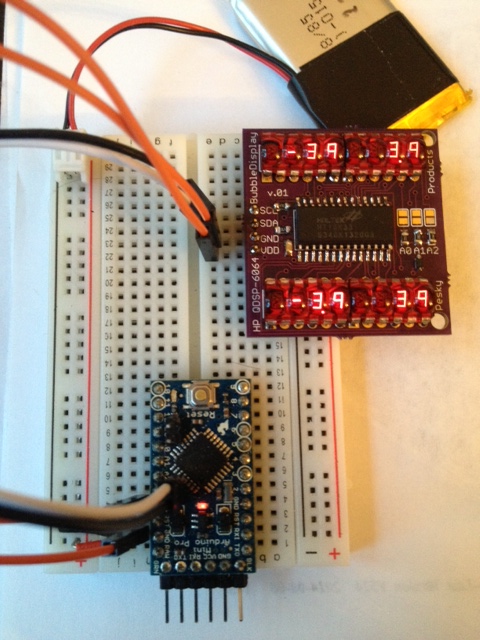
a55e100a-f9b7-11e3-8383-eef494fc2576


PeskyProducts shared the board on OSH Park:

BubbleDisplayFrontPack.v02x

i (15)
Order from OSH Park

Bubble Display I2C adapter

ADC on a Key-chain

John Boyd wanted learn more about ADCs, so he designed this 4-bit pipelined residue amplifier ADC using discrete components:

adc

ADC on a Key-chain

The residue amplifier pipeline ADC consists of one key block: the residue amplifier. These residue amplifier blocks are then connected in series, forming a pipeline, hence the name.

adc5

To design this kind of ADC, I just used some opamp logic to make a residue amplifier and then cascaded four of them together to make a 4 bit ADC.

394571418019659263

The design files are available on Github:

adc10

ADC on a Key-chain

Teensy addressable LED shield

Charles Lakins created this shield for Teensy 3.x which can control addressable RGB LEDs (WS28xx):

The shield also enables data logging of  Smart Port Sensors: FrSky S-Port telemetry library.

Video of the shield controlling RGB LEDs:

3D-printed Neopixel Triplet holds WS2812B modules connected with 6-pin silicone wire:

PB200125_preview_featured

irun4fundotca has shared the board on OSH Park:

Teensy v3.1 – S.Port & WS28xx Led Shield

i

Order from OSH Park

Teensy addressable LED shield

PCB Order Pre-flight Checklist

770219589.jpg
Excited about the new board design?

Great! So are we!

Check your Design Rules and Specs

Part of any great design is making sure that what you’ll get matches what you designed.

  • The design rules, stackup, and specifications depend on your chosen fabrication service. You’ll want to enter the important information into your design tool’s DRC checker so it can verify things for you.
  • Run your DRC tool. We don’t perform any design rule checking on our end, since your design tool will help you fix errors more efficiently than we can.
  • EAGLE users can load our design rules files, which contains all the DRC information.

Preparing the design for fabrication

  • Preparing the board outlineWe use a separate board outline file that tells us where your board edge should be. We use that for both calculating the board size and cost, and send it to the fab for a milling guide. Most design tools have a special layer for this. You can also use Gerbv to get one from a different layer.
  • If you have any internal cutouts or slots, you’ll want to verify that your design tool generates them how we expect.
  • Preparing a bitmap or logoAs much as we love board art, some ways of generating it can be problematic. We can handle silkscreen logos up to 500 DPI but the process can be a little complicated. With a few adjustments though, you can ensure your design comes through as expected.
  • Check connections against your schematic.
  • Check footprints against the datasheet.
  • Make up your bill of materials and verify all your parts are in stock. Nothing is worse than ordering a board, only to realize a critical component isn’t for sale.
  • Add a time stamp, version number, the board name, and any other extra text you want.
  • In Eagle, run ratsnest one more time to make sure any airwires and ground planes are cleaned up.
  • In other design tools, you may need to rebuild ground planes, fill zones, or other final steps to ensure your copper pours connect properly.
  • Run the Design Rules Check (DRC) to verify your design against our fabrication specs.
  • Do a last-minute once over on your design, and look for odd spots. Are all the traces routed? Will a via or pad mess up your silk? Is everything you care about inside the board outline? Are there any dead-end traces? If so, correct them and re-run the DRC.

Preparing the manufacturing files for submission

  • It’s often a good idea to take a look at our Design Tool Help section. We try our best to keep track of surprises that might affect fabrication, to save you some trouble.
  • Run the DRC checker one more time. You can’t use this tool too often!
  • EAGLE users can usually upload the .BRD file directly to oshpark.com, and let us make the gerbers.  In some cases though, you may want to generate your own gerbers.
  • Generate the gerbers: Our Design Tool Help has tips for generating gerbers from design tools. Our automatic upload process expects the following layers for a typical PCB:
    • Board Outline
    • Top Copper
    • Bottom Copper
    • Top Mask
    • Bottom Mask
    • Top Silk (Optional)
    • Bottom Silk (Optional)
    • Internal Layer 1 (4 Layer only)
    • Internal Layer 2 (4 Layer only)
  • Preparing the drills file: There’s a lot of odd drill formats, so this tends to be the most problematic file. Our Design Tool Help section will have specific tips for your tool, but generally the format we need is
    • NC Drill Format (sometimes labeled Excellon)
    • Inches
    • 2:4 precision
    • Absolute Coordinate Origin
    • No Zero Suppression or Leading Zero Suppression
  • Verify the gerbers using a compatible gerber viewer program, such as gerbv.
  • If you have a 4 layer board, convert all the internal layers to positive layers.
  • Remove Alignment points: Ultiboard tends to add alignment points on the files, which confuses our site’s pricing system. Removing those is suggested.
  • Supported Naming Pattern: Our site can detect the default gerber layer naming schemes from several PCB design tools, but this is a naming scheme that is known to work. This is especially important for 4 layer designs to ensure that the internal planes are where you expect them.
  • Finally, upload the gerbers in a .zip file to oshpark.com.

If you get through all these steps and are still having trouble, or just have questions, feel free to contact [email protected].

PCB Order Pre-flight Checklist

Tips for over 20 CAD packages

NiceBoardShot.jpg


Having trouble uploading?

Curious about what we want from your design files?

Here are some help pages for using common CAD packages with OSH Park:

Running into something unusual?

Can’t figure it out?

We can help! Send your files to [email protected], and we’ll get everything in order.

You might also take a look at our more general errors relating to submitting orders.

Tips for over 20 CAD packages

Star Simpson launches Circuit Classics

circWe’re very excited that Star Simpson has now launched Circuit Classics on Crowd Supply!

Exquisite printed circuit boards that bring to life Forrest Mims’ vintage designs from “Getting Started in Electronics.”

circuit

Forrest M. Mims III is a trusted name in the electronics world for good reason: his charming and engaging texts have drawn millions of people into the world of electronics for the first time. I am bringing some of those hand-drawn circuits projects to life by creating an exquisitely designed series of finely crafted and highly detailed boards.

Our past blog posts about Star and Circuit Classics:


Star Simpson launches Circuit Classics

Buck Regulator Olympics

diy

Buck Regulator Olympics is the current advanced contest in /r/diyelectronics on reddit:

The goal is to build a switching buck DC-DC converter from discrete components that can step down a fairly common input voltage to another common output voltage–in this case, 3.3V

1024px-Buck_operating.svg

Constraints

  • Output voltage of 3.3V.
  • Minimum current of 100mA.
  • Can not be a prepackaged buck regulator solution
  • Must build from scratch using discrete components

Winners

  • One winner be picked by a panel of judges including kentaurus712 and RTA5
  • One winner will be picked by community votes
  • Selection criteria:
    • Cost efficiency (lowest overall BOM cost)
    • Power efficiency
    • Output tolerance
    • Features:
      • Feedback loops
      • error correction
      • overcurrent protection
      • turn-on voltage enables

Prizes

  • Both winners will receive $30 gift code for OSH Park

Deadline

  • April 30th, 2016
Buck Regulator Olympics

Winners of An Unconventional Clock contest

diyelectronics

Congratulations to the winners of An Unconventional Clock contest in /r/diyelectronics on reddit!

Winner of Community vote:

Steam Punk owl clocks by Kurt Schaefer

With 20 votes total, this comprehensive build combines electronics, woodworking and using plexiglass to simulate Nixie tubes in a clock with a bunch of added features.

Be sure to check out Kurt’s detailed blog about the design and construction:

Plexitube Owl Clock

position an LED at the edge of a piece of acrylic that has a pattern laser-etched into its surface, and the LED lights up the pattern. Long ago I’d realized that a stack of 10 laser-etched digits with an LED to light up each digit might have the same visual charm as a Nixi Tube


Winner of Jury vote:

Persistence of Vision Clock by mr_stivo

We appreciated the innovative idea and the finished look the project has. Moreover, the documentation was great and it looked awesome in the demo video.


Want to join in the fun?  Buck Regulator Olympics is the current advanced contest in /r/diyelectronics:

build a switching buck DC-DC converter from discrete components that can step down a fairly common input voltage to another common output voltage


Winners of An Unconventional Clock contest