Bubble display shield for Adafruit Trinket

davedarko created this Adafruit Trinket Pro shield for the adorable HP QDSP-6064 bubble display

trinket pro bubble display shield

6258141443734981847

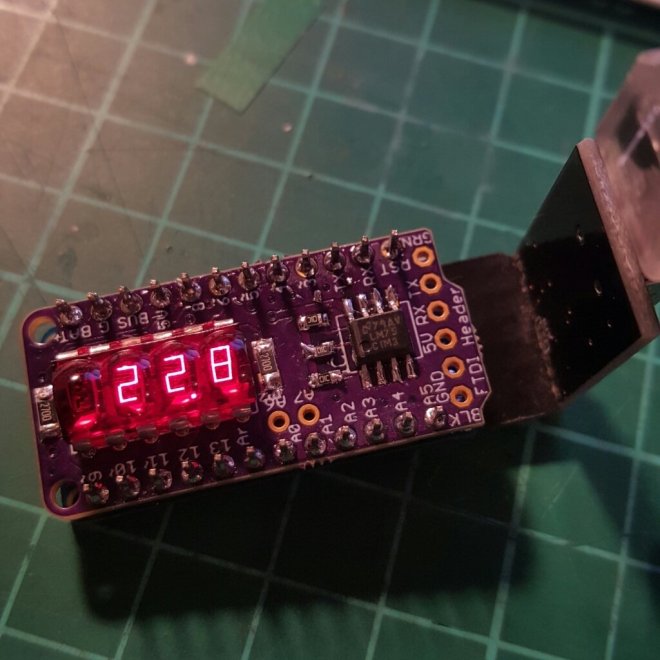
for building clocks and bring them anywhere you want, even integrated a temperature sensor, if you’re into that kind of stuff

The design files and source code are hosted on GitHub:

/TrinketProShield_display

Shield for trinket pro to feature a bubble display and lm75

I created this project, inspired by the events in Texas, where a 9th grade kid called Ahmed got arrested for bringing a clock as a hardware project to school.

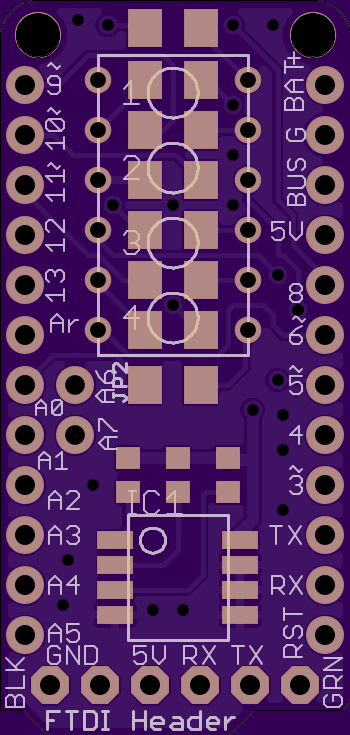
It is a shield for an adafruit trinket pro, based on an atmega238p with vusb.

An additional temperature sensor in the form of the LM75 can be added to this bubble display shield. The atmega32p is capable of driving up to 40mA per pin, so with the display needing 5mA per element of a digit, it should be fine, since it will be a pulsed signal and there are 8 elements max.

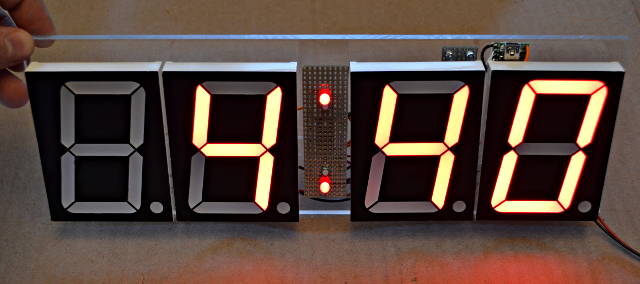
The display is a famous pocket calculator LED bubble display called the HP QDSP-6064.


davedarko has shared the board on OSH Park:

ProTrinket Bubble Display shield

04bc624f503303d6e746bb4707c4a299
Order from OSH Park

Bubble display shield for Adafruit Trinket

Big 7-Segment Countdown Timer

Paul Stoffregen of PJRC created this big 7-segment countdown timer for DorkBot PDX meetings:

big7seg1_0

Big 7-Segment Countdown Timer

A few months ago I was feeling inspired to create a nice countdown timer.  With the next Dorkbot open mic only days away, I finally had the motivation to actually put it together.

The main challenge was driving the LEDs with a constant current, because they need about 10.5 volts across the several series LEDs.  I wanted to run from 12 volts, so there wasn’t much voltage left over for the normal current limiting resistors.  Instead, I used this opamp circuit.

The project runs from a Teensy 2.0.  The code is very simple, using the SPI and Bounce libraries for the hardware interfacing.


PaulStoffregen has shared his board design on OSH Park:

Shared Project: big7seg i.png

Big 7-Segment driver. A ‘595 shift register lets you chain any number of these to build a large display.

Perfect for keeping Open Mic talks at hackerspaces on time!

Order from OSH Park


Big 7-Segment Countdown Timer

CANdlestick: ODB-II CAN adapter


Julien Vanier created this OBD-II CAN adapter for the Particle Photon or Electron boards:

CANdlestick

I wanted to make a compact internet-connected analyzer for my car’s OBD-II diagnostic port.

The WiFi-capable Particle Photon or better yet the cellular Particle Electron are great options for that.

Luckily the pins for a Photon fits right in between the 2 rows of pins of a straight OBD-II connector so it’s possible to make a very compact OBD-II adapter with a Photon.

Julien has shared the board on OSH Park:

CANdlestick R1.1

fc47f7c4012c4e3c02dde593a47b508c

Order from OSH Park

CANdlestick: ODB-II CAN adapter

RGB LED display with Raspberry Pi GPIO

Henner Zeller designed hardware and software to control up to three chains of 32×32 or 16×32 RGB LED displays using Raspberry Pi GPIO:


Controlling RGB LED display with Raspberry Pi GPIO

A library to control commonly available 32×32 or 16×32 RGB LED panels with the Raspberry Pi. Can support PWM up to 11Bit per channel, providing true 24bpp color with CIE1931 profile.

Supports 3 chains with many 32×32-panels each. On a Raspberry Pi 2, you can easily chain 12 panels in that chain (so 36 panels total), but you can stretch that to up to 96-ish panels (32 chain length) and still reach around 100Hz refresh rate with full 24Bit color (theoretical – never tested this; there might likely be timing problems with the panels that will creep up then). With fewer colors you can control even more, faster.


Here it is in action:


Henner has shared the his board designs on OSH Park:

Passive-RPi-3xHub75-Adapter

i (8)

Order from OSH Park


Active-RPi-3xHub75-Adapter

bac56b729411189c56b9427e5de65a3d
Order from OSH Park


Passive-RPi1-Hub75-Adapter

i

Order from OSH Park

RGB LED display with Raspberry Pi GPIO

“FTDI-be-gone” USB serial port gizmo

Nick Sayer has created his own USB to serial converter:

FTDI-be-gone

There are countless devices to add a traditional DB9M serial port via USB. The general problem is that when you just buy a cheap one, you don’t have any idea what’s inside. With the reminder of the recent FTDI shenanigans, it’s become more important to use modem “class” chips that use generic OS drivers rather than proprietary driver devices. Cypress Semi’s CY7C65213 is one such device. Because it uses drivers supplied by the OS, there’s no opportunity for them to attempt to weaponize a proprietary driver.

Nick has also shared the board on OSH Park:

FTDI-be-gone v0.4

4d8242a1ee5330d95fdc5ae4325480e6 (1)

Order from OSH Park

“FTDI-be-gone” USB serial port gizmo

CANPi: CAN Bus for Raspberry Pi


RasmusB created a CAN Bus adapter for the Raspberry Pi:

GitHub.io: CANPi

This is an electrically isolated CANBUS adapter for your Raspberry Pi. Even if you screw up the connections somehow, nothing will be damaged. It also fits within the normal Raspberry Pi footprint, meaning that you can use it with most enclosures.

The board was designed with KiCAD and the design files are on GitHub:

githubRasmusB/CANPi


RasmusB has made the board a Shared Project on OSH Park:

CANPi v1.1

2 layer board of 1.58×1.08 inches (40.16×27.46 mm).

i (2)

Order from OSH Park


CANPi: CAN Bus for Raspberry Pi

NEDONAND Homebrew Computer

Alexander Shabarshin of NEDOCON has created the impressive NEDONAND homebrew computer:

NEDONAND is 8-bit homebrew computer entirely built out of many 74F00 chips (2-input NAND gates)

Alexander describes the details on Hackaday.io:

I started NEDONAND in order to achieve a few goals:

  •  use only 74F00 chips (2-5 ns delay per gate) to get maximum possible performance (at least 1 million instructions per second)
  • 8-bit data, but 4-bit ALU (similar to Z80) with carry/borrow and overflow flags (with approach similar to 6502 where borrow is inverted carry)
  • no microcode in ANY form, just 2-stage pipeline and RISC instruction set (similar to PIC – 4 ticks per cycle, 1 cycle per instruction)
  • open source (public domain hardware and copylefted software) and hobbyist friendly design (only through-hole components)
  • all parts will be well-documented and could be used as standalone addons in other projects
  • everything simulated in Logisim first (circuits are provided as a single nedonand.circ file)
  • plan to build PC-connected “testbed” to test different parts of the project separately
  • If you want to purchase NEDONAND boards (I share only tested ones): OSHPark/Shaos
  • Hardware files for Eagle v5.12 and gEDA (pcb): Eagle files, gEDA files (it may have some untested things).

In this video, Alexander shows part of the NEONAND program counter:

Shared Projects on OSH Park by Alexander:

NEDONAND-1

d251b18679cb02780c30babeec9f9202


NEDONAND Homebrew Computer

FeatherWing designs by Sync Channel

Dan Watson of the The Sync Channel Blog has been designing exciting FeatherWings (e.g. daughterboards) for the Adafruit Feather line of microcontroller development boards.  Dan wrote a nice introduction to Feather:

feathers

Helping Your Feathers Flock Together

“Occasionally I see a new product or microcontroller development board that really sparks my interest. That’s what happened with the Adafruit Feather line of boards. They pack a lot of punch into a small footprint, especially when you consider the fact that LiPo charging is built-in, as well as Wi-Fi, Bluetooth, or an SD card on some of the variants.”

Dan designed a FeatherWing that combines a GPS and 9DOF IMU sensor:

MultiNav_FW

MultiNav FeatherWing for Adafruit Feather

“The MultiNav FeatherWing is an add-on board for Adafruit Feather. It incorporates a U-Blox NEO-6M GPS module as well as an InvenSense MPU-9250 9 Degrees of Freedom (9DOF) sensor.”
 
He also added the board as as OSH Park Shared Project:

9c878fc8070a5920468f687d3df94c17

MultiNav FeatherWing

by SyncChannelBlog.

2 layer board of 2.00×0.90 inches (50.80×22.89 mm).
Shared on January 26th, 2016 04:50.

Order from OSH Park

Dan also designed a FeatherWing for low-power, long-range wireless communication:

lorafw_st

LoRa FeatherWing Development Breakout

“LoRa is an ultra-long range wireless technology that uses sub-GHz ISM bands. It allows the interconnection of small, low-power sensor nodes and Internet of Things (IoT) devices. There are many LoRa transceiver modules on the market from manufacturers such as HopeRF and MicroChip.”

Dan shared the board on OSH Park:

9a07fa4a0101249bff6de91eaf479445

LoRa FeatherWing Development Breakout

by SyncChannelBlog.

2 layer board of 2.00×0.90 inches (50.80×22.89 mm).
Shared on February 25th, 2016 13:06.

Order from OSH Park

FeatherWing designs by Sync Channel

The World’s Tiniest RGB LED Cube

Hari Wiguna has created a hand soldered 4x4x4 RGB LED cube that is about the size of a quarter!

The World’s Tiniest RGB LED Cube

2e535da5404f60439fd3e7aeee295de8
Order from OSH Park

Hari posted on Google Plus:

It is insanely tiny! [..] I could not believe they could drill a hole that small and plate it through.

20160126_183708

Design files and code are on GitHub: 122-Worlds_Tiniest_LED_Cube

2996501448829547929.JPG

For more details, checkout the project page on Hackaday.io:

Hand soldered 4x4x4 RGB LED cube. Uses 2.7mm x 3.4mm SMD RGB LEDs.
– The cube itself is less than 1″x1″x1″ on a slightly larger custom designed PCB.
– 64 SMD (Surface Mounted Device) common anode RGB LEDs.
– All driven by an Arduino Nano (WITHOUT any shift registers)
6314421454644872268 (1)
The World’s Tiniest RGB LED Cube

Jedi Light Switch


TinamousSteve has shared his exciting project:

Jedi Light Switch V1.2

77ed0c0698d8cb05c2c3fdff05bb119b.png
Order from OSH Park

Design files and source code are available:

GitHub: JediLightSwitch4307698

Home automation light switch which responds to the Jedi wave or touch. It aims to bring the humble wall switch into the modern WiFi lighting era.

More details on the project:

Hackster.io: Jedi Light Switch 

Replace your boring old wall light switch with this Photon based switch to control Lifx lighting with touch or the wave of a Jedi.

Jedi Light Switch