Do you have an idea burning in the back of your mind; a design that you just want to get out? Well, flex those creative muscles with the “Flexible PCB Contest” – sponsored by OSH Park, Hackaday and Digi-Key Electronics.
Flexible PCBs have many uses; their small size letting them fit where rigid PCBs might not, and ensuring weight won’t be an issue on sensitive projects.
Design a flexible PCB project and enter to win anything from gift cards to complimentary boards. Digi-Key offers many options to assist with any design to help you with your project!
The rules and contest information can be found here. The contest ends on May 29th, 2019 at 7:00 am PDT, so be sure to create, share and send in your designs!
Bi-quinary driven Nixie tubes have nice features by requiring a low bias current and minimized shift registers, but also are sensitive to digit ghosting and require a good level of cathode poison elimination. With the procedures and circuit tricks described above, this was successful for the ETA Nixie Tube Clocks. Good luck with your testing. Let me know if you have any comments or your own improvements.
[Glen]’s project sounds perfectly straightforward: have a big industrial-style push button act as a one-key USB keyboard. He could have hacked something together in any number of ways, but instead he decided to create a truly elegant solution. His custom PCB mates to the factory parts perfectly, and the USB cable between the button and the computer even fits through the button enclosure’s lead hole.
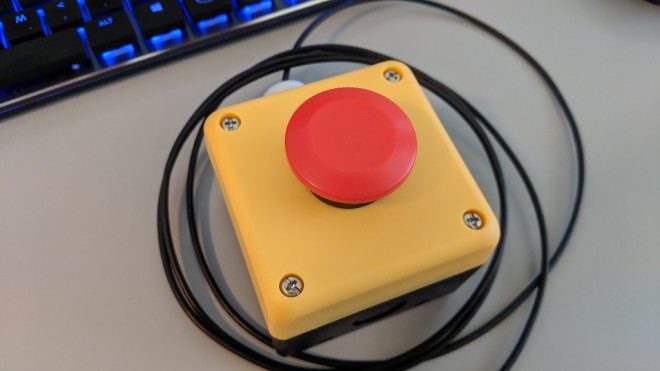
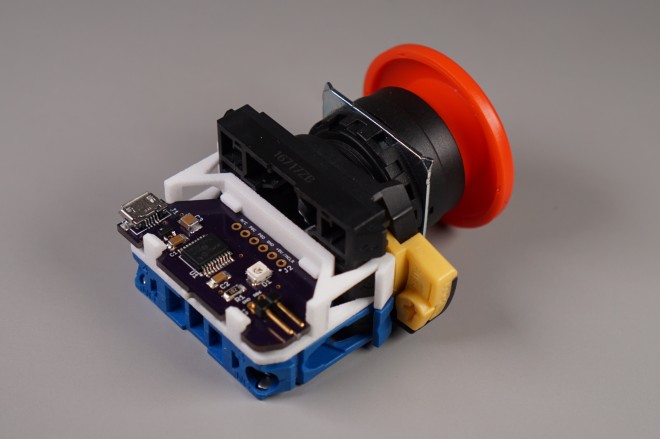
It turns out that industrial push buttons have standardized components which can be assembled in an almost LEGO-like manner, with components mixed and matched to provide different switch actions, light indicators, and things of that nature. [Glen] decided to leverage this feature to make his custom PCB (the same design used in his one-key keyboard project) fit just like a factory component. With a 3D printed adapter, the PCB locks in just like any other component, and even lines up with the lead hole in the button’s enclosure for easy connecting of the USB cable.
This is the 2019 Hackaday Prize, the worldwide hardware design contest focused on product development. We know you can build a working prototype, and we still want to see you do that. But a great idea should have reach beyond your own workshop. This year’s Hackaday Prize is about taking your product across the finish line, from concept to design for manufacture.
PRIZES TO JUMP START YOUR PRODUCT
$125,000 and a Supplyframe DesignLab Residency await the Best Product winner. There are five focus categories this year, with the winner of each receiving a $10,000 prize. And to help encourage those early beginnings, we have another $10,000 in seed funding set aside which means up to $500 for each of the top 20 entries who get in and gather those “likes” before June first.
There are a few areas of focus you should have in mind as you work on your products. These are Concept, Design, Production, Benchmark, and Communication. All entries are eligible to receive prizes related to these, and in addition to the $50,000 we mentioned above for the winner in each area, we have another $3,000 for each set aside to recognize an honorable mention.
We rarely take a moment to consider the beauty of the components we use in electronic designs. Too often they are simply commodities, bought in bulk on reels or in bags, stashed in a drawer until they’re needed, and then unceremoniously soldered to a board. Granted, little scraps of black plastic with silver leads don’t exactly deserve paeans sung to their great beauty – at least not until you cut them in half to reveal the beauty within.
We’ve seen a little of what [Tube Time] has accomplished here; recall this lapped-down surface-mount inductor that [electronupdate] did a while back. The current work is more extensive and probably somewhat easier to accomplish because [TubeTime] focused mainly on larger through-hole components such as resistors and capacitors
What if there were something like a KVM switch for your micro programmer, logic analyzer, and other various tools? There was a time when KVM switches (keyboard, video, and mouse, by the way) were metal enclosures surrounding an absurdly complicated rotary switch.
A few weeks ago, I detailed my process for upcycling a Photon-based project of mine—the Brew Buddy—to the new Particle Argon. I covered creating a new breadboard prototype, adding a few new features not in the Photon version, and the process of converting the firmware to work with the Argon.
In this post, I’ll cover the second half of the project: from prototype to PCB and cloud-based control panel. As with the first part of this project, I’ve been live-streaming all my work on this project over on Twitch, so if you want to watch the replays, or join me for future projects, head over to my page and give me a follow to get notified.
DESIGNING A NEW PCB WITH EAGLE AND OSH PARK
Having the ability to breadboard a new project is amazing, but once I get everything working, I can’t wait to get rid of that rats nest of wires and replace them with a fancy, custom-designed Printed Circuit Board (PCB). My original Brew Buddy project saw several PCB revisions over its early life, so of course I had to spin another board for this Argon-based iteration.
Various iterations of the Brew Buddy custom PCB that I’ve used over the years
ToorCamp is a five-day open air tech camping event held every two years somewhere around the northwest corner of Washington state. Think of it as something like Burning Man, except you can survive for three hours without water, there aren’t a whole bunch of scenesters and Instagram celebs flying in on private planes, and everyone there can actually build something. Oh, and ToorCamp has delivery drones that will send you creme brulee. These mini creme brulees were probably made with the hot air gun hanging off a soldering station. Don’t worry, you’re getting fresh air that’ll balance out the heavy metal poisoning.
For last year’s ToorCamp, the biggest welcome sign was a 40-foot-long illuminated ToorCamp sign. This was designed, built and coded by Zach Archer, and he was at the 2018 Hackaday Superconference to give us the details on how he made it and how it was coded.
Sporting a new wristwatch to school for the first time is a great moment in a kid’s life. When it’s a custom digital-analog watch made by your dad, it’s another thing altogether.
As [Chris O’Riley] relates, the watch he built for his son [Vlad] started out as a simple timer for daily toothbrushing, a chore to which any busy lad pays short shrift unless given the proper incentive. That morphed into an idea for a general purpose analog timepiece with LEDs taking the place of hands. [Chris] decided that five-minute resolution was enough for a nine-year-old, which greatly reduced the number of LEDs needed. An ATtiny841 tells a 28-channel I2C driver which LEDs to light up, and an RTC chip keeps [Vlad] on schedule. The beautiful PCB lives inside a CNC machined aluminum case; we actually commented to [Chris] that the acrylic prototype looked great by itself, but [Vlad] wanted metal. The watch has no external buttons; rather, the slightly flexible polycarbonate crystal bears against a PCB-mounted pushbutton to control functions.
In this project, I mount the electronics from my single-key USB keyboard project to the back of an industrial mushroom push button switch. The finished big red button now activates my screensaver with a single overly-large button press. The biggest issues in this project were where to mount the USB electronics and how to connect the USB cable between the button and my computer.
check out the software and schematic for the single-key keyboards on Github.