Notes from the presentation by Drew Fustini (@pdp7) on the OHS18 badge at the Alternative Computing Club meeting in Chicago
What is #BadgeLife?
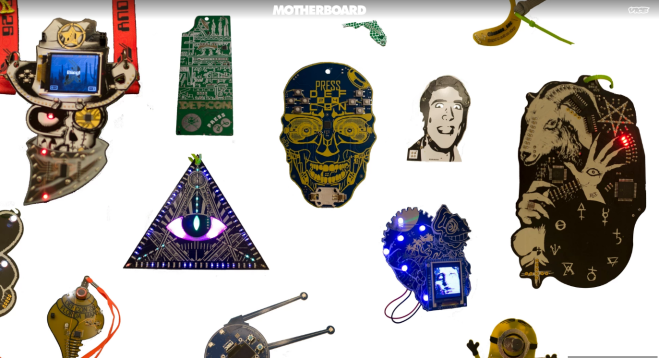
Motherboard article: “A History of Badgelife, Def Con’s Unlikely Obsession with Artistic Circuit Boards”
Badgelife documentary by Hackaday
2018 Open Hardware Summit at MIT

Here is my brief overview of the badge on stage at the Summit:
Hackaday.io project for the OHS18 badge

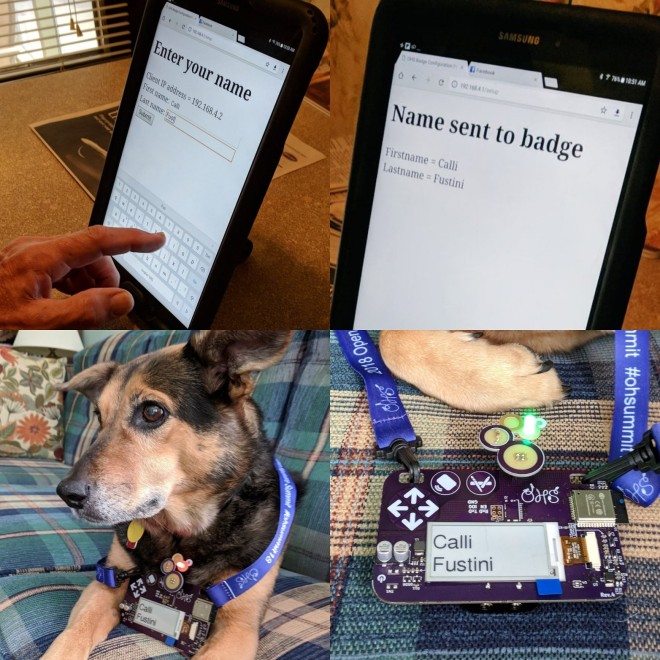
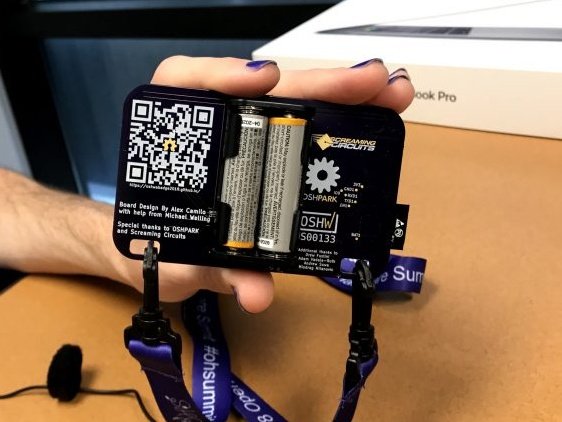
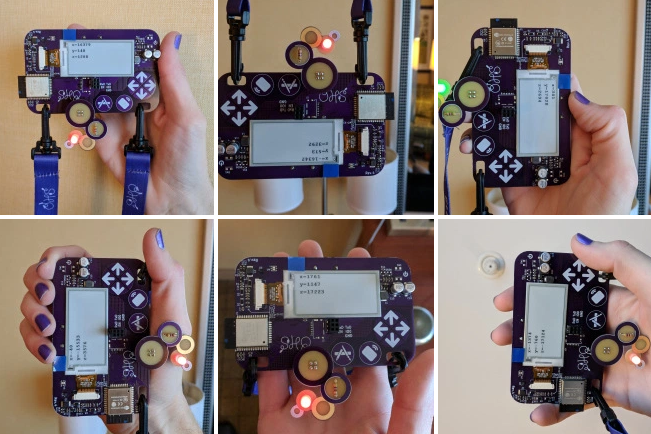
OSH Park and Screaming Circuits produced an electronic conference badges for the 2018 Open Hardware Summit. Hardware design by Alex Camilo based on concept from ESP trINKet by Mike Rankin. Features for the OHS18 badge: ESP32 microcontroller with built-in WiFi; E-Paper to display the badge wearer’s name; badge wearer can update the displayed text from phone, tablet or laptops. Powered by 2x AA batteries.

")


This project was developed by a team of wonderful people that came together on Hackaday.io, in particular, this badge could not have happened without Alex Camilo and Michael Welling!


OHS18 Badge documentation website
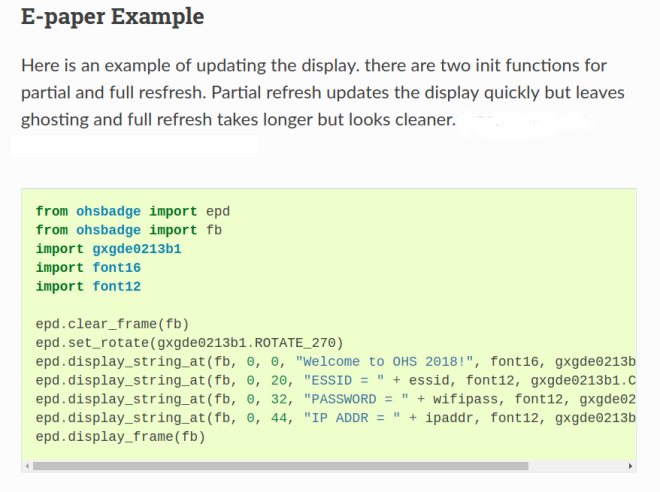
OHS18 Badge: MicroPython documentation
OHS18 Badge: Accelerometer demo
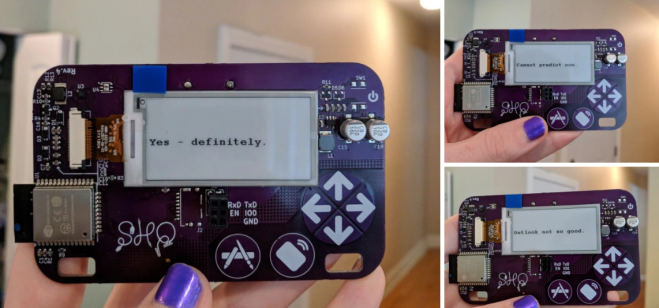
OHS18 Badge: Magic 8-Ball MicroPython game
Python REPL using the serial port
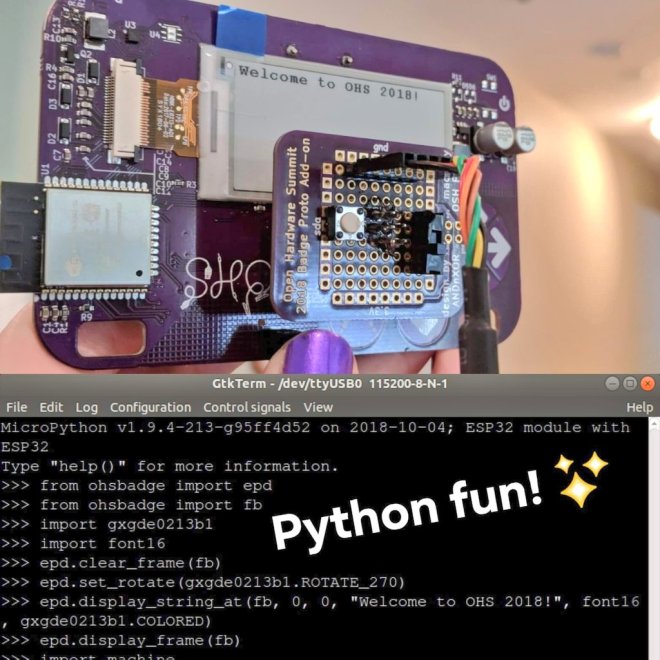
To use the interactive Python prompt (REPL), press the menu button on the badge and select Serial REPL from the Available Apps menu. The terminal emulator connected to the serial port should then display the interactive Python prompt (REPL). You can type in MicroPython code to experiment.
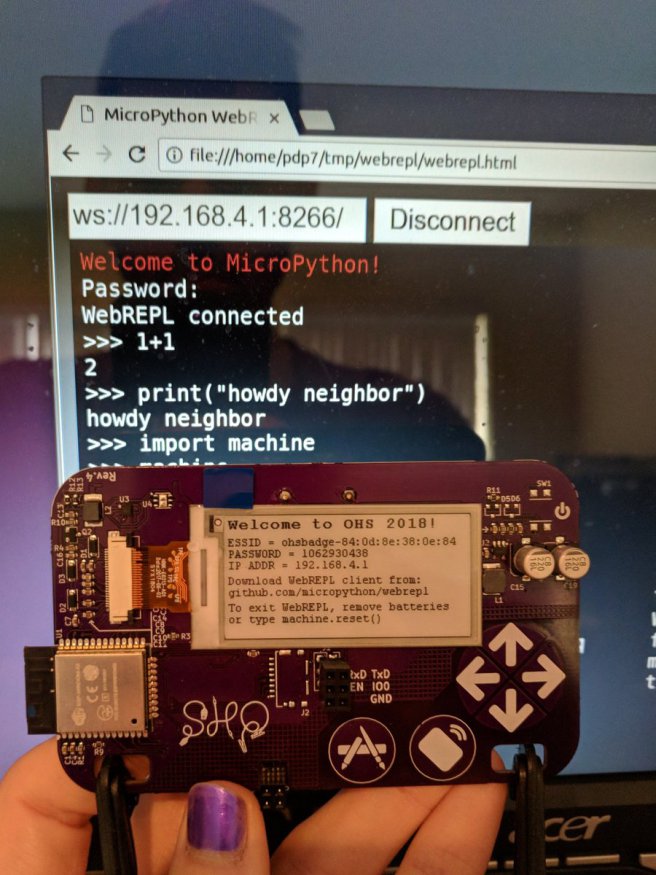
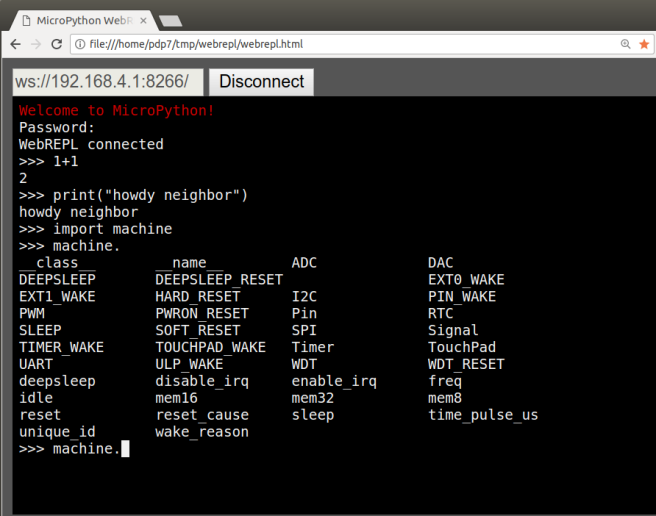
MicroPython WebREPL
he 2018 Open Hardware Summit badge runs MicroPython firmware which allows for an interactive programming experience known as the REPL:
Getting a MicroPython REPL prompt
REPL stands for Read Evaluate Print Loop, and is the name given to the interactive MicroPython prompt that you can access on the ESP8266. Using the REPL is by far the easiest way to test out your code and run commands.
There is an USB-to-serial adapter board which be used to access the REPL on the badge via the serial port. However, a simpler option is to use the WebREPL:
Learn to Solder add-on board
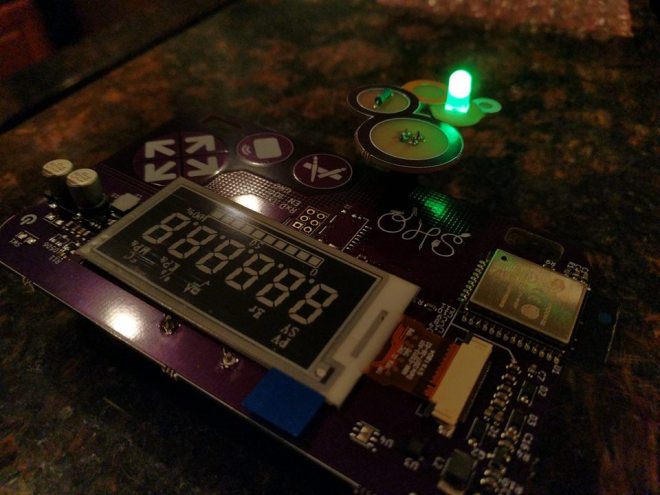
The OHS18 badge also features the DefCon 26 #badgelife add-on header. Andrew Sowa designed this OSHWA-themed Learn to Solder add-on board to connector the badge add-on header:

")
")
#badgelife add-on adapter for Adafruit LED matrix


Programming jig to flash 300 badges
Alex Camilo created this wonderful programming jig! Drew was able to use it to program all 300 badges and provision the names of the 150 people that pre-registered in time. Thanks so much to Artisan’s Asylum makerspace near Boston for giving us a space to work on the badges before the Summit!
")

")
")
Brian Benchoff writes on Hackaday:
The Exquisite Badges Of Open Hardware Summit
The boards were made through OSH Park, and Screaming Circuits took care of the assembly. Anyone who has ever built a badge will tell you it isn’t the assembly that gets you — it’s the programming and provisioning. This is especially true since the Open Hardware Summit badge is distributed with the attendee’s names already preloaded. That’s a few hundred badges, all with unique firmware. This is a nightmare by any definition.
However, there’s always a good solution to a problem, and [Drew] from OSH Park showed me the best programming jig I’ve ever seen during the Summit pre-game at Artisan’s Asylum.
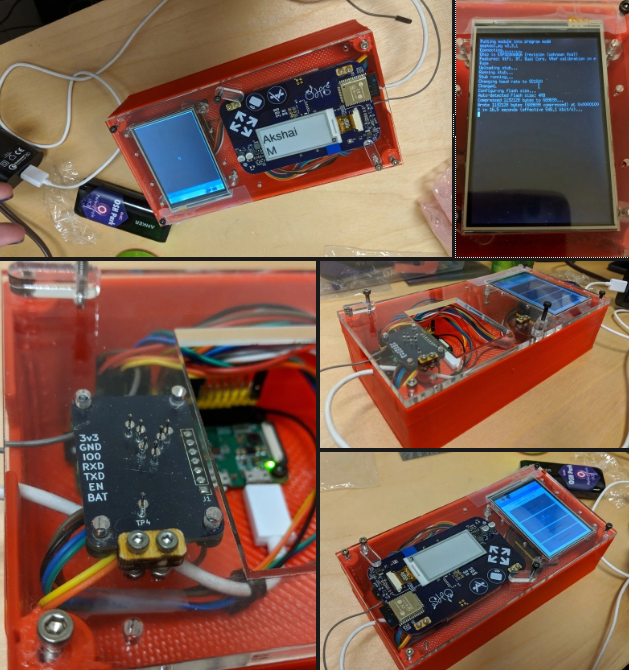
What you’re looking at is a 3D printed box loaded up with a touch-screen display, a Raspberry Pi Zero W, and a few pogo pins. This Raspberry Pi does all the heavy lifting by connecting to the Internet, pulling down the current version of the firmware, and loading that firmware onto the badge. There are a few more options thanks to the touch-screen interface, including provisioning all the badges with the names of the attendees — this can be done by reading a list of attendees and uploading the next one to the badge in the jig. All of this is wrapped up with a nice laser-cut cover that securely holds each badge exactly where it needs to be for the pogo pins to make contact.
This is, without question, the best programming jig I’ve seen. Any badge makers out there should take note: this is how you program a few hundred badges. The badge, itself, is great and just as this post is published there will be hundreds of eager hackers futzing about with this remarkable piece of hardware. If you want to check out the current progress of the badge hacking, check out the updates on Twitter
Lesson Learned:
- Badges should have built-in USB port:
- USB connector makes it easy to multiple volunteers with laptops to flash firmware onto the badges in parallel, versus having just one programming jig
- USB connector makes it easier for people attending the Summit to experiment with modifying the firmware and developing their own functionality
- Pretend that the deadline is 1 month before the event
- We originally had the goal of being ready on September 1st for the September 27th conference, but we allowed ourselves to push the deadline for final firmware release to the day before the Summit. That meant staying up all night to flash the updated firmware on to the badges
- We should have identified the minimum feature set and simplified the functionality sooner in the design revision process
- We should have planned that we would have 3 hardware revisions and allowed for it in the schedule
