Data Fitness Connector (DFC) update on Crowd Supply

New update for the Data Fitness Connector (DFC) on Crowd Supply which wirelessly connects your Peloton bike to third-party apps, fitness watches, and more:

The DFC Build Process by Jason V

At this point we’re about two thirds of of the way through the campaign, and we’re very excited to report that we’ve hit our funding goal! Thank you!

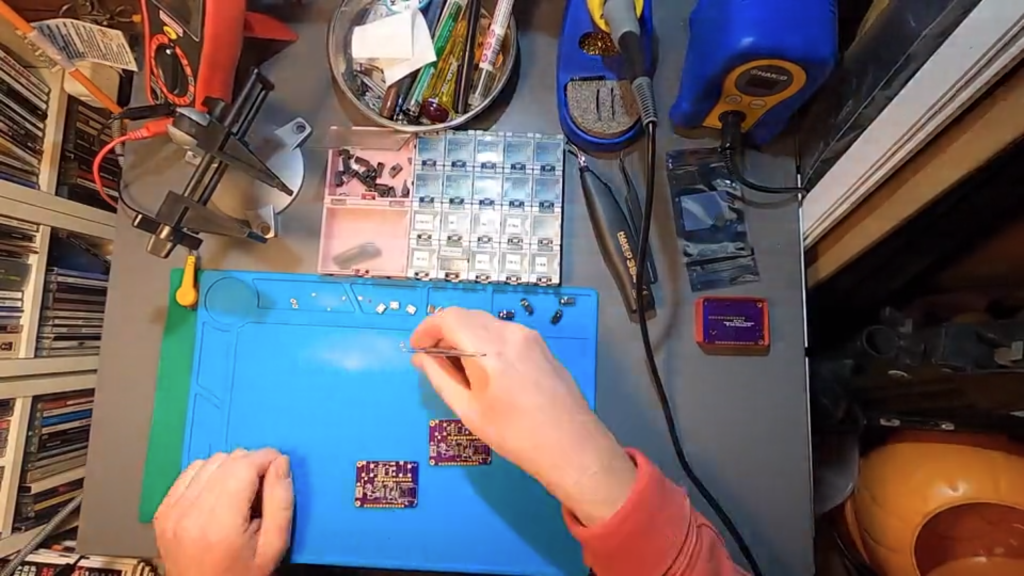
This week’s update is for the curious minds out there who like to see how things are made. We’re taking you behind the scenes for a look at how early prototypes were put together. The final version of DFC will be made by our manufacturing partner here in the US, but we needed to build a few ourselves so we could test them before ramping up production.

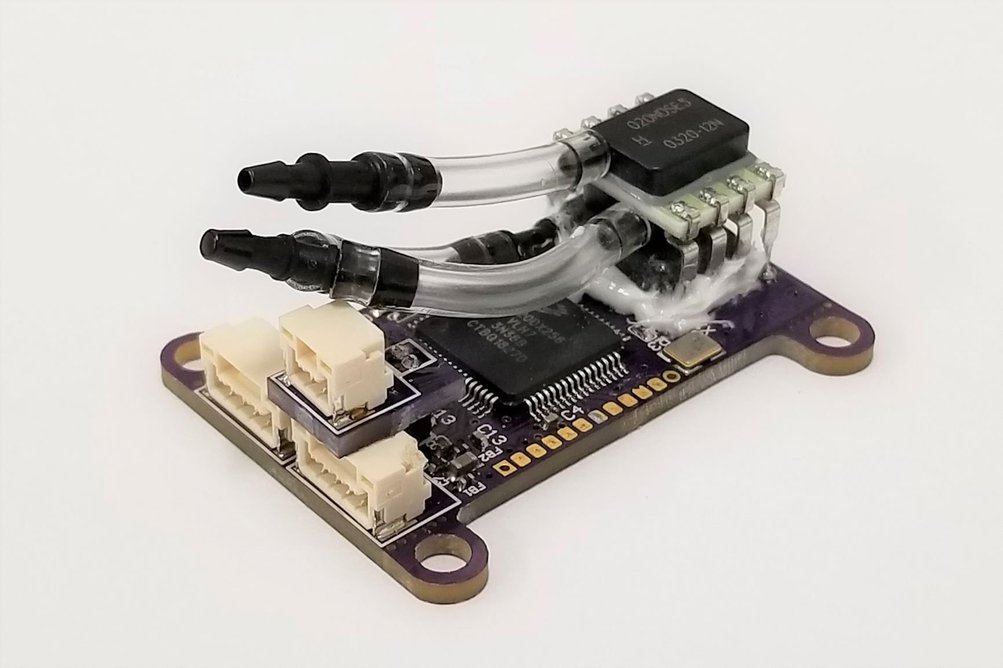
In the time-lapse video below, you can see how a prototype DFC circuit board was built, starting with the application of solder paste atop a stencil, followed by the careful placement of all those tiny little components that make it work. After that, the board was placed in a circuit oven (kind of like a fancy toaster oven), which melted the solder paste and secured everything in place.

Building circuits by hand in this way is an odd mix of calming concentration and frequent frustration, so we’re happy to hand this off to a robotic pick-and-place machine for mass production.

Data Fitness Connector (DFC) update on Crowd Supply

The Creativity Podcast Talks Selling on Tindie

While I’ve written for Tindie for several years now, and at the same time I’ve helped host The Creativity Podcast: Where Art and Engineering collide. In our latest episode, we interview none other than head Tindarian, Jasmine Brackett.

She of course answers obligatory question of “What is Tindie?” for the audience, and talks about selling on the platform in general. Specifically, we delve down on the question of how do you keep things in stock without overbuying? Jasmine has a few ideas on the subject, though there’s definitely no one-size-fits-all answer. One important tip that she points out is that at some point items on the wait list get “cold.” In other words, people eventually move on to other ideas, especially if it’s been quite some time. So be sure to restock if you’re out!

Read more: The Creativity Podcast Talks Selling on Tindie

The Creativity Podcast Talks Selling on Tindie

AtomIO Simplifies Your Breadboard UI

We’ve all been there, you hook things up to a breadboard, only to find that you need to figure out a simple LED indicator to see what’s going on, or have to use a wire or two as an input “button.” This is fine, but not really optimal. You can of course add actual buttons and switches, and perhaps cut down your LEDs to make them more presentable, but this takes up valuable space and time.

If you’d like a little shortcut to this problem, then the Atom IO may be just what you need. The device plugs in to the + and – rails of a breadboard, with 5 lines that connect to 3 LEDs, as well as 2 buttons. The LEDs are routed to the ground rail, so if you apply 2-ish volts, each will light up. The buttons are normally pulled low, but supply voltage from the positive rail when engaged.

Read more: AtomIO Simplifies Your Breadboard UI — Tindie Blog

AtomIO Simplifies Your Breadboard UI

Smallest Discrete Transistor 555 Timer

Over at Tiny Transistor labs, [Robo] took it upon himself to reproduce the classic 555 timer in discrete transistor form. For bonus points, he also managed to put it in a package that’s the same basic size, pin compatible with, and a plug-in replacement for the original. The first task was deciding which 555 circuit to implement. He examined a handful of different implementations — and by examined, we mean dissected them and studied the die circuitry under a microscope. In the end, he went with Hans Camenzind’s original circuit, both as a tribute and because it used the fewest transistors — a point which helped manage the final size, which is only a little bit bigger than the IC!

Read more Smallest Discrete Transistor 555 Timer — Hackaday

Smallest Discrete Transistor 555 Timer

UAVCAN Air Data Computer and Airspeed Sensor

From Avionics Anonymous on Tindie:

UAVCAN Air Data Computer / Airspeed Sensor

Airspeed, Altitude and Air Temperature sensing with UAVCAN interface for Pixhawk and other autopilots

A tiny, richly-featured Air Data Computer (ADC) for small unmanned airplanes. Includes an MS5611 barometric pressure sensor for 10cm-resolution altitude, a Honeywell RSC-series differential pressure transducer for extremely accurate airspeed, and a thermistor interface with high-resolution convertor for air temperature measurement with less than 1 degree precision. All of this interfaces to your autopilot via robust UAVCAN interface – no sketchy I2C wiring! Comes fully assembled, ready to use!

UAVCAN Air Data Computer and Airspeed Sensor

Open Source Turtle Robot Kit

From Ken Olsen of The Maker’s Box on Tindie:

Open Source Turtle Robot Kit

A 3D printed drawing robot you can build, program, and modify.

Robotics is the exciting intersection of a number of engineering fields including mechanical engineering, electrical engineering, and computer science. This project was designed as the basis for a two-day workshop for high school age students to introduce them to engineering principles and giving them a jumping off point for exploring their interests further. There is something for everyone here, even if it is just for the art it creates. The design goals were:

Easy to build.

Easy to program.

Did something interesting.

Low-cost so participants could take it home and continue to learn.

Open Source Turtle Robot Kit

DIY Arduboy Contest

Exciting announcement from Kevin Bates, creator of Arduboy, on Hackster:

Make your own Arduboy-compatible game system and win the brand new Arduboy FX!

Arduboy is an open source game system based on Arduino that has been supported by an awesome community for over five years with over 200 games available to play!

DIYBig.png
Example DIY Arduboys found on the web

Arduboy community members have already made hundreds if not thousands of homemade versions of their very own Arduboy, now is your chance to share yours on Hackster!

The Arduboy consists of an OLED display (SSD1306), ATmega32U4 processor (same as Leonardo, Micro or Pro Micro), six tactile buttons and an optional speaker and RGB LED. You are encouraged to try and port Arduboy games to other microprocessor platforms and displays for bonus points!

ArduboySchematic.png

All the instructions on how to make your own Arduboy game system are available for free online. If you have already documented your project on the Arduboy community or elsewhere you can import it to Hackster and join the contest too.

Because Arduboy is open source all of the information about how it is made is published for others to learn and understand from. Learning to make and program an Arduboy helps teach critical thinking and problem solving skills! Make an Arduboy today, you just might learn something!

Bonus Points.png

Alternate Processor or Display – Get extra points for going beyond the ATmega32U4 and SSD1306!

Custom PCB – Projects that use a custom circuit board made for this contest will receive bonus points!

DIY Arduboy Contest

New Contest: Reinvented Retro — Hackaday

There are so many ways to make things look awesome by pulling inspiration from great retro hardware. And combining today’s futuristic functionality with yesterday’s lines, colors, and kitsch is the quick path to a winning combination. So why not give it a try and show us what you got? That’s the gist of Hackaday’s Reinvented Retro Contest which begins right now and runs through June.

Read more New Contest: Reinvented Retro — Hackaday

New Contest: Reinvented Retro — Hackaday