We are all familiar with the idea of a hologram, either from the monochromatic laser holographic images you’ll find on your bank card or from fictional depictions such as Princes Leia’s distress message from… 624 more words
The Hackaday Superconference for 2018 was another massive success. As my first supercon, it was amazing to finally meet my fellow Tindarians in person. Not only did we have an awesome Tindie meetup, but several sellers also hosted talks, demos, and even workshops!
Let’s take a look back at Supercon 2018 and see what our fellow Tindarians were up to during this epic weekend!
The Tindie Meetup
During lunch on Saturday, we had a Tindie meetup outside in the alley area behind the Supplyframe DesignLab. There were several products on display, live demos, and more than a few familiar faces!
A weekend for people who love hardware, by people who love hardware. It’s a simple recipe and it makes a delicious event that we call the Hackaday Superconference.
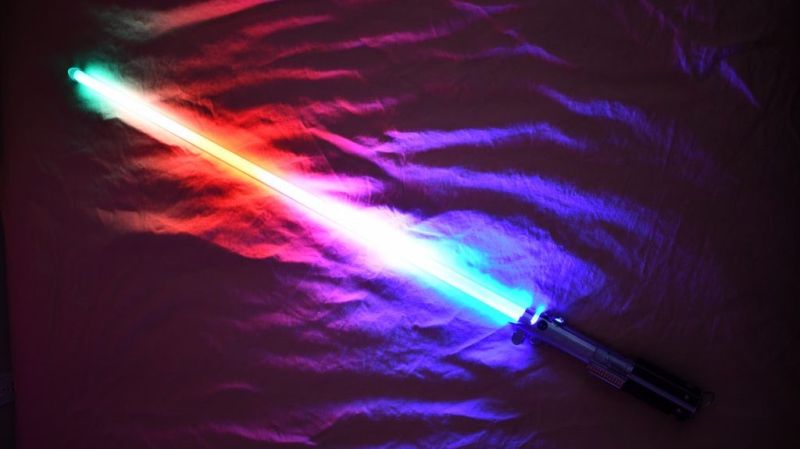
There was an endless supply of fantastic projects at Supercon this year, but one whose fit and finish really stood out was [Scott]’s lightsaber. If you were walking around and saw someone with a very bright RGB device with a chromed-out handle hanging off their belt it was probably this, though it may have been hard to look at directly. On the outside, the saber looks like a well-polished cosplay prop, and it is! But when Scott quickly broke down the device into component pieces it was apparent that extra care had been put into the assembly of the electronics.
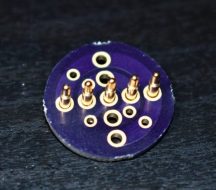
Like any good lightsaber replica the blade is lit, and wow is it bright. The construction is fairly simple, it’s a triplet of WS2812B LED strips back to back on a triangular core, mounted inside a translucent polycarbonate tube with a diffuser. Not especially unusual. But the blade can be popped off the hilt at a moments notice for easy transport and storage, so the strips can’t be soldered in. Connectors would have worked, but who wants flying wires when they’re disconnecting their lightsaber blade. The answer? Pogo pins! Scott runs the power, ground, and data lines out of the strips and into a small board with slip ring-style plated rings. On the hilt, there is a matching array of pogo pins to pass along power and data. The data lines from all the strips are tied together minimizing the number of connections to make, and the outer two power rings have more than one pin for better current-carrying capacity. A handy side effect is that there is nowhere on the blade where there aren’t LEDs; the strips go down to the very end of the blade where it meets the main board inside the hilt.
Scott is selling this as a product but also provides detailed instructions and parts lists for each component. Assembly instructions for the blade are here. The hilt is here. And pogo adapters are on OSH Park here. An overview of the firmware with links to GitHub is here. Check out a walkthrough of the handle assembly and blade attachment after the break!
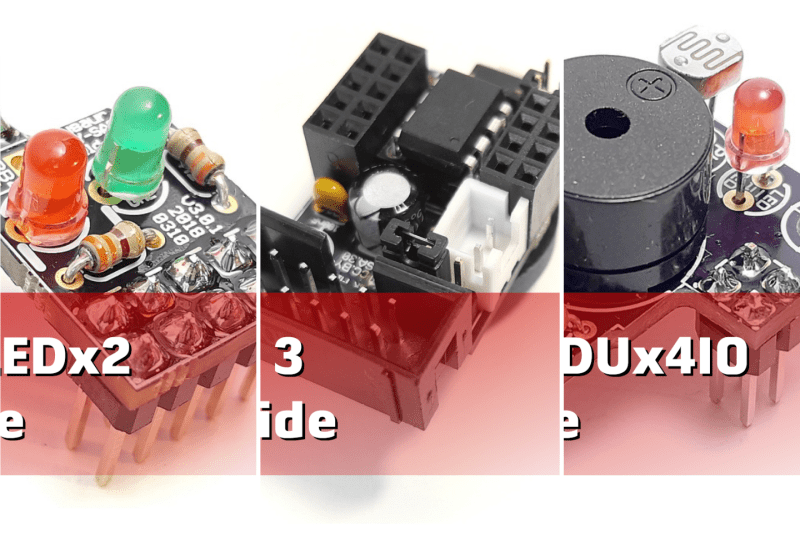
We have updated the user guides for how to assemble the Tinusaur Board, Shield LEDx2 and Shield EDUx4IO. They are all in PDF format and are available at the following links: Tinusaur Board 3 – Assembling Tinusaur Shield LEDx2 – Assembling Tinusaur Shield EDUx4IO – Assembling The collection of user guides is at tinusaur.org/guides. Our plans are, […]
The Hackaday Prize is the greatest hardware competition on the planet. It’s the Academy Awards of Open Hardware, and over the last few years we’ve been doing it, we’ve seen literally tens of projects that have gone from an idea to a prototype to a finished project to a saleable product. 2,275 more words
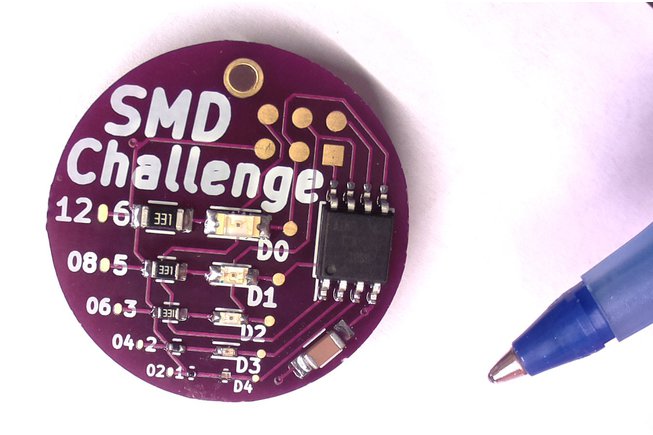
Who will show the best soldering skills at the Hackaday Superconference next week? We have a little — in fact, a very little — challenge for you: solder surface mount components down to a tiny 0201 package.
2018.03.18 : BML project for using a $2 FTDI FT260Q for adding 14 bits of GPIO to any PC via USB with no device drivers required. Ever miss the simple days of using a PC’s LPT1 parallel port to bit-bang GPIO over 8 output pins and 4 input pins of the DB-25 connector? I sure […]
The upper left corner of the Hackaday Belgrade 2018 badge is a series of standard 0.1″ pitch electric connection pins that serves as a portal to the world of hardware hacking projects. When the onboard peripherals aren’t enough, external accessories connect here. There’s also a less exotic use – the five pins on the left […]