We’re on the lookout for the most interesting connected projects, things that communicate wirelessly to do something clever. Show us your creations and you can win!
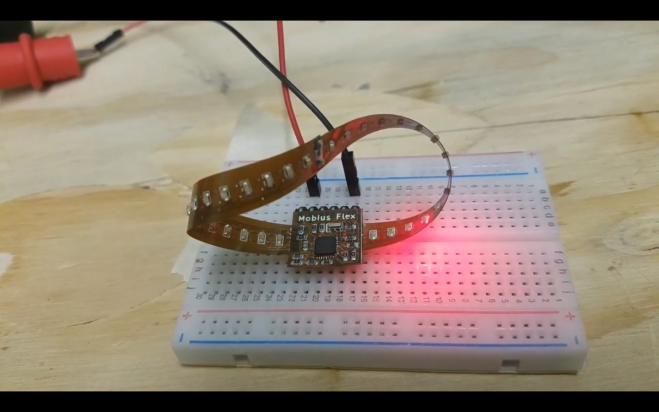
Back in March, the call went out: take your wiggliest, floppiest, most dimensionally compliant idea, and show us how it would be better if only you could design it around a flexible PCB. We weren’t even looking for a prototype; all we needed was an idea with perhaps a sketch, even one jotted on the…
We loveed seeing this lamp bot hop around during Bring-A-Hack back in May. Thanks to Roger Cheng for writing about it on Hackaday:
Reinforcement learning is a subset of machine learning where the machine is scored on their performance (“evaluation function”). Over the course of a training session, behavior that improved final score is positively reinforced gradually building towards an optimal solution. [Dheera Venkatraman] thought it would be fun to use reinforcement learning for making a little robot lamp move. But before that can happen, he had to build the hardware and prove its basic functionality with a manual test script.
Inspired by the hopping logo of Pixar Animation Studios, this particular form of locomotion has a few counterparts in the natural world. But hoppers of the natural world don’t take the shape of a Luxo lamp, making this project an interesting challenge. [Dheera] published all of his OpenSCAD files for this 3D-printed lamp so others could join in the fun. Inside the lamp head is a LED ring to illuminate where we expect a light bulb, while also leaving room in the center for a camera. Mechanical articulation servos are driven by a PCA9685 I2C PWM driver board, and he has written and released codeto interface such boards with Robot Operating System (ROS) orchestrating our lamp’s features. This completes the underlying hardware components and associated software foundations for this robot lamp.
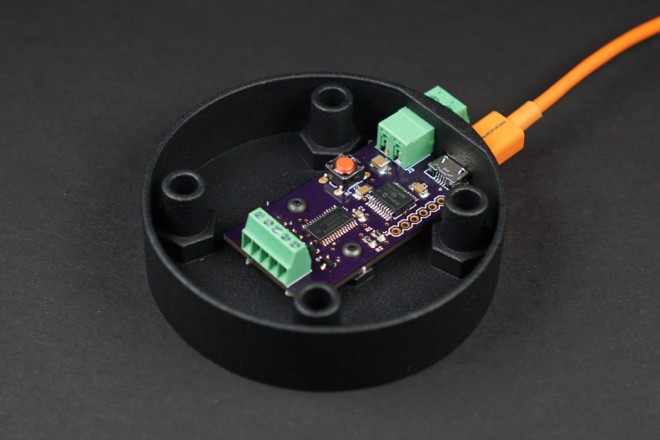
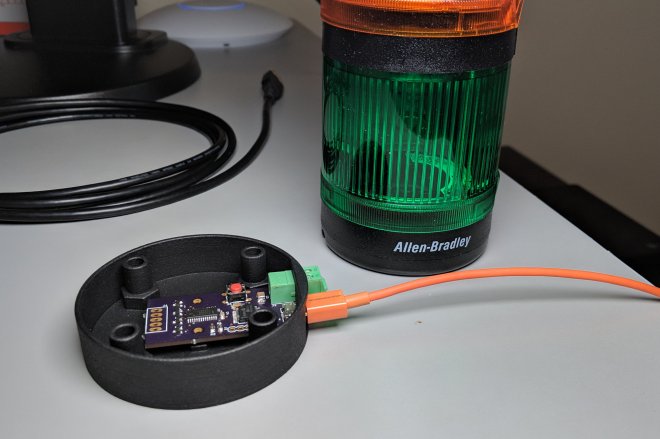
After using the PIC16F1459 to build numerous USB HID input devices including a giant keyboard, a tiny keyboard, and a big red button, it was time to see if the PIC16F1459 could be used to control outputs too. Sticking with the industrial theme, I chose to build a USB controller for a, um, stack of industrial stack lights.
Industrial stack lights are usually used to indicate the status of machines on production lines. Green could indicate all is functioning normally, yellow could mean the machine is running low on input material, and red could indicate the machine jammed and needs intervention.
For a simple, quick project such as this one, one does not want to have to write a custom USB driver for a Mac, PC, or Linux box. The best way to avoid writing a custom driver is to use an existing USB device class that lends itself to controlling custom hardware. The USB Human Interface Device (HID) and USB Communication Device Class (CDC) device classes both support controlling custom hardware.
KiCad is the electronic design automation software that lives at the intersection of electronic design and open source software. It’s seen a huge push in development over the last few years which has grown the suite into a mountain of powerful tools. To help better navigate that mountain, the first ever KiCad conference, KiCon, is happening next week in Chicago and Hackaday is hosting one of the afterparties.
The two days of talks take place on April 26th and 27th covering a multitude of topics. KiCad’s project leader, Wayne Stambaugh, will discuss the state of the development effort. You’ll find talks on best practices for using the software as an individual and as a team, how to avoid common mistakes, and when you should actually try to use the auto-router. You can learn about automating your design process with programs that generate footprints, by connecting it through git, and through alternate user interfaces. KiCad has 3D modeling to make sure your boards will fit their intended enclosures and talks will cover generating models in FreeCAD and rendering designs in both Fusion360 and Blender. Dust off your dark arts with RF and microwave design tips as well as simulating KiCad circuits in SPICE. If you can do it in KiCad, you’ll learn about it at KiCon.
Of course there’s a ton of fun to be had as interesting hackers from all over the world come together in the Windy City. Hackaday’s own Anool Mahidharia and Kerry Scharfglass will be presenting talks, and Mike Szczys will be in the audience. We anticipate an excellent “lobby con” where the conversations away from the stages are as interesting as the formal talks. And of course there are afterparties!
Friday 4/26 Pumping Station: One, the popular Chicago hackerspace now celebrating its 10 year anniversary, is hosting an afterparty (details TBA)
Saturday 4/27: Hackaday is hosting an after party at Jefferson Tap from 6-8:30. We’re providing beverages and light food for all who attended the conference.
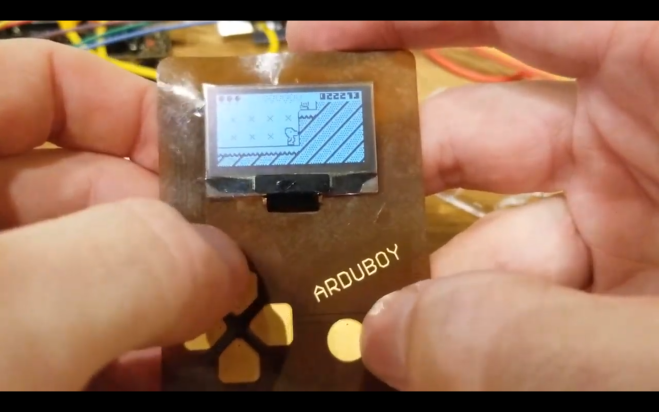
The Arduboy is a fantastic 8-bit game handheld video game platform built around a Microchip ATmega32U4 micro-controller. It’s open source, and there is a bunch of documentation that will help you build your own games. Since it crowdfunded itself into the retro-gaming scene back in 2015, it has become a staple of the community — and we’ve seen some impressive hacks.
A flexible Arduboy, the “Arduflexboy.” (📷: Kevin Bates)
While flexible PCBs have been around for a while, it’s only in the last few months that they’ve become readily available to the maker community with OSH Park introducing them as an option at the tail end of last year.
Bates made use of the OSH Park new flex service, and hiding all the Arduboy components behind the LCD screen, produced a flexible version that’s paper thin. Even the ‘bump’ of the screen is still only 2.5mm thick.