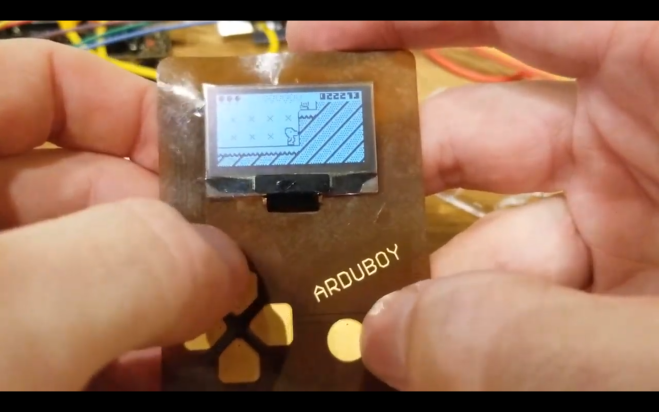
The Arduboy is a fantastic 8-bit game handheld video game platform built around a Microchip ATmega32U4 micro-controller. It’s open source, and there is a bunch of documentation that will help you build your own games. Since it crowdfunded itself into the retro-gaming scene back in 2015, it has become a staple of the community — and we’ve seen some impressive hacks.
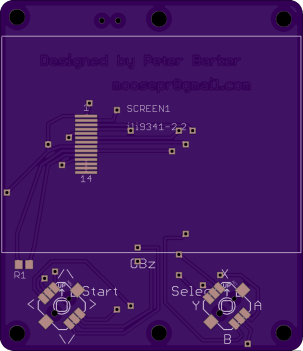
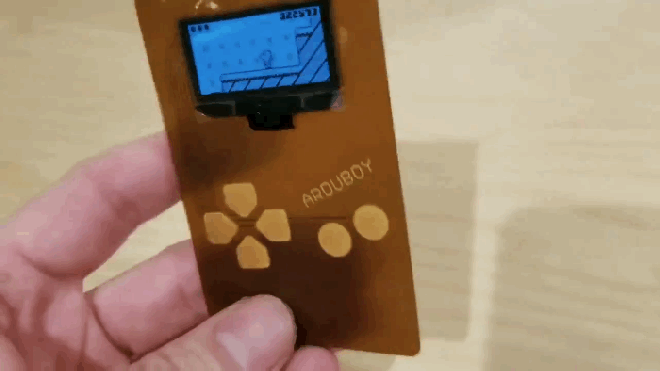
A flexible Arduboy, the “Arduflexboy.” (📷: Kevin Bates)
While flexible PCBs have been around for a while, it’s only in the last few months that they’ve become readily available to the maker community with OSH Park introducing them as an option at the tail end of last year.
Bates made use of the OSH Park new flex service, and hiding all the Arduboy components behind the LCD screen, produced a flexible version that’s paper thin. Even the ‘bump’ of the screen is still only 2.5mm thick.
A Python-based micro game console, optimized for game development workshops.
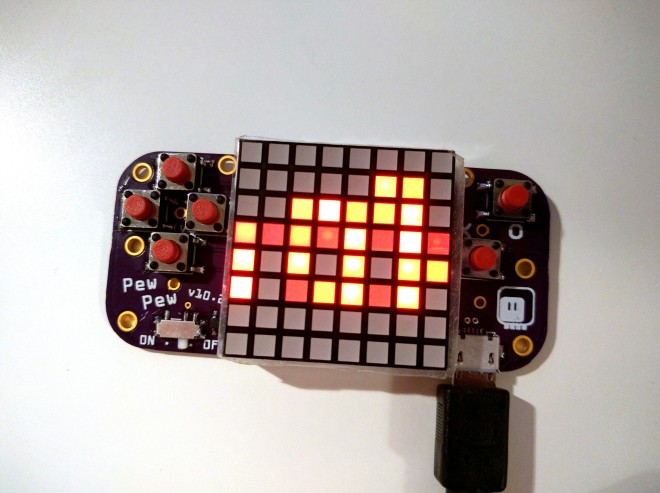
I really like the #PewPew FeatherWing as a platform for teaching game development, but the cost of Feather boards needed to use it makes it difficult to organize workshops for larger groups of people. I have previously tried to work around that problem by merging the FeatherWing with the schematic stolen from a Trinket M0 (with an additional flash memory), but the resulting design was complex, difficult to make and still a bit expensive. Now after having designed a few more CircuitPython boards I think I can really cut the costs and make a standalone device with all the functionality of the original shield, but optimized for workshops.
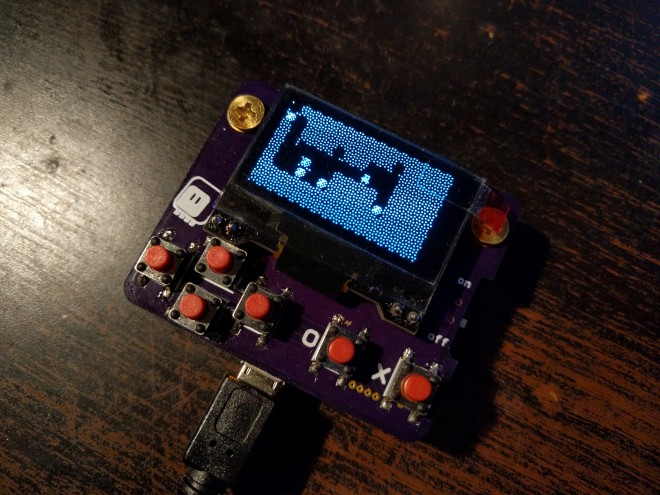
The Micro:bit is a pretty decent platform for teaching kids to program, but you can’t really make arcade-style games for it. You only have two buttons and a 5×5 display. Perhaps enough for a very small snake game, but that’s pretty much it. That’s why I started working on #PewPew FeatherWing as an alternative platform, but at some point I started wondering if it’s really impossible to do it on the micro:bit.
When the most recent version of micropython got the ability to use any pins for I2C, I realized that I can finally connect a display easily. I could use a HT16K33 and a 8×8 LED matrix like on the PewPew, but I decided to try something else — a monochrome OLED display, similar to the one used on many Arduino-based game consoles.
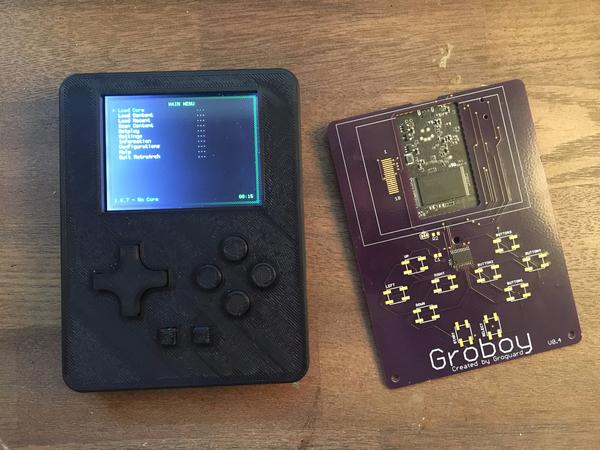
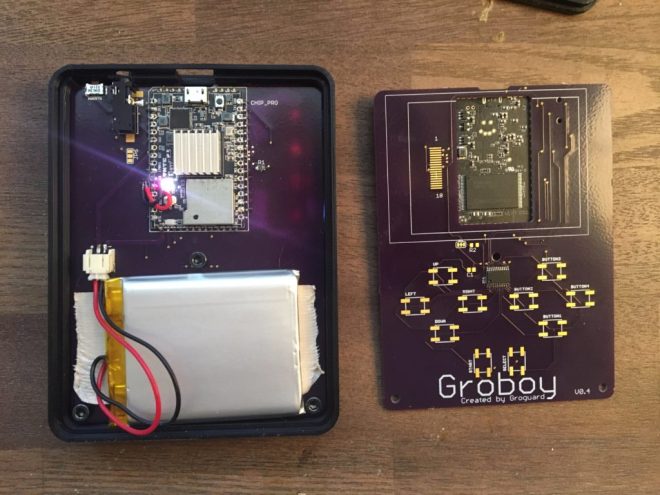
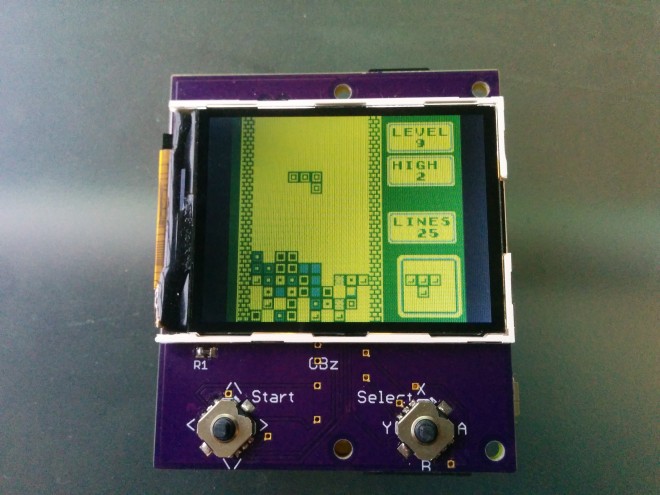
Groboy, created by Groguard, is a C.H.I.P. Pro-powered handheld system designed to run retro console emulators and games on the go.
It’s also a testament to the open source community, readily available data sheets and manufacturing houses, and the tenacity to teach yourself engineering. Groguard, like many of us, is self-taught and pursuing his passion for making through custom projects.
After 4 revisions of the board, Groguard had the design where he wanted it. The custom OSH Park PCB at the heart of Groboy routes signal lines from the 2.8″ TFT display, headphones jack, internal 2500mAh LiPo battery (he estimates 3-5 hours of battery life, though he’s not rigorously tested it), and the PCA9555 I2C GPIO expander, which manages inputs from the 11 onboard buttons, to the respective input and output pins on C.H.I.P. Pro.
A very fun Internet of things project to control the custom RGB led over the internet from a web-browser or enjoy a nice sound reactive experience. Perfect for a smart home setup as you can easily connect this to any IoT platform or smart home software
Shortcuts:
0:45 – zPulse intro
1:00 – Designing the board in EagleCad
7:45 – Sending the board to a manufactured to get fabricated
 GameBoy Zero, but smaller!