Obsidian Boa: Greg Davill squeezes the ESP32 into a ItsyBitsy

Tom Fleet writes on Hackster about the latest open source board from the prolific Greg Davill:

image_AA1rCHSTD2

Meet Obsidian Boa: This ItsyBitsy — with WiFi — Is What It’s All About!

No, we’re not branching out into nursery rhymes, but it’s too hard to pass up on the chance offered by the latest development from Hackster favorite Greg Davill!

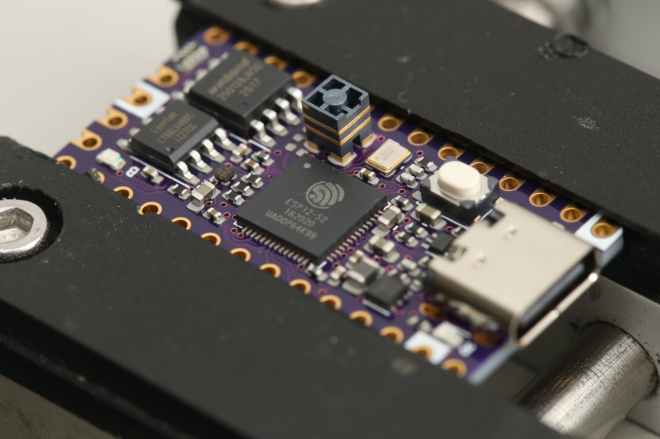
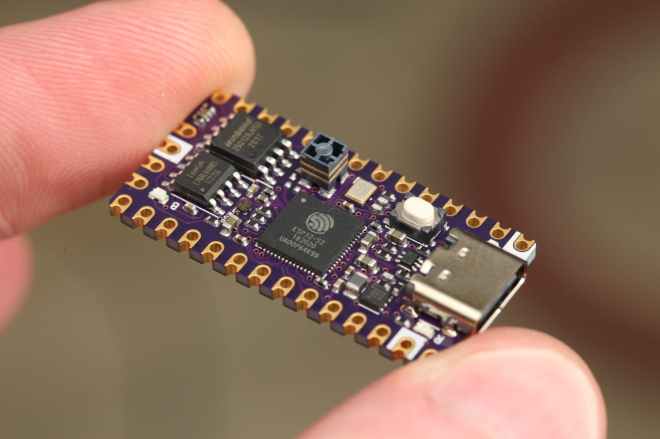
With the dust in his workshop only just settling (if that’s possible there…) from his successful OrangeCrab crowdfunding campaign, he’s gotten straight back to work, turning his sights from the Lattice ECP5, and setting them squarely on the Espressif Systems ESP32, with his latest creation — the ObsidianBoa!

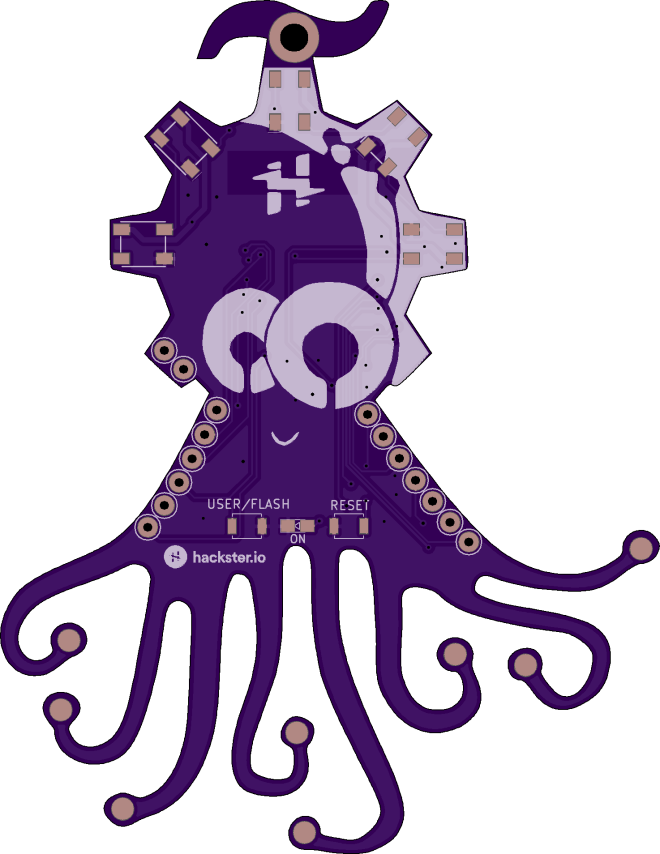
While the above image is a render, the quality of Davill’s work shines through in both the the physical and the virtual world — some of his recent rendering work is hard to tell from reality.

image_hwhyR3mzg6

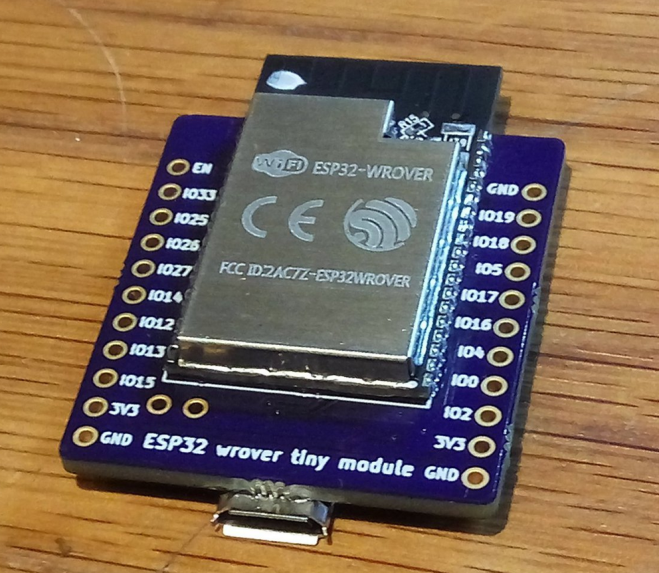
While there are a number of ESP32 development boards, there are few in such a diminutive form factor. The only one I know of, until now, has been the TinyPICO, from @unexpectedmaker. This is a fantastic board in it’s own right, and has been rightfully successful within the maker community.

Obsidian Boa has a few notable differences however, which might make it more suitable for certain applications.

The first point of note is where we get the title of this article from. Not just a descriptive phrasing, ItsyBitsy is a lesser-heard-of form factor — and just as we all know boards in the Arduino R3 layout, or the hugely popular Feather form factor from Adafruit, ItsyBitsy started out life as yet another Adafruit board format, and was shortly thereafter realized as a baby brother alternative to the well known iCEBreaker FPGA boards.

image_3w3adIdgXw

Obsidian Boa: Greg Davill squeezes the ESP32 into a ItsyBitsy

OSHWi Octopus Badge by Gustavo Reynaga

Alex Glow of Hackster.io takes a look at the OSHWi octopus badge designed by Gustavo Reynaga:

Screenshot from 2017-12-23 09-39-22.png

The design files and source code are available on GitHub:

hulkco/oshwi_2017

GReynaga has shared the board on OSH Park:

001_Hackster_Rev1.kicad_pcb

Oshwi Badge HACKSTER Version Rev 1


3eb6bc329e2a6b344b29db05cb1c8f17

Order from OSH Park

OSHWi Octopus Badge by Gustavo Reynaga

Tiny ESP32 WROVER pSRAM board

Tiny ESP32 board from the store on Tindie with optional battery header and pSRAM:

Screenshot from 2017-11-15 00-17-12.png

Tiny ESP32 WROVER pSRAM board

It’s a little ESP32 Board. Perfect for controlling or sensing stuff in the real world and sync it to the internet! Despite that it features the ESP32 WROVER Module. This means it got 4MB FLASH and 4MB RAM. That’s an absolute incredible amount of RAM. I honestly have no clue for what I will ever need 4MB in my embedded Projects.

Screenshot from 2017-11-15 00-25-49

Why did you make it?

I wanted a small ESP32 Board with the pSRAM and which works and doesn’t eat your whole time to get it working and find it’s issues and quirks.

I’ve used the CP2102 Serial converter because this is the one, which works the best way to program the ESP32. Even Espressif uses this serial converter on their own dev boards.

2017-11-14T20:11:04.072Z-IMG_20171114_204145

What makes it special?

It’s propably the smallest ESP32 Board with pSRAM. Despite the size it’s ideal for battery operation. It uses under 200uA in Deep Sleep mode!

2017-11-14T21:18:21.815Z-IMG_20171114_221457

Tiny ESP32 WROVER pSRAM board

LAMEBOY: another ESP12 handheld

davedarko designed this portable ESP12 project with battery charging and power muxing:
3908671505908224547 (1)

LAMEBOY – another ESP12 handheld

Ever since Nokia 3310 / 5110 display board I’ve wanted to slap on an ESP module and some buttons to make a nice little portable handheld. Now with some googling and checking out other projects how they get their stuff done and a bit time on hand while on vacation I’m using every spare minute to work on this PCB. There are some minor things I’m not sure about that need testing, but the general concept is clear. 
LAMEBOY: another ESP12 handheld

Help gamaral’s Cancer Treatment

If you’ve enjoyed Guillermo Amaral’s electronics projects such as the Canon DSLR WiFi RemoteRaspberry Pi PSUUARTMatic 3000+, Keypad Submodule and many more, then please consider giving to his cancer treatment fund:

Gamaral’s Cancer Treatment

I’ve unfortunately had to flip the bill for my two past surgeries and my on going cancer treatment… and as you can imagine, I’m running out of cash.

If you like my content and/or have found my published projects interesting or useful, please consider sending me some spare change and I’ll be ever so grateful.

Here are couple great project videos by Guillermo on YouTube:

Help gamaral’s Cancer Treatment

Wemos D1 Mini Breakout for an ST7735 Display

Radomir Dopieralski has created this breakout board to make it easier to slap a popular ST7735 module on top of a Wemos D1 Mini:

8571081501668647022.jpg

D1 Mini Breakout for an ST7735 Display

There is a number of options you have for display shields for the D1 Mini: there is the nice OLED shield, there is a shield with a single WS1228B neopixel, there is the #D1 Mini Matrix Shield I’m still working on. But there is no high-resolution color display you could just slap on it. This “shield” doesn’t really deserve the name, it’s just a simple breakout board that connects the ST7735 display module with the SPI pins of the D1 Mini, and adds a trim pot for brightness control.

4514121484133413329.png

To save some pins, the CS pin is hardwired to GND, and the A0 pin is connected to MISO. That means you can’t connect other SPI devices while this is in, but that’s a rare enough case for me to care. It uses four GPIOs total, from GPIO12 to GPIO15. The backlight is connected to the 5V supply (to not strain the on-board 3V3 regulator) through a trim pot, so you can adjust brightness.

I used alternating holes for the module’s header, so that with some luck you should be able to plug in the module directly, without soldering a female pin header there — that should also save some space.

Wemos D1 Mini Breakout for an ST7735 Display

Asset Tracker

Kris Winer designed this is a small 4-layer PCB for remote logging of absolute position and orientation:

3029441499292022189.jpg

Asset Tracker

STM32L433-based board with CAM M8Q concurrent GNSS, EM7180 + MPU9250 + MS5637 for absolute orientation, and an ESP8285 for wifi connectivity.

The absolute orientation engine uses the MPU9250 accel/gyro/magnetometer IMU sensor plus the MS5637 barometer as slaves to an EM7180 motion co-processor that sends quaternions and drift-stabilized altitude to the host via I2C.

PeskyProducts has shared the board on OSH Park:

AssetTracker.v02c

a12067ff0680dc9f13a9933a8bb07507

Order from OSH Park

Asset Tracker

Wireless Terminal Over ESP8266

From debug messages to the fundamental ‘hello world’, serial communication does it all over three little wires. Now imagine being able to cut the cord to your next microcontroller project and use your phone as a VT100 terminal. This was the premise of [Ondřej Hruška]’s Wireless Terminal Project where he took an ESP8266 and added an in-browser terminal emulator which can be accessed…

via Wireless Terminal Over ESP8266 — Hackaday

assembled-on-bb.jpg

Wireless Terminal Over ESP8266

Hackaday Prize Entry: WiFi ePaper

[Frank Buss] designed an electronic version of a sticky note: a WiFi enabled, solar-powered ePaper, with magnets embedded in the casing. It’s based on the new ESP32, and the idea is that you can update it via your smart-phone or over the internet via a cloud app to show any message you want. Being an…

via Hackaday Prize Entry: WiFi ePaper — Hackaday

Hackaday Prize Entry: WiFi ePaper

ESP8266 Pogo Jig Programming Board

We like the novel orientation of pogo pins that Wing Tang Wong used in this board design:

screenshot-from-2017-02-28-12-59-47

ESP8266 Pogo Jig Programming Board

Upcycles D1 Mini Wemos board to create a USB connected ESP8266 Pogo pin jig

2034481488075526204.JPG

This is a board designed to take a WeMos D1 Mini board(with the ESP module removed) and use it as a USB interface with built-in reset/flash functionality for bare ESP8266 modules similar to the ESP-12 units.

The design files are available on GitHub:

github ESP8266 Programming D1 Mini Pogo Jig V1

ESP8266 Pogo Jig Programming Board