User [mircemk] presents his “MiliOhm Meter” project which you can build with an Arduino, a handful of common parts from your lab, and a cigar box. It doesn’t get much simpler than this, folks. While this is something you won’t be getting calibrated with NIST traceability, it looks like a fun and quick project that’s more than suited for hobbyist measurements. It’s not only easy to build, the Arduino sketch is less than thirty lines of code. This is a great learning project, plus you get something useful for your lab when its finished.
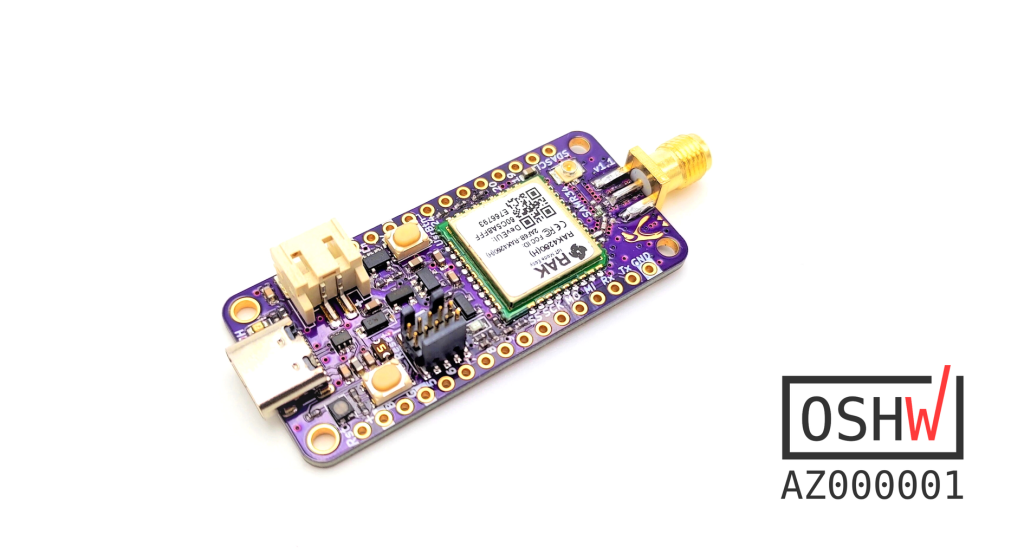
This is a SAMR34 based LoRa/LoRaWAN™ dev-board with all the necessary components for fast prototyping. It’s a successor of my previous Penguino SAMR34 design. The new design uses the RAK4260 module from @RAKWireless and improves on some aspects, such as a USB Type-C, a RGB LED, a user button, battery protection & voltage supervision, and optional flash & per-provisioned secure element IC pads.
Current HW version is v.1.2 and it’s offered in green soldermask (ENIG). All the design files can be found on my GitHub.
From v.1.2 onward the Penguino board also features CH340E USB-to-UART converter to further ease the development.
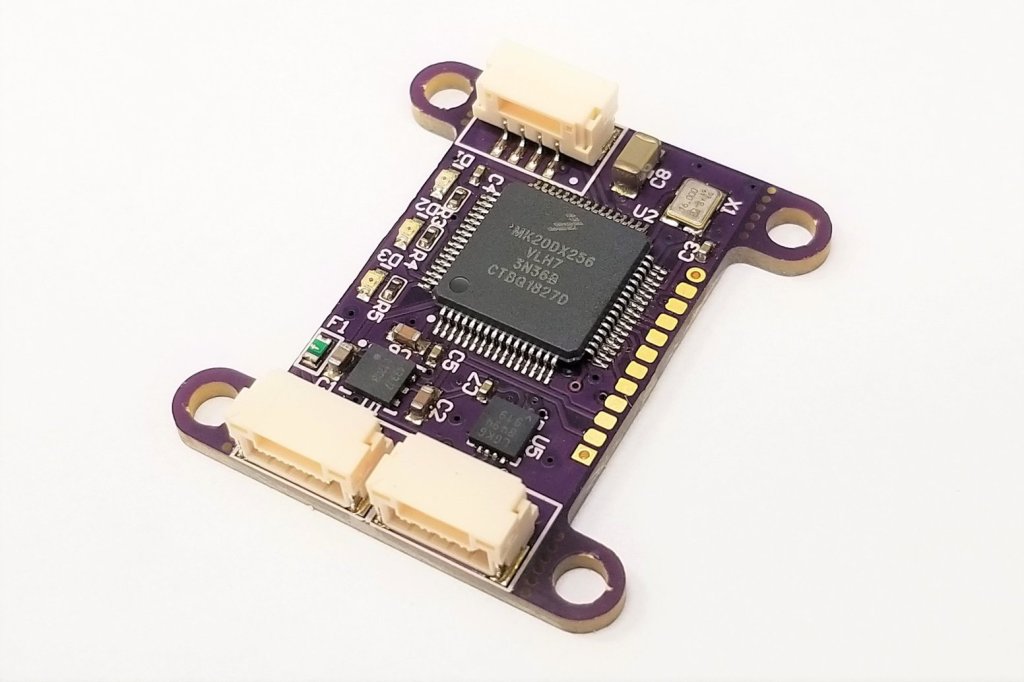
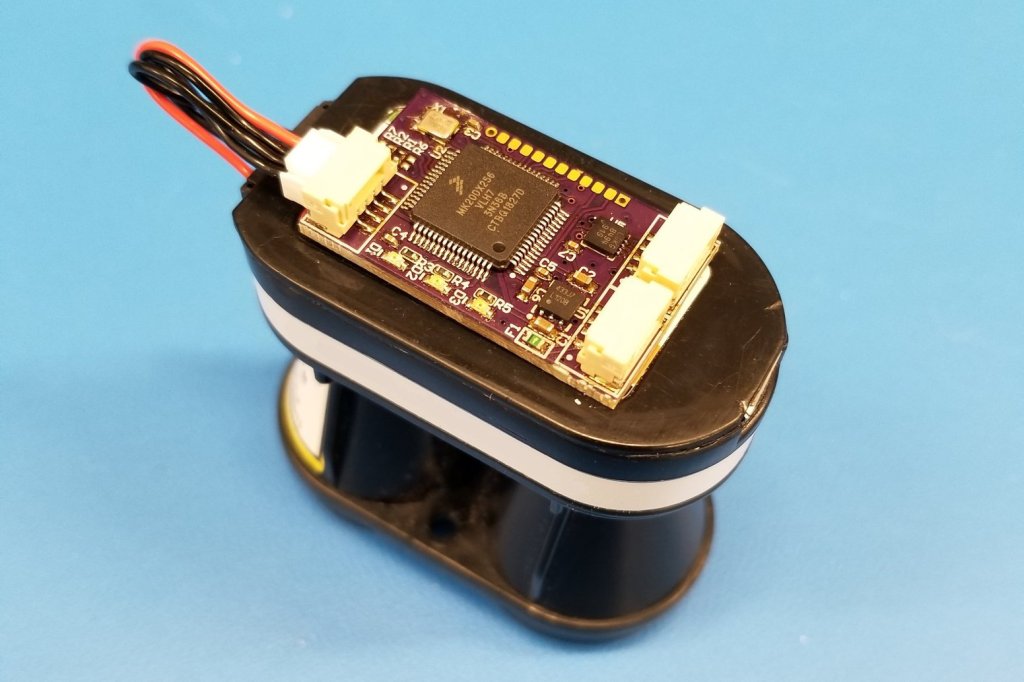
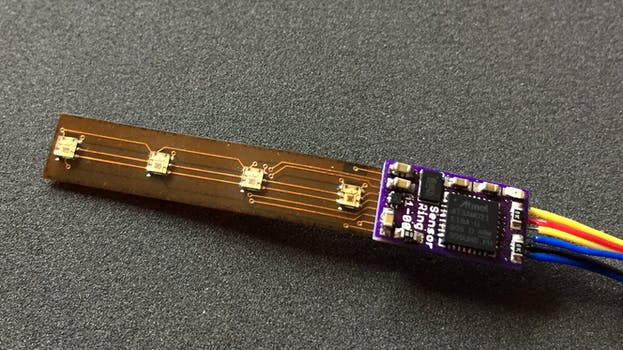
Laser range finders can be useful on UAV as altimeters and can make autonomous landings easier to perform. However adding a laser range finder to your UAV can be a little tricky. You might want the laser to be positioned far away from your flight controller, meaning you don’t want to use I2C, and you might not have a serial port to spare. This interface board uses the robust CAN bus using to connect a range of popular Lightware lasers to the common Pixhawk autopilots and others.
The laser altimeter is utilising UAVCAN which is an opensource, MIT licensed, lightweight protocol designed for resilient intra-vehicular communications. The CAN bus can also be used to re-flash the firmware meaning if you change out your laser model you can still use this board. Supplied preconfigured for a laser of your choosing, this adaptor board is compact, lightweight and has numerous screw mounts designed to be easily removed if space is short and you want to mount it directly with double sided tape.
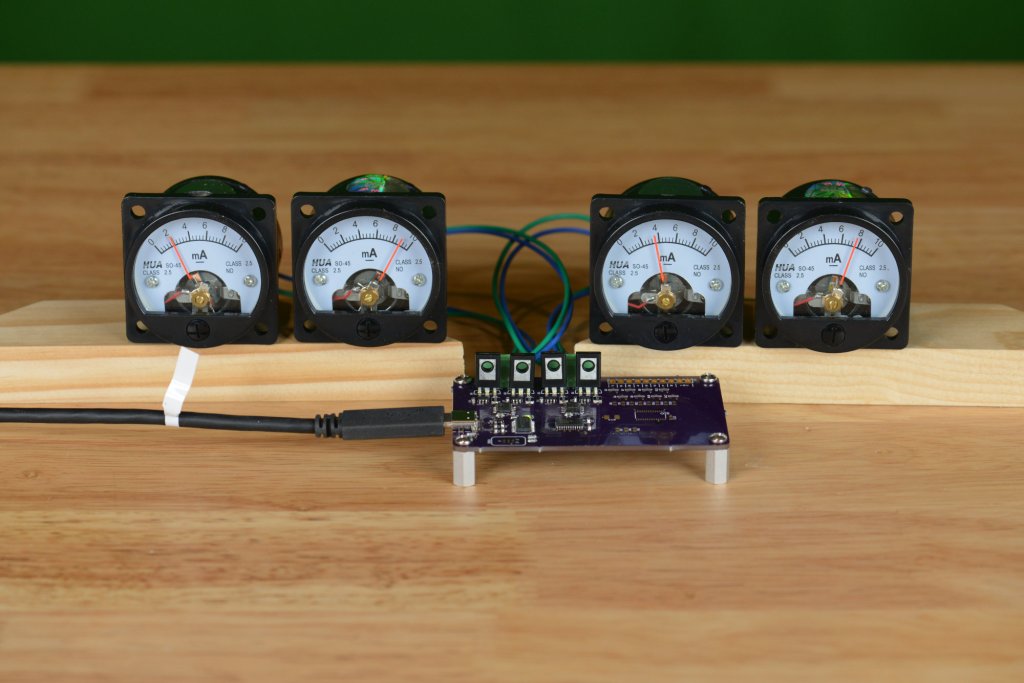
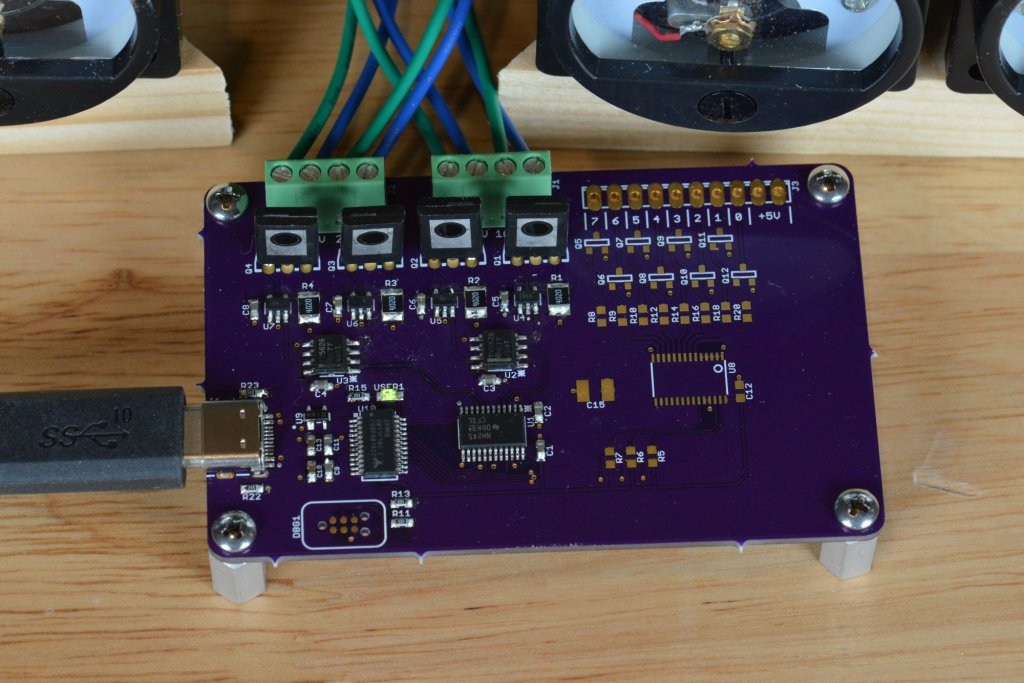
I’ve always liked the way these little HUA SO-45 analog panel meters looked, but, given the long lead times from China, I’ve never ordered a set. This fall, I changed my mind and finally decided to order a set. While they were in transit to the United States, I designed a small board to control them over USB using a Silicon Labs EFM8UB1 Universal Bee 8051-baeed microcontroller.
Here's a complete write up of my USB-controlled analog panel meters project! Four 10mA analog panel meters all under USB control using a vendor-defined USB HID class. Features @oshpark boards, the @siliconlabs EFM8UB1, and @TXInstruments DACs & opamps. https://t.co/sgvIcWvTr9
Today we are excited to announce the launch of a read/write API for our Open Source Hardware Certification program. This API will make it easier to apply for certification directly from where you already document your hardware, as well as empower research, visualizations, and explorations of currently certified hardware.
OSHWA’s Open Source Hardware Certification program has long been an easy way for creators and users alike to identify hardware that complies with the community definition of open source hardware. Since its creation in 2016, this free program has certified hardware from over 45 countries on every continent except Antarctica. Whenever you see the certification logo on hardware:
Joey Castillo is one of those makers that not only seems to have a myriad projects continuously on the go, but also seems to actually make significant progress on them, rather than getting overwhelmed from juggling them in the air — something I’ve been known to end up doing…
With a striking resume of work that includes the Open Book, the Hiking Log, and even the more somber Big Board of Death, he’s no stranger to the pages at Hackster.io!
Keeping in following with Castillo’s focus on projects that monitor health metrics, his latest work tracks that theme perfectly, but also scales down the size of the hardware to something intended to fit within the form factor of a ring!
When they were invented in the 1950s, Nixie tubes were a huge leap forward in display technology. In the days before affordable LEDs made seven-segment displays a commodity, there were few alternatives to the charming glow of the clear and legible characters inside Nixies. Sturdy and reliable, the cold-cathode displays found their way into everything from scientific instruments to test equipment, and even some of the earliest computers and the equipment that formed the foundation of the Space Race sported the venerable tubes.
But time marches on, and a display that requires high voltage and special driver circuits isn’t long for a world where LEDs are cheap and easy to design with. Nixies fell from favor through the late 1960s and 1970s, to the point where new tubes were only being made by the Russians, until that supply dried up as well. Rediscovered by hobbyists for use in quirky clocks and other displays, any stock left over from the Nixie’s heyday are quickly being snapped up, putting the tubes on the fast track to unobtainium status.
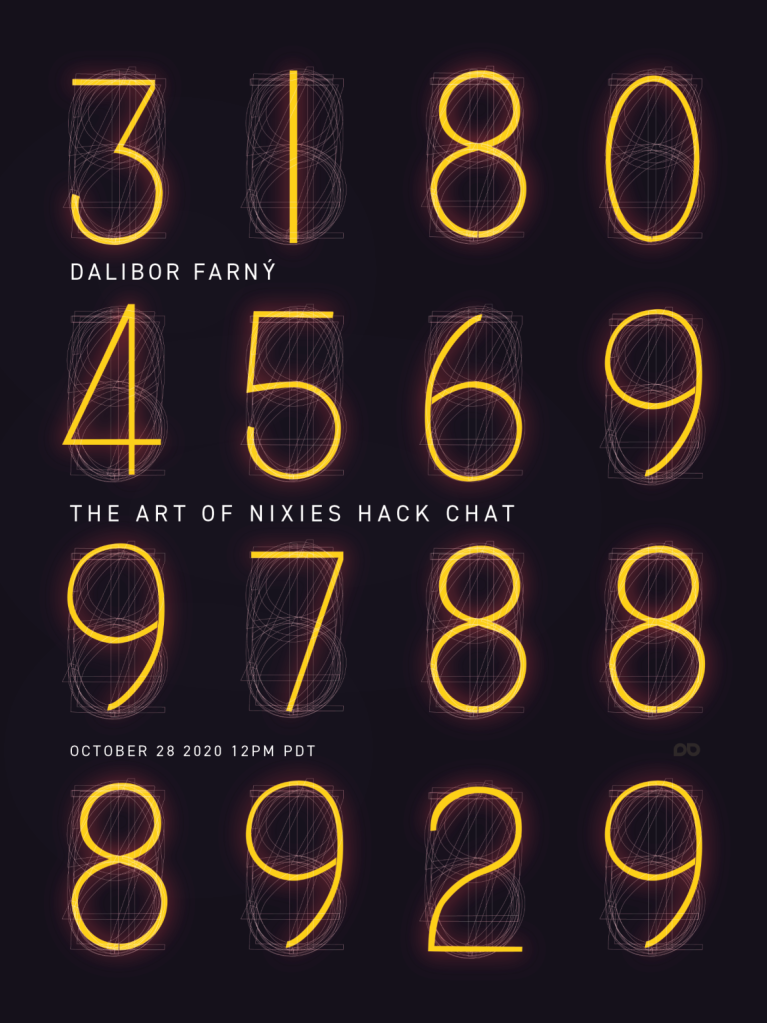
That’s not to say that you can’t get brand new Nixie tubes, of course. Artisanal manufacturers like Dalibor Farný have taken the Nixie to a whole new level, with big, beautiful tubes that are handcrafted from the best materials. Reviving the somewhat lost art of Nixie manufacturing wasn’t easy, but the tubes that Dalibor makes in a castle in the Czech Republic now find their way into cool clocks and other builds around the world. He’ll join us on the Hack Chat to dive into the art and science of Nixies, and what’s going on with his mysterious “Project H”.
Click that speech bubble to the right, and you’ll be taken directly to the Hack Chat group on Hackaday.io. You don’t have to wait until Wednesday; join whenever you want and you can see what the community is talking about.
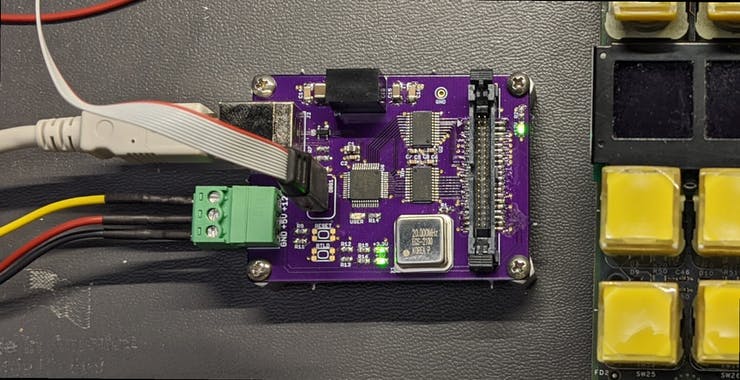
AWWWW YEAH! My little purple board from @oshpark can can now control everything on this Grass Valley Kalypso Aux Panel using an 8051-based @siliconlabs EFM8UB2. That's my board on the far right with the blinking green light and ribbon cable. Time to work on the software! pic.twitter.com/mGkPYDFxlG
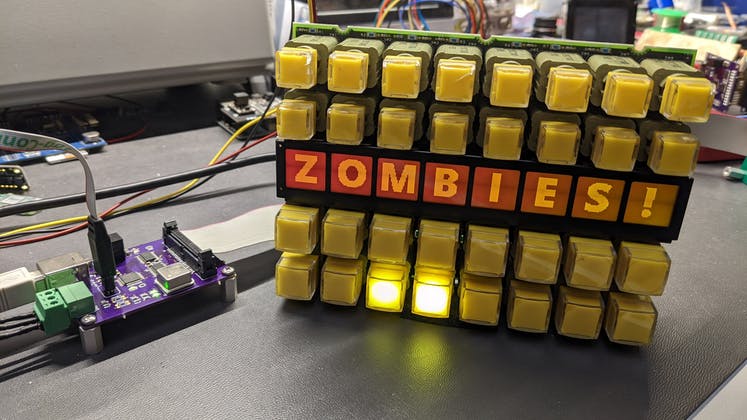
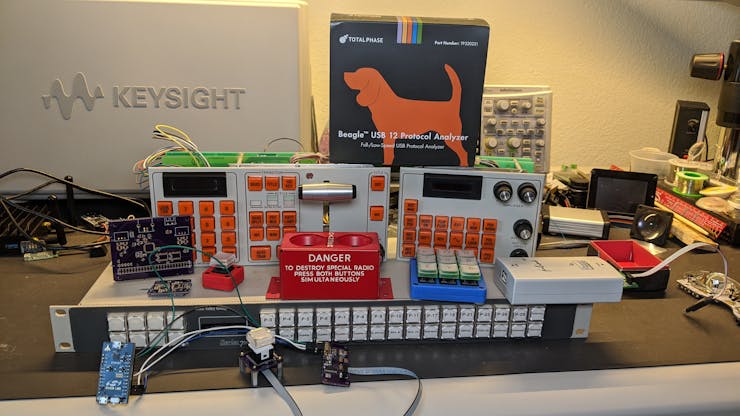
Sometimes you just need a single photo to know that the ensuing project is going to be worth keeping tabs on.
With Glen Akins on my Twitter feed, I’ve been treated to more than a few photos of some very interesting looking work in the area of creating custom, USB-HID control interfaces, and well… just look at the all the fun stuff waiting to go below!
When you know where to look, there are some glorious control interfaces to be found, full to the brim with high quality, and interesting format parts, like key switches that can be illuminated — or even featuring tiny integrated LCD displays.
There’s micro LED dot matrix displays, motorized linear potentiometers, and some panel manufacturers even share supplier chain links with The Empire — is that what looks like a prototype control panel for the Death Star main weapon pictured below…?
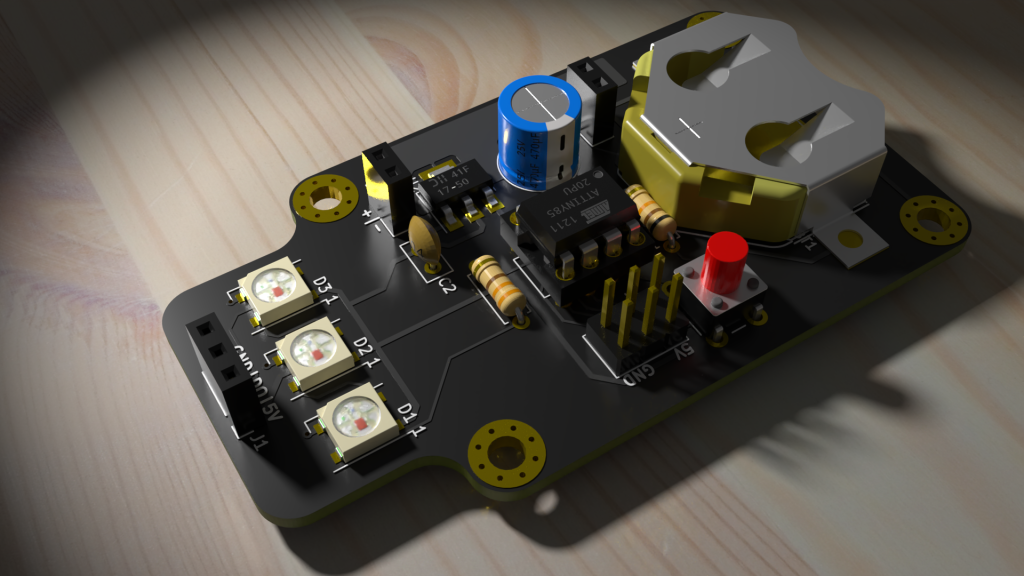
Those of us using KiCad for circuit board design know how useful the built-in 3D viewer and associated (rudimentary) renderer is. KiCad renderer is getting better, but if you want to get there fast, and want to create some amazing photorealistic renders of your PCB, then Blender’s the way to go. Blender can be intimidating to start with, so we’ll walk through a couple of simple steps to go from KiCad VRML export to photorealistic Blender renders.