Nick Pool has created an easy way to create silkscreen labels in EAGLE:
SparkFun Buzzard Label Generator
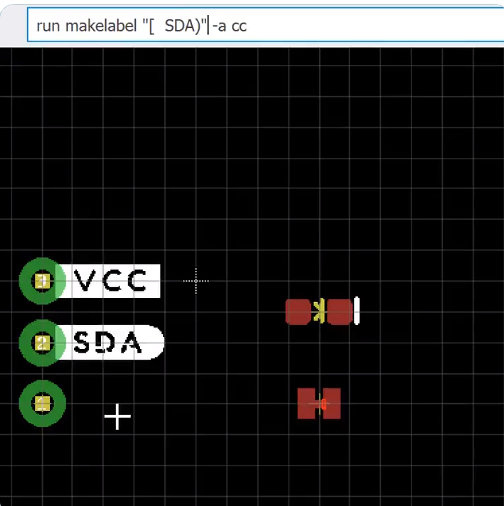
Greg Davill is now working on a version for KiCad:
Nick Pool has created an easy way to create silkscreen labels in EAGLE:
SparkFun Buzzard Label Generator
Greg Davill is now working on a version for KiCad:
From Zack Freedman of Fat Cat Labs:
Chips are tiny and phones are glass, so why are circuits still flat and green? The printed circuit board played a pivotal role in World War 2, and it’s barely changed since then. Nearly every modern device has at least one circuit board; they’re so ubiquitous, we just assume that electronics are flat rectangles. It wasn’t always that way – once upon a time, terrifying globs of exposed connections and miles-long webs of wrapped wires lurked behind the wood veneer.
See how the literal foundation of technology is made, learn about the modern features that enable powerful electronics, catch a glimpse of the advanced future, and most importantly, discover why, after 80 years of progress, we still put all our circuits on boards.
Great post by Shawn Hymel about routing differential pairs in KiCad:

How to Route Differential Pairs in KiCad (for USB)
Routing differential pair lines in PCB layout software can be a tricky process. Luckily, KiCad has a few tools to help us with the process. In this tutorial, we’ll walk you through the process of calculating the differential impedance and using that information to create a pair of USB data lines in a project.
Andrew Sink has a great video about the new DIY synth from Oskitone:
Oskitone POLY555 – 3D Printed 555 Timer Analog Synth!
Interested in 3D printing, circuit bending, or synthesizers? Check out the POLY555 by Oskitone, a synth that uses twenty 555 timers to create polyphonic music!
Find out more: POLY555 DIY Kit
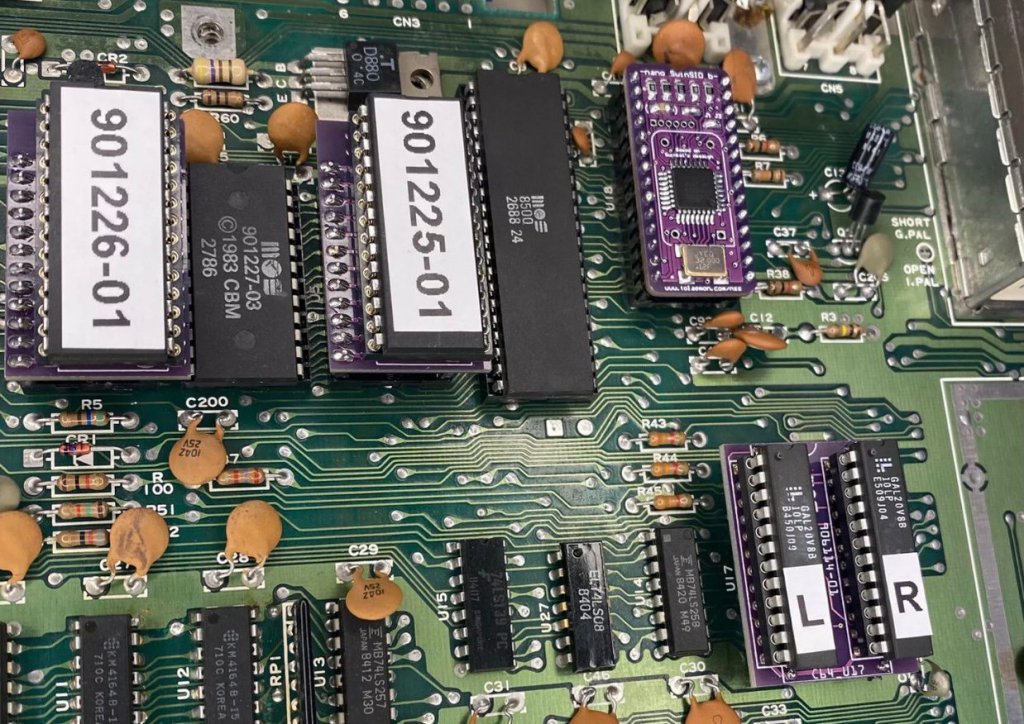
From Amethyst IND on Tindie:
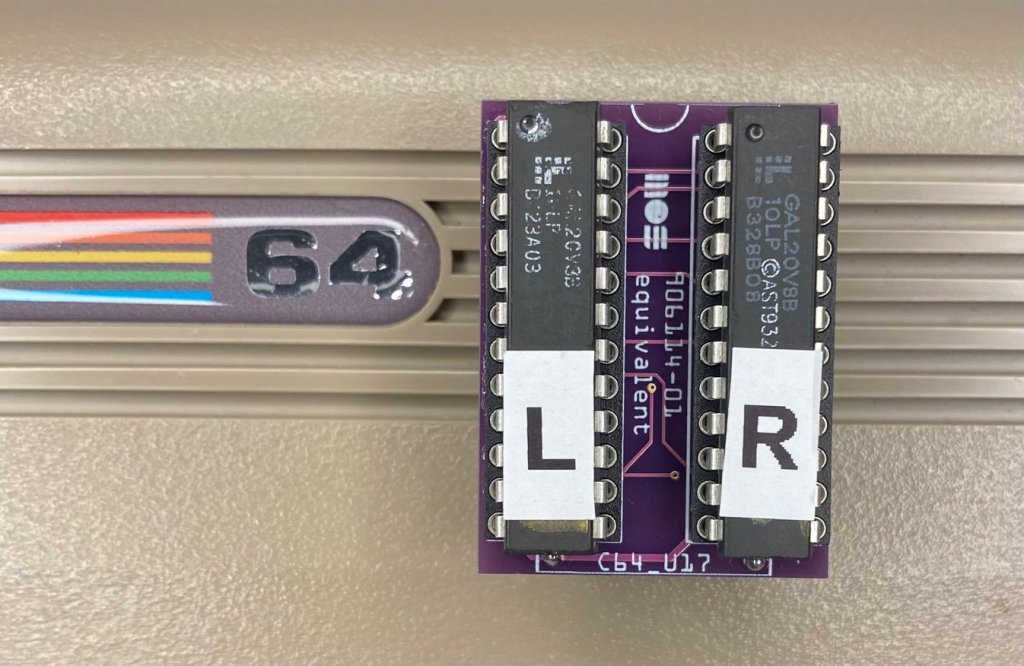
Commodore 64 GOLD PLA C64 Programmable Logic Array
This is a programmable logic array constructed using a Gold-Immersed PCB adapter, high quality round pin sockets, and two double GAL chips. This is a replacement for the known vintage defect device on the C64 (U17)
New project from Matt Mets of blinkinlabs.com:
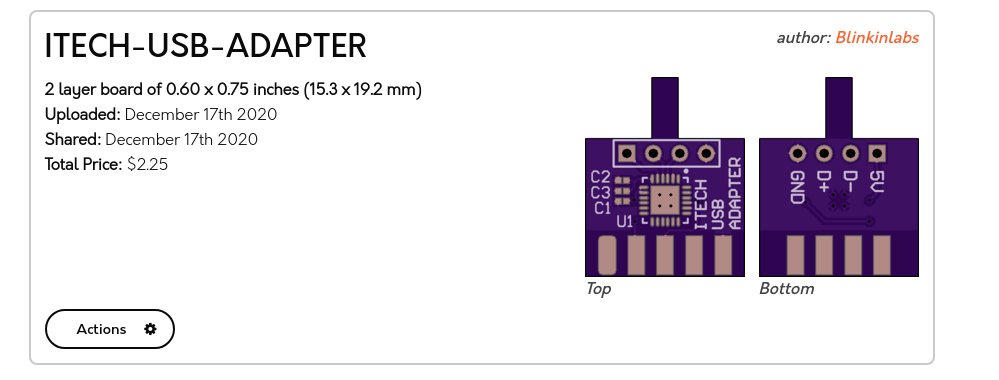
Some ITECH test equipment has a DSUB connector with a standard-breaking 5V TTL connector on it. This is a non-isolatd USB converter for this equipment, for interfacing to a PC.
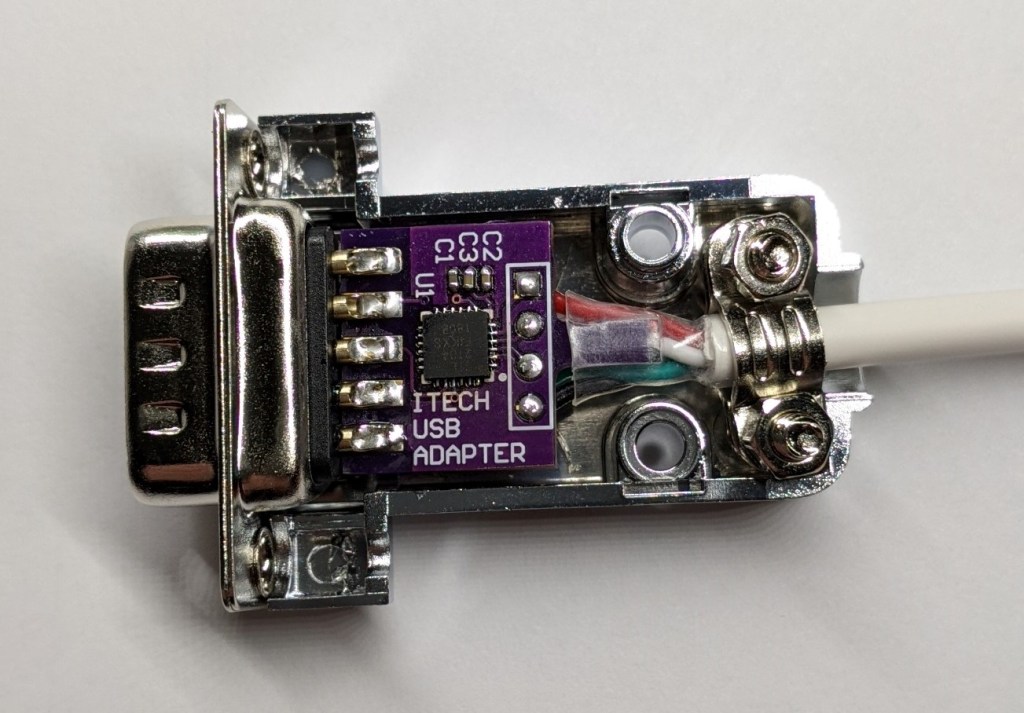
Shared project: ITECH-USB-ADAPTER
You can order the PCBs direct from the OSH park project, or use the gerbers and order from anywhere. You’ll need the parts listed in the BOM, substituting a USB ‘A’ cable for the 4-pin header. The PCB is designed to be sodlered directly to a NorComp 171-009-103L001 DSUB connector, and the whole thing will fit in a NorComp 977-009-020R121 shroud.

By pretty much any metric you care to use, 2020 has been an unforgettable year. Usually that would be a positive thing, but this time around it’s a bit more complicated. The global pandemic, unprecedented in modern times, impacted the way we work, learn, and gather. Some will look back on their time in lockdown as productive, if a bit lonely. Other’s have had their entire way of life uprooted, with no indication as to when or if things will ever return to normal. Whatever “normal” is at this point.
But even in the face of such adversity, there have been bright spots for our community. With traditional gatherings out of the question, many long-running tech conferences moved over to a virtual format that allowed a larger and more diverse array of presenters and attendees than would have been possible in the past. We also saw hackers and makers all over the planet devote their skills and tools to the production of personal protective equipment (PPE). In a turn of events few could have predicted, the 2020 COVID-19 pandemic helped demonstrate the validity of hyperlocal manufacturing in a way that’s never happened before.
For better or for worse, most of us will associate 2020 with COVID-19 for the rest of our lives. Really, how could we not? But over these last twelve months we’ve borne witness to plenty of stories that are just as deserving of a spot in our collective memories. As we approach the twilight hours of this most ponderous year, let’s take a look back at some of the most interesting themes that touched our little corner of the tech world this year.
Read more… 2020: As The Hardware World Turns — Hackaday
Open-source, drop in controller for the IKEA Bekant standing desk from Greg’s Tinker Town on Tindie:
Megadesk is an AVR based, open source, drop in controller for the IKEA Bekant standing desks.
The Bekant is a relatively inexpensive motorized standing desk. It doesn’t come with memory positions.
I wanted to have memory positions for easily switching between various work positions. I also didn’t want to be limited to just 2 positions. However, as I went through the process, I realized the hardest part was designing the enclosure. 3D Printing is a great option, but lacks that professional look, and limits the availability to those with printers. Additionally, getting custom membrane buttons that would look good was also extremely expensive. Simple push-buttons would take away from the look of the desk.
By targeting the factory enclosure, it keeps the original look and robustness, while adding functionality.

From Anool Mahidharia on the Hackaday blog:
Simple Christmas Tree Christmas Tree Ornament
When the only tool you have is a hammer, every problem looks like a nail. An LED ornament for the Christmas tree can be built in any manner of simple, easy implementations. You certainly don’t need an ARM Cortex M4 CPU running at 120MHz having a mouthful of three letter features like FPU, ETM, ETB, ECC, RWW, TCM, EIC, AES, CAN bus and much, much more. But [Martin Held] built a super simple LED Christmas tree ornament using the ATSAME51 series micro-controller, which he regularly works with and had on hand, and lots of bi-color LEDs. He already had schematic symbols and programmers for the device from other projects where he uses it more extensively, so putting it all together in time for the festive season was that much faster for him, despite the fact that the micro-controller was most likely the cheapest part of the BOM, besides the passives.
From James Lewis on the Hackster blog:

Bridge “Chip” Accesses the PCI-Express Bus on a Raspberry Pi 4
About a year ago, Tomasz Mloduchowski showed the world how to access the PCI-Express bus on a Raspberry Pi 4. By removing the PCI-Express to USB bridge chip, it is possible to connect external PCI-Express devices to a Pi. That hack was a bit of a wiring mess. Zak Kemble has taken the work a step further and created a replacement PCIe Bridge “Chip” to make the Pi’s PCI-Express mod more straightforward than before.
Kemble did not make an actual chip. Instead, it is a PCB with roughly the same dimensions as the Pi 4’s VL805 controller chip. After replacing the existing IC with this PCB, it patches the PCI-Express traces from the SoC to the USB 3 ports.
Out of the OSHPark envelope, the boards are not a perfect fit. The Bridge “Chip” needs a bit of sanding to fit the dimensions of the VL805. This step also exposes some of the copper for soldering the edge connections. (Kemble designed the board with this modification in mind.)
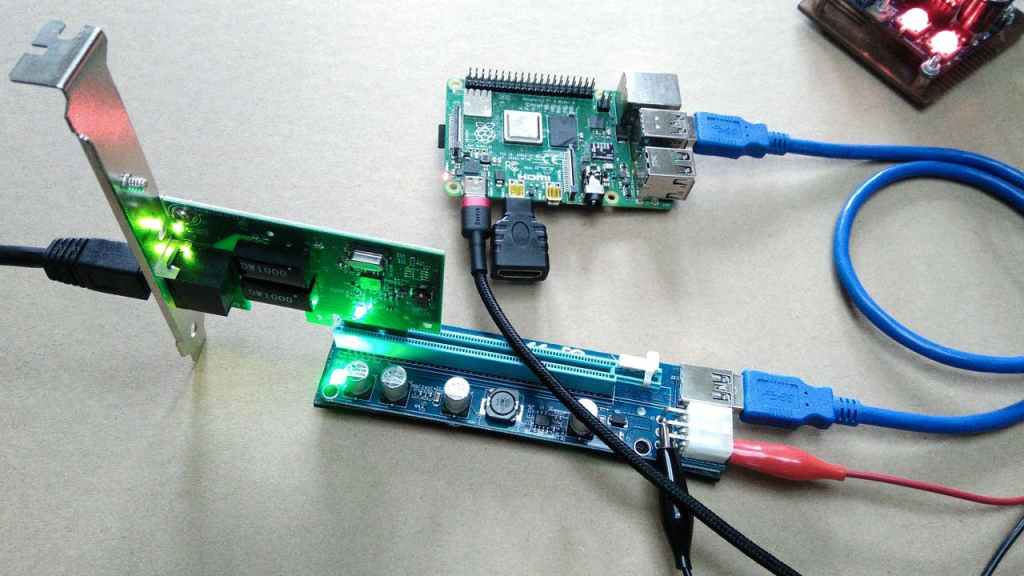
Once the Bridge “Chip” is in place, the Raspberry Pi’s USB 3.0 port is now carrying PCI-Express traffic. A PCIe expansion board kit is an ideal companion to this mod. They connect a x1 slot to a x16 riser card over a USB 3.0 cable. These cables easily carry up to 5 Gb/s traffic between the Pi 4’s USB 3.0 port and an external PCI-Express slot.
We should point out that once you modify a Raspberry Pi for PCI-Express access, you lose USB functionality. This loss is from removing the VL805 USB bridge chip. Ironically, one of the first external devices Kemble attached to his modified Pi was a VL805 based adapter. It is an excellent choice to make sure the link works since Raspbian has drivers for that chip.
Overall, this approach is a relatively easy way to get access to PCI-Express on an inexpensive consumer-grade device. If you’d like to convert your Raspberry Pi 4 to use external PCI-Express cards, check out the RPi4-PCIe-Bridge GitHub repo. There you can find pinout information on the VL085 and the EAGLE design files for the Bridge “Chip.”
