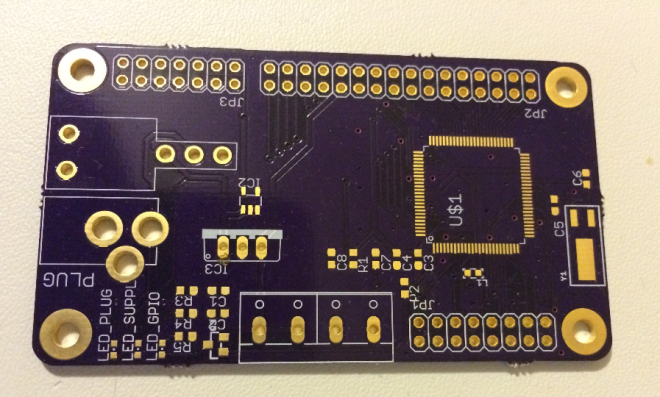
Paul Stoffregen has shared this Teensy audio shield:
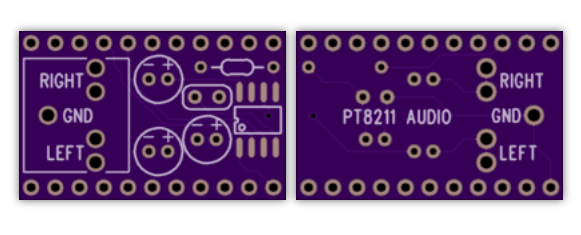
PT8211 Audio Shield for Teensy
PT8211 is an inexpensive 16 bit stereo DAC.
This small breakout board connects the PT8211 to Teensy 3.2, Teensy 3.5 or Teensy 3.6.
![]()
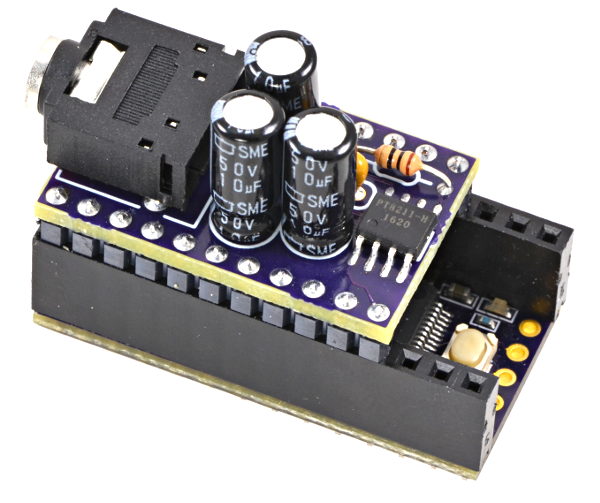
Paul Stoffregen has shared this Teensy audio shield:
PT8211 is an inexpensive 16 bit stereo DAC.
This small breakout board connects the PT8211 to Teensy 3.2, Teensy 3.5 or Teensy 3.6.
![]()
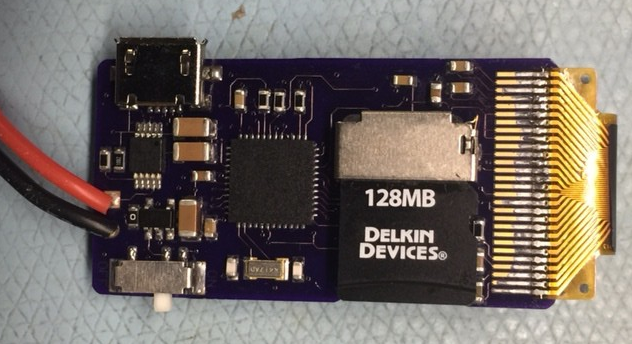
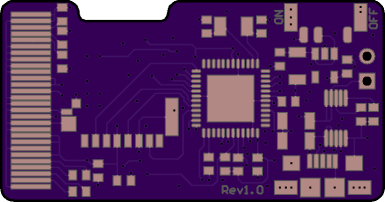
Kris Winer of Pesky Products designed these easy-to-program, high-performance and low-power dev boards:
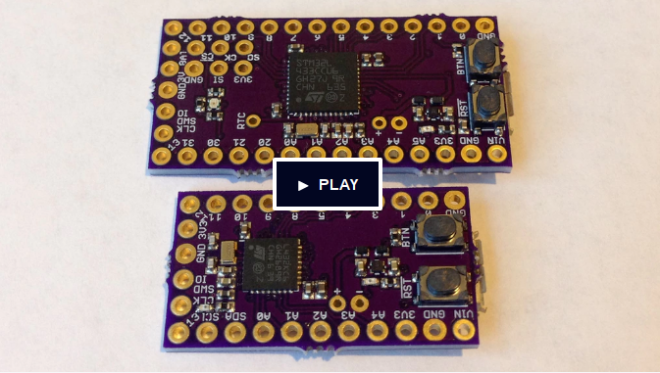
Program an STM32L4 Cortex M4F with the Arduino IDE via USB
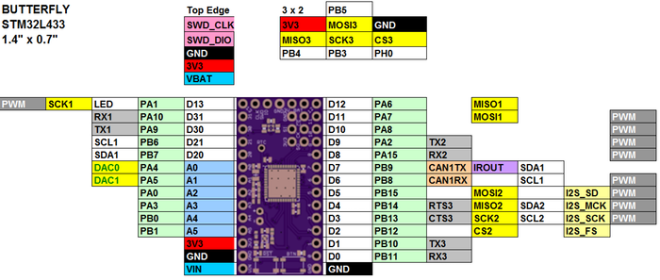
Technical specifications of the Butterfly and Ladybug STM32L4 dev boards:
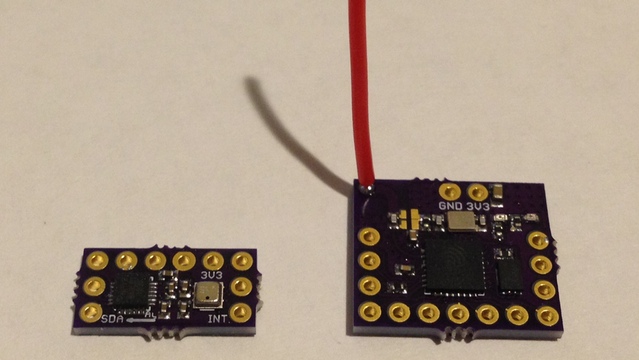
To the left is an MPU9250 accel/gyro/magnetometer motion sensor and the BME280 pressure/humidity/temperature sensor
To the right is an ESP8266 wifi-enabled add-on board for Butterfly
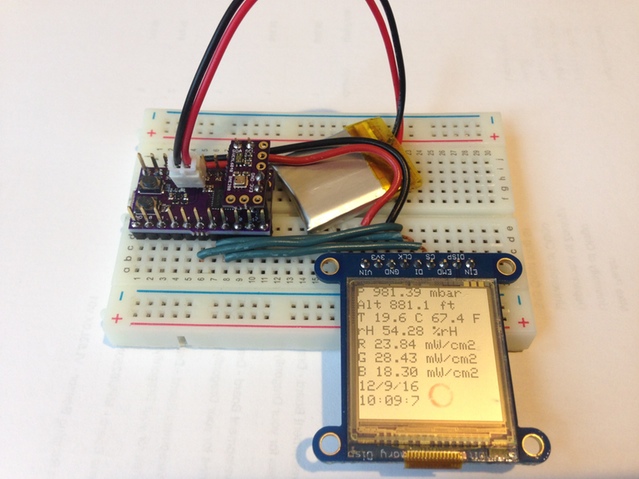
Reading the BME280 and VEML6040 sensors at 0.5 Hz and outputting pressure, temperature, humidity, altitude, RGB light intensity and RTC time and date to the Sharp memory display
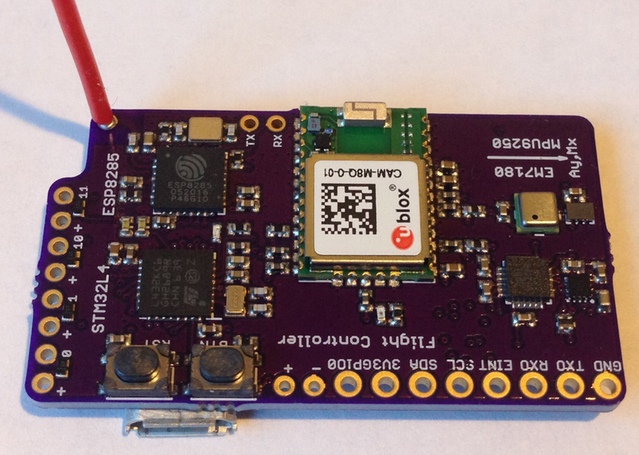
Flight Controller:
STM32L432 receives quaternions from the EM7180, which itself is master to the motion and pressure sensors, GNSS data from the CAM M8Q, then processes and packages the data and sends it to the ESP8285 via UART bridge for transmission to a hand-held controller
Industrial Diagnostics:
uses an STM32L433 as master to several slave sensors to detect and process signals from industrial equipment and report to a remote server via blue tooth

Piotr Esden-Tempski and Gareth McMullin joined the embedded.fm podcast to talk about their Black Magic Probe and 1bitsy projects:
They discussed their current Kickstarter campaign: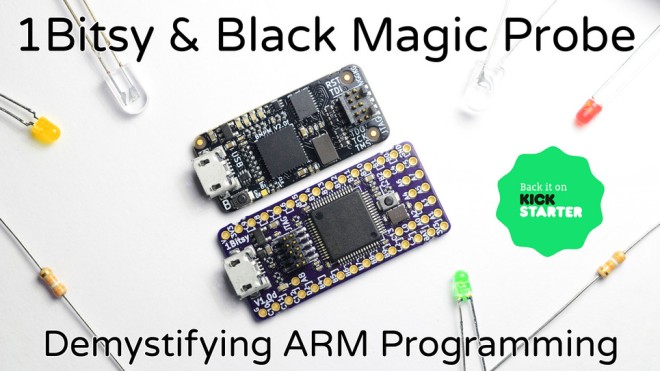
Design files and source code for both projects is available on GitHub:
 blacksphere
In application debugger for ARM Cortex microcontrollers.
 1bitsy
Open Source JTAG enabled ARM development platform
You can also ask questions on Black Magic’s Gitter channel.
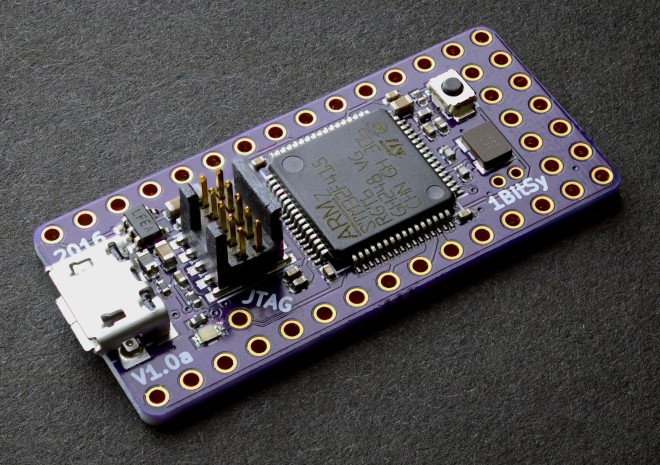
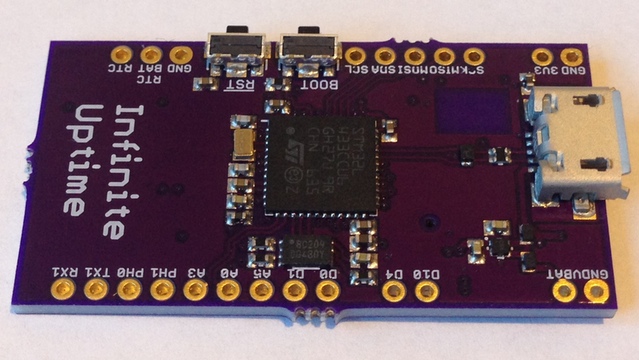
Piotr Esden-Tempski of 1Bitsquared created this Open Source and Open Hardware debuggable ARM development platform:
Firmware development with the lights on
Design files and source code are shared on GitHub:
 1bitsy-hardware
Small breadboard friendly STM32 (eventually other mcu’s too) eval boards with exposed JTAG and SWD for the use with Black Magic Probe and others!

Having my reflow solder oven finished, I couldn’t wait to see how far can I challenge it with complex circuit boards and tiny components. I decided to build a system with components that are tricky to solder, such as BGA and QFN packages. Not interested in designing the whole circuit on my own, I […]
via Building an ARM based microcomputer at home — HELENTRONICA
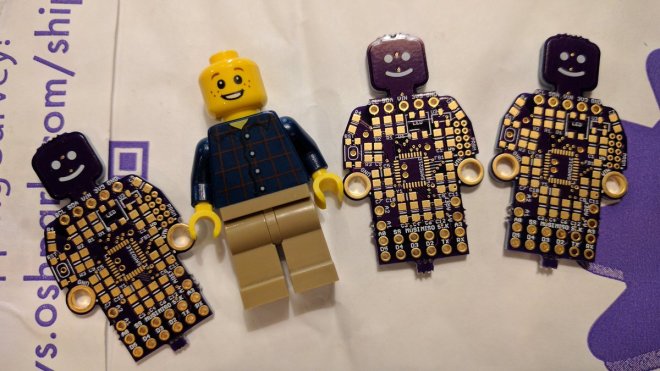
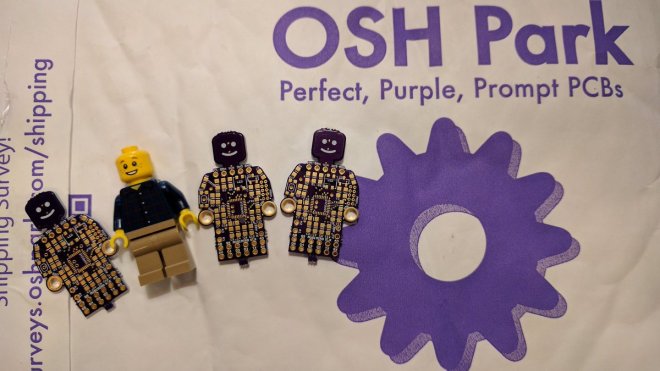
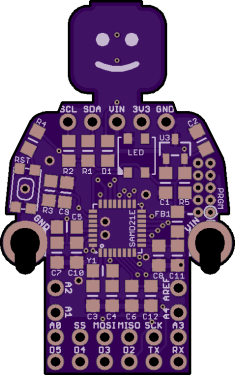
Benjamin Shockley designed this adorable Atmel SAMD21 dev board in the shape of Lego mini-figures!
This circuit board was designed as a fun project for a SAMD21E microcontroller based development board. The circuit design follows the recommended design from the SAMD Datasheet.
The design files are shared on GitHub:
bwshockley has shared the board on OSH Park:
![]()
What I’d like to give away one SAMD21 logger/sensor board to someone, wherever in the world you are. Why I’m a hardware guy, not a programmer. I’ve had fun designing this project and wrote simple code to verifying everything works. There is enough hardware and sketch space available to create a pretty cool logger project. […]
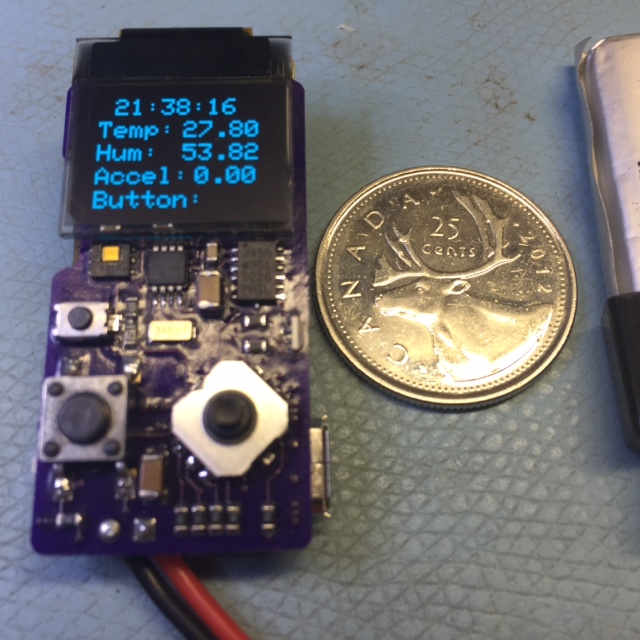
Mike Rankin created this tiny sensor board with an ARM Cortex M0+ microcontroller and OLED display:

It’s pretty tiny so a 4 layer board made the whole job easier. The top and bottom are pretty much dedicated for components, layer1 are tracks and power traces, layer2 is a ground plane. Mixing up an internal plane and routing layer was interesting.
The hardware consists of:
The design files and source code are available on GitHub:
Video of the board in action:
miker has shared the board on OSH Park:
![]()
[Written by OSH Park engineer Jenner Hanni on Wickerbox Electronics]
The STM32F4-Discovery development board has columns of male pin headers. I made a breakout board since you can’t plug the dev board into a breadboard, since the two columns on each side will short, and I’ve found the female-to-male jumpers to be unreliable. I made up a breakout board but it’s sadly cost prohibitive at $40 for three boards. Still a quick, fun project.
I’ve open sourced and shared the project at OSH Park.
I started with Jason Lopez’s STM32F4-Discovery Board Eagle schematic and footprint.
For the first test, I placed all the traces on the bottom of the board. Bottom in the layout here is blue. This made it possible to route a breakout board on the PCB router at Portland State’s Lab for Interconnected Devices. I didn’t want to have to plate all the via holes by hand to solder on the bottom and use traces on the top. Been there, done that, not interested. There are 200 vias on this board!


It worked fine, but there’s no silk and I’d really like a better looking board. I uploaded the now-verified Eagle .brd file to OSH Park. Of course, since OSH Park charges $5/square inch for three boards, it was $53.05 for three! Way out of my price budget. Luckily, you can submit designs where two completely separate boards are sitting next to each other on one .brd file.

This is the OSH preview with a cost of $33.95 for three. OSH Park charges for the smallest rectangle that encompasses your design, and you have to leave 100 mils between boards so the fab can mill it out.

It’s still significant, at about $10/board, but I can live with that. The 2×25 and 1×25 female headers also added up. Looks great, though.

The design files are available at the Github repository, and the boards can be ordered for $33.95 for a set of three from OSH Park.
I used these Sullins female headers:
Qty 4 of PPTC251LFBN-RC 1×25 0.1″ for $1.41 each
Qty 2 of SFH11-PBPC-D25-ST-BK 2×25 0.1″ for $2.89 each.
I’d bet you could search on Digikey or Mouser and find a cheaper equivalent.
This project is licensed under CERN’s Open Hardware License v1.2.
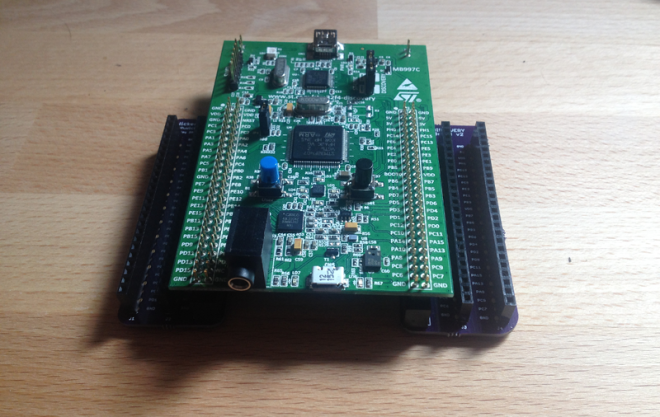
John Boyd created simple controller for RGB LED panels with the Texas Instruments MSP432 ARM microcontroller:
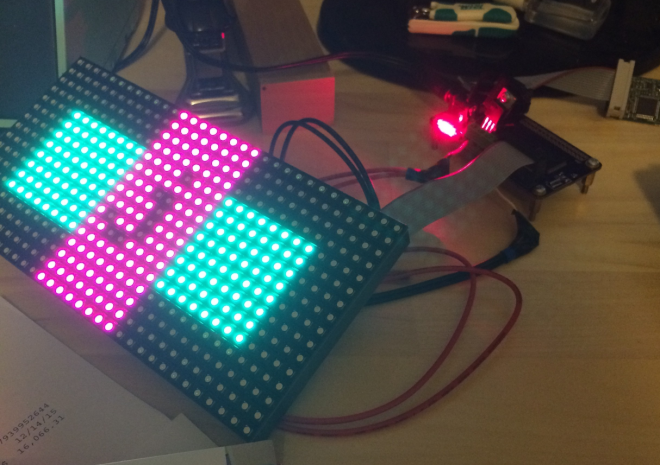
I have managed to get it working without issue at 60 FPS [..] I think I could push to above 100 FPS.
The challenging part of this project was designing the firmware in a way to leverage all of the MSP432 peripherals to reduce the computational requirements for the CPU.
The hardware design files and firmware source code are hosted on GitHub: