Hackaday Superconference tickets on sale

We’re thrilled to announce Supercon tickets are now available. The 2017 Hackaday Superconference is November 11th and 12th in Pasadena, California. This is the ultimate hardware conference. Hackers, designers, and engineers from all over the world converge — from the greenest beginners to those who have made history with their designs. This is the Hackaday community,…

via Hackaday Superconference: Tickets and Proposals — Hackaday

Hackaday Superconference tickets on sale

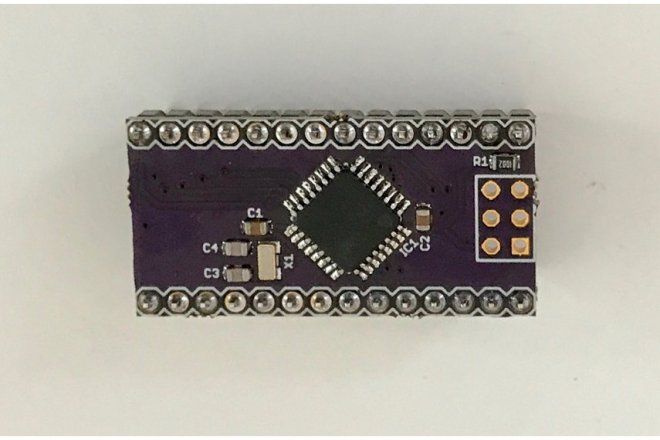
ATXMega32E5 adapted for a breadboard

2017-07-04T23:35:25.015Z-IMG_8570.jpg.855x570_q85_pad_rcrop.jpg

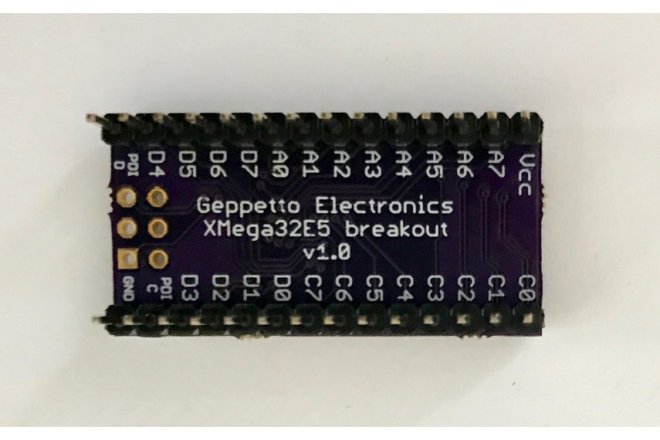
ATXMega32E5 breakout board

The ATXMega32E5 is the next step up for those experienced with the AVR series of microcontrollers from Microchip (formerly Atmel). They use the same compilers and libraries as the rest of the AVR 8- and 16-bit families, but they can run at 32 MHz and have an amazingly powerful set of internal peripherals that can take your projects to the next level and beyond.

2017-07-04T23:35:25.015Z-IMG_8571.jpg.855x570_q85_pad_rcrop.jpg

For prototyping, however, the disadvantage is that the XMega chips are not available as through-hole parts. That’s where this breakout board comes into play.

nsayer has shared the board on OSH Park:

ATXMega_E5 breakout v1.0

9ccb24bd9f9b447019c3a97cfa9dd06b.png
Order from OSH Park

ATXMega32E5 adapted for a breadboard

DIY 6-Axis Micro Manipulator

[David Brown]’s entry for The Hackaday Prize is a design for a tool that normally exists only as an expensive piece of industrial equipment; out of the reach of normal experimenters, in other words. That tool is a 6-axis micro manipulator and is essentially a small robotic actuator that is capable of very small, very precise movements.…

via Hackaday Prize Entry: DIY 6-Axis Micro Manipulator — Hackaday

DIY 6-Axis Micro Manipulator

EasyPWR

From mcu_nerd on Hackaday.io:

1456891490358322562.JPG

EasyPWR

A small, easy to assemble board that makes use of old wall warts.


Like many of us, I had a bunch of various wall-warts lying around, but sadly though none of them produced a regulated 5V/3.3V. I had some 78xx regulators around, so I went into KiCad and made a board to make those wall-warts useful! Changing the world by saving old wall warts from the dumpster!

EasyPWR

Building a PCB lapel

JinGen Lim created this beautiful project:

csslapel-done

Building a PCB lapel

I had little experience with fabric, but building a lapel out of PCB seemed like something that might just work. PCBs are typically built with extremely high tolerances for its copper and mask layers and still acceptably accurate for the silkscreen.


Building a PCB lapel

Ultrasound Imaging with Raspberry Pi

 writes on the Hackaday blog:20170529_203924_notes

Best Product Entry: A HSDK for Ultrasound Imaging

As an entry into this year’s Best Product portion of the Hackaday Prize, [kelu124] is developing a hardware and software development kit for ultrasound imaging.

Ultrasound is one of the primary tools used in modern diagnostic medicine. Head to the doctor with abdominal pain, and you can bet you’ll be seeing the business end of an ultrasound system. While Ultrasound systems have gotten cheaper, they aren’t something everyone has in the home yet.

AD9200

[kelu124] is working to change that by building a hardware and software development kit which can be used to explore ultrasound systems. This isn’t [kleu124’s] first rodeo. HSDK builds upon and simplifies Murgen, his first open source ultrasound, and an entry in the 2016 Hackaday prize. [kelu124’s] goal is to “simplify everything, making it more robust and more user-friendly”.

setup.png

The system is driven by a Raspberry Pi Zero W. A custom carrier board connects the Pi to the pulser block, which sends out the ultrasonic pings, and the analog front end, which receives the reflected signals. The receiver is called Goblin, and is a custom PCB designed [kelu124] designed himself. It uses a variable gain amplifier to bring reflected ultrasound signals up out of the noise.


Ultrasound Imaging with Raspberry Pi

Programming Surface Mounted Chips

Ken Olsen writes in a Surface Mount Challenge project log on Hackaday.io:

5429531497407265994

Programming Surface Mounted Chips

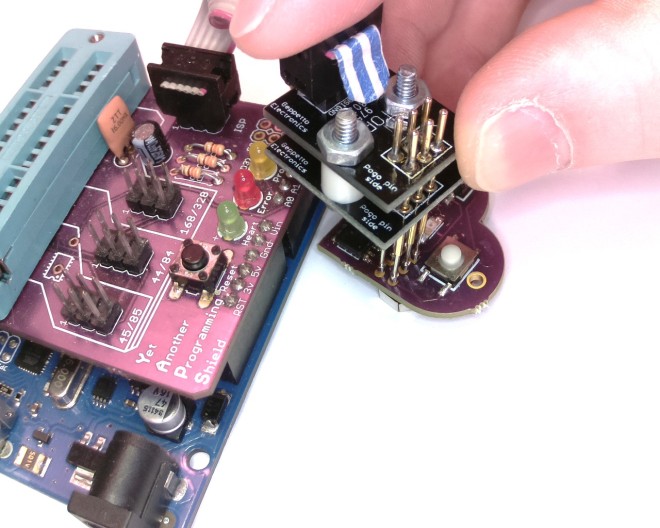
A majority of my projects to date have used DIP package Attiny85, 84, and Atmega328. These are usually programmed beforehand using a ISP shield on an Arduino, or afterwards using the ISP header. My first PCB design, was in fact, a shield which could be used to program the variety of AVR chips I was using. Breadboarding up an Arduino-as-ISP circuit time every time I needed one was error-prone and frustrating.

8494451497407448299.jpg

It occurred to me that since not all projects have ISP headers, there should be some way to program the chips prior to installation. With a little googling, I found SOIC to DIP adapters which can be used to mate up with a DIP ZIF fixture. A SOIC 20 allows me to program the AVR 8-pin, 14-pin, and 20-pin packages!

Programming Surface Mounted Chips