BeagleLogic Standalone featuring the Octavo SiP

Guest article written by  Kumar Abhishek on the Octavo Systems website:
beaglelogic-case

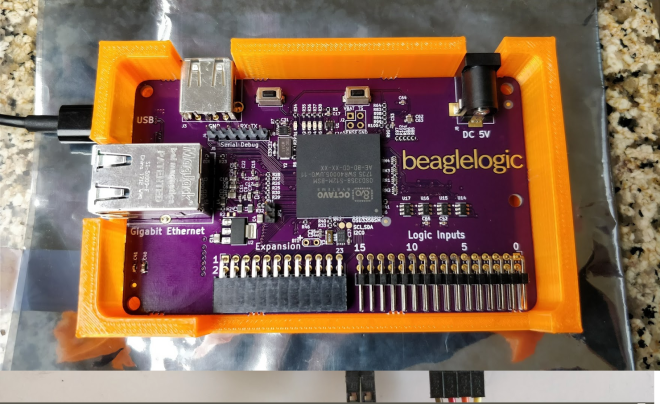
BeagleLogic Standalone – Featuring the OSD3358-SM

Three years ago, as a student under the Google Summer of Code program for BeagleBoard.org, I developed BeagleLogic – that turned the BeagleBone Black and its variants into a Logic Analyzer using the Programmable Real-Time Units (PRUs) on the AM335x SoC to capture up to 14 inputs up to 100 MSamples/sec. It is possible to fill up to 300MB of the 512MB DDR RAM in the BeagleBone with logic samples – that’s 3 seconds of data at 8 channels (1.5 secs at 16 channels). I also designed a cape for the system – called the BeagleLogic cape that would allow buffering the external logic signals up to 5V TTL so that they do not damage the BeagleBone.
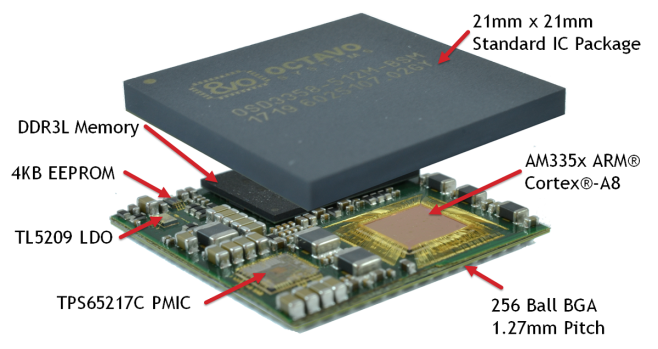
Stack-Up-Description.png

The launch of Octavo Systems and its OSD3358 SiP got me excited, and the idea of a turnkey version of BeagleLogic was rekindled as the design would be greatly simplified due to the SiP integrating the core components, leaving me to focus on the features I want to add to the system.
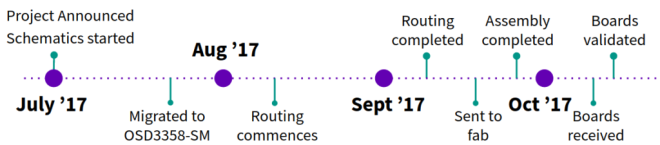
beaglelogic-timeline-1024x225

From concept to completion, this project took 4 months working on it part-time. I relocated in August so work happened at an even slower pace during that month

The schematics were originally based on the OSD3358, however Jason encouraged me to design based on the newly announced OSD3358-SM as it was smaller and had a more optimized ballmap. The schematics were then migrated to the OSD3358-SM in late July. At the beginning of the routing exercise, I was really apprehensive if the design could be routed in 4 layers but thanks to the optimized ball map of the OSD3358-SM, the routing was easily completed so.
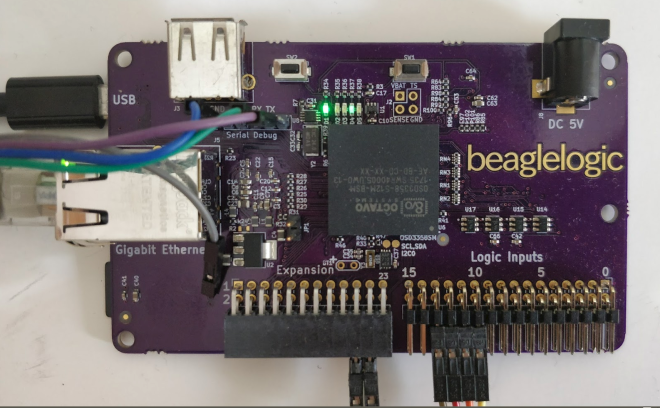
beaglelogic-standalone

BeagleLogic Standalone featuring the Octavo SiP

Reflowduino: Circuit Board Assembly for Everyone

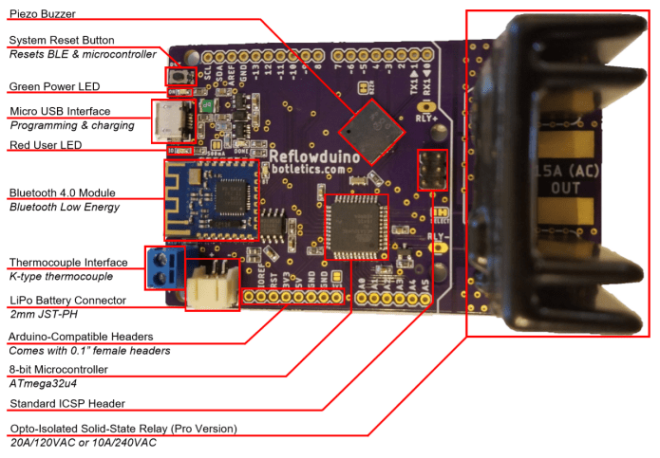
Timothy Woo has launched a Indiegogo campaign to manufacture his open-source, Arduino-compatible, wireless PCB reflow oven controller:

vwqlvw1alqs19g9mq16x.jpg.png

Reflowduino: Circuit Board Assembly for Everyone!

Reflowduino is the first completely open-source, Arduino-compatible reflow oven controller of its kind that enables practically anyone to assemble their own beautiful circuit boards at home!

Reflowduino comes loaded with features, all in a compact Arduino-compatible package, with full documentation, example code, demo app, and comprehensive wiki on Github.

ecriw1wwk9mpio5pmbz4

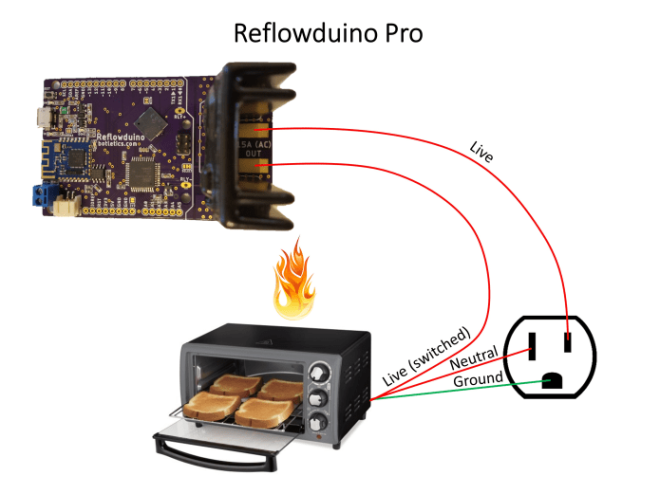
Reflowduino is designed to be extremely easy to use! The general concept is to switch the power of the appliance on or off with a solid-state relay as shown below, measuring the temperature by placing the thermocouple tip inside the oven during the whole process.

If nothing else, please share this campaign to your friends, family, and anyone who might be interested on social media! Remember that every view counts for me, and I’m depending on you to make this happen!

arynyhrvcfd87k9omiwx

Reflowduino: Circuit Board Assembly for Everyone

Mike Ossmann and Dominic Spill: IR, Pirates!

Mike Ossmann and Dominic Spill have been at the forefront of the recent wave of software-defined radio (SDR) hacking. Mike is the hardware guy, and his radio designs helped bring Bluetooth and ISM-band to the masses. Dominic is the software guy who makes sure that all this gear is actually usable. The HackRF SDR is…

via Mike Ossmann and Dominic Spill: IR, Pirates! — Hackaday

Mike Ossmann and Dominic Spill: IR, Pirates!

Stepper Driver Module with Swappable Heatsinks

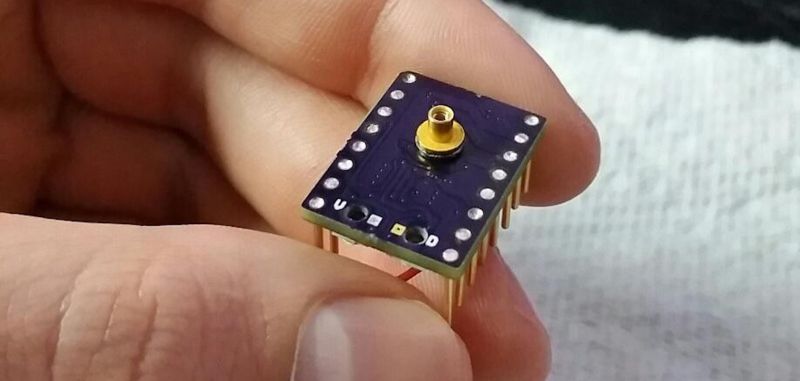
At first glance, [Dean Gouramanis]’s stepper driver module for 3D printers looks like just another RAMPS-compatible stepper board. Except, what could that gold-plated copper peg sticking out of the PCB possibly be? That would be [Dean]’s PowerPeg Thermal Management System that he built and entered in the Hackaday Prize competition for 2015, where it rocked…

via Stepper Driver Module with Swappable Heatsinks — Hackaday

Stepper Driver Module with Swappable Heatsinks

Hackaday: A Fidget Spinner We Can Love


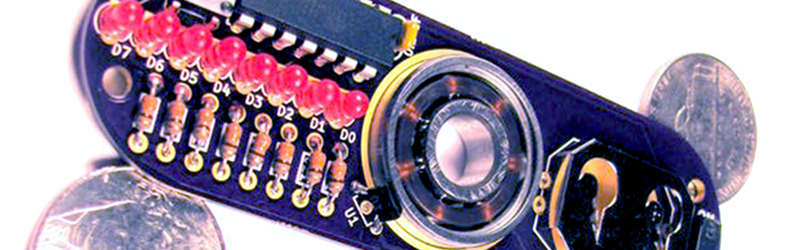
We’ve been frankly mystified at the popularity of fidget spinners. After all, we can flip an ink pen around just fine. However, [MakersBox] just sold us on what he calls the geek spinner. The fact that the spinner is actually a PCB and has parts on it, would probably have been cool enough. However, the…

via Finally, A Fidget Spinner We Can Love — Hackaday

Hackaday: A Fidget Spinner We Can Love

Prototyping, Making A Board For, And Coding An ARM Neural Net Robot

[Sean Hodgins]’s calls his three-part video series an Arduino Neural Network Robot but we’d rather call it an enjoyable series on prototyping, designing a board with surface mount parts, assembling it, and oh yeah, putting a neural network on it, all the while offering plenty of useful tips. In part one, prototype and design, he starts…

via Prototyping, Making A Board For, And Coding An ARM Neural Net Robot — Hackaday

Prototyping, Making A Board For, And Coding An ARM Neural Net Robot

An Interview with Alex Williams, Grand Prize Winner


Alex Williams pulled off an incredible engineering project. He developed an Autonomous Underwater Vehicle (AUV) which uses a buoyancy engine rather than propellers as its propulsion mechanism and made the entire project Open Source and Open Hardware. The design aims to make extended duration missions a possibility by using very little power to move the…

via An Interview with Alex Williams, Grand Prize Winner — Hackaday

An Interview with Alex Williams, Grand Prize Winner

Interface the Raspberry Pi Zero W to Commodore 64

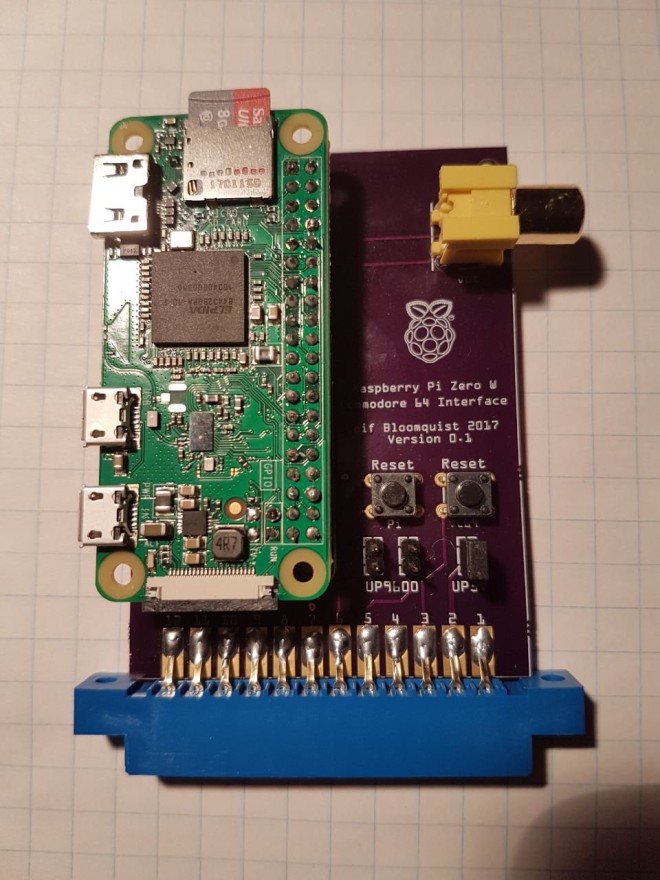
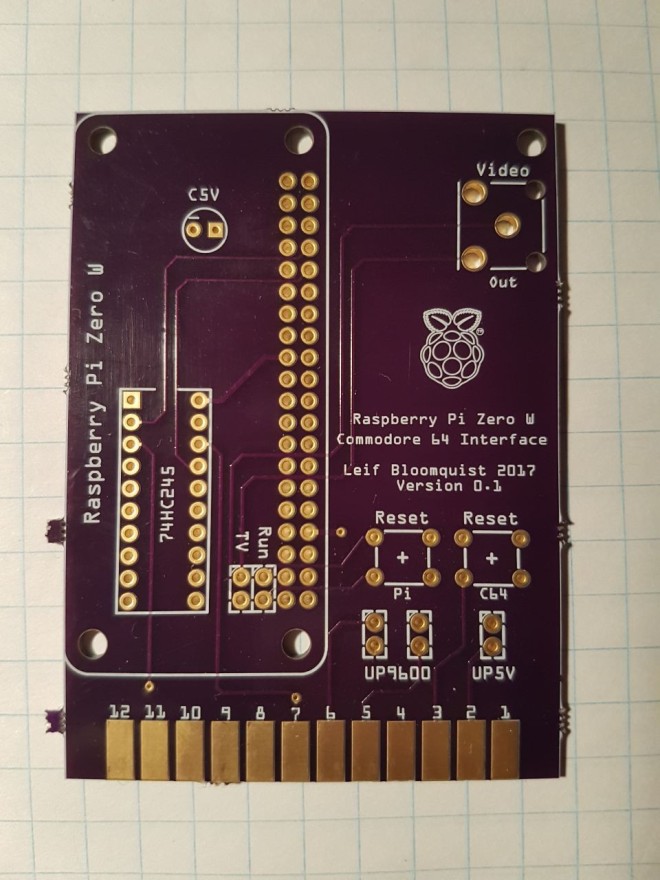
Leif Bloomquist has designed a board to interface the Raspberry Pi Zero W to the Commodore 64 through the User Port.

4826291511238099961.jpg

Raspberry Pi Zero W / Commodore 64 Interface Board

Project goals:

1. Get a Linux shell prompt on your C64 through the Pi Zero’s Console Pins.

2. Use the Pi Zero as a virtual Floppy Disk Drive through raspbiec (https://github.com/Flogistoni/raspbiec) (another option is ninepin, https://github.com/FozzTexx/ninepin)

3. Allow your C64 to access the Internet, USB, etc. through the Pi Zero. ssh!

4. Provide Composite Video out from the Pi Zero that is usable directly on a Commodore monitor.

5. (Stretch Goal #1) If possible – use your C64’s keyboard as the keyboard on the Pi Zero (through the serial port). Maybe through softwedge? (https://github.com/theatrus/softwedge)

6. (Stretch Goal #2) Add PWM audio output (along the lines of https://learn.adafruit.com/introducing-the-raspberry-pi-zero/audio-outputs)


  • 1 × Commodore 64
  • 1 × Raspberry Pi Zero W
  • 1 × 75HC245 For 5V / 3.3V translation
  • 1 × Custom board To be designed.

955771511238228834

Interface the Raspberry Pi Zero W to Commodore 64

Hackaday: What Actually Happens At A Hardware Hacking Con


The Hackaday Superconference was last weekend, and it was the greatest hardware con on the planet. What can you build out of a conference badge? If you answered “a resin-based 3D printer” you would have won a prize. If you decided to put your badge in a conference water bottle and make a stun gun…

via What Actually Happens At A Hardware Hacking Con — Hackaday

Hackaday: What Actually Happens At A Hardware Hacking Con