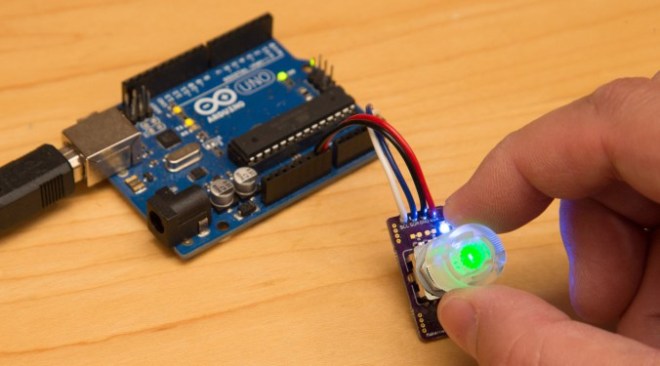
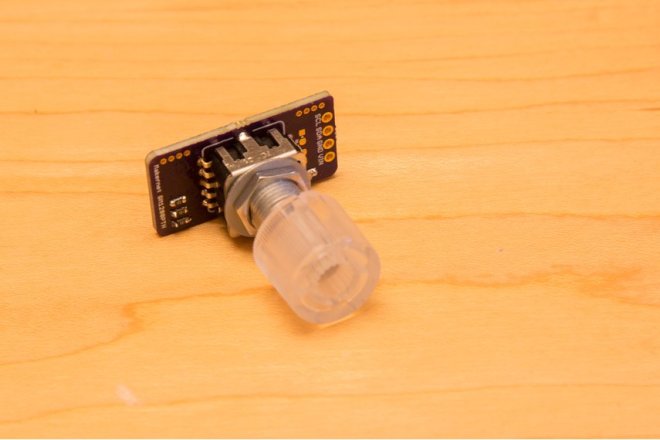
Makernet Knob’s makes the point that “Rotary encoders are cool but hard to wire into your projects.” Having wired up a custom input device for my computer using an encoder, I can attest to both of these statements. In my case, it took me quite a bit of time simply to figure out how each encoder pin was used!
To help alleviate complicated wiring issues, this custom knob features a built-in I2C interface, which allows several (even hundereds) of knobs to be chained together without issue. Additionally, the top of the encoder can be depressed as a pushbutton, and it even has an RGB LED integrated inside of it to give you feedback right on the knob!
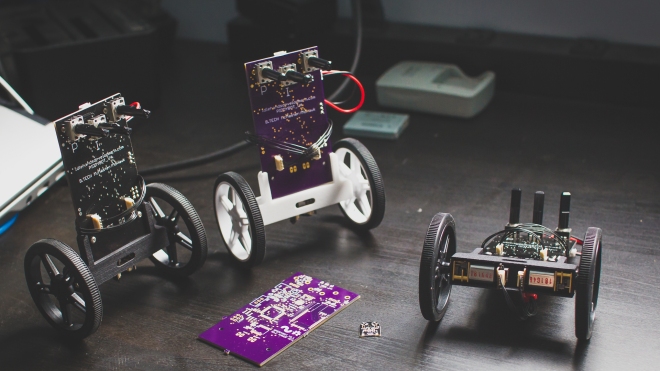
The PIDDYBOT is currently using a Atmega32u4 microncontroller. It uses 3 potentiometers that allow you to manually tune the PID loop to get the robot balancing. This allows you to see how each term affects the performance of the system. It is a great teaching tool for the classroom and is currently being used by students at McMaster University.
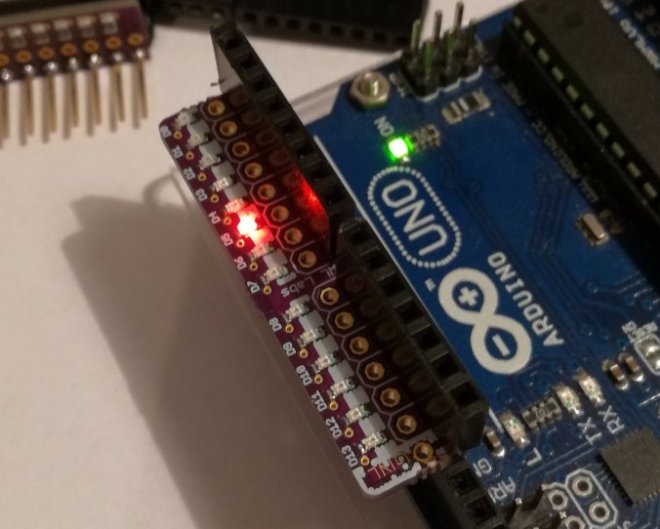
simply plugs into the I/O female header pins on one side of an Arduino UNO, and allows signals to pass through its own headers while lighting up to indicate what is HIGH and LOW
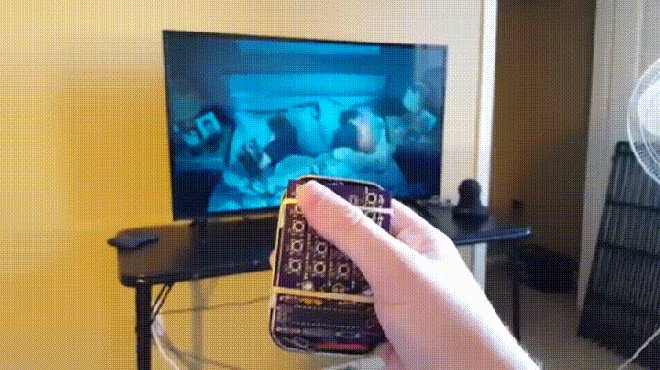
A couple years ago my TV remote broke. I had used one of those universal remote phone apps as an alternative for a while, but that just got really frustrating. Without the tactile feel of buttons it was too easy to press wrong buttons on my smart phone; accidentally pressing mute, stop or changing the channel / input, etc.
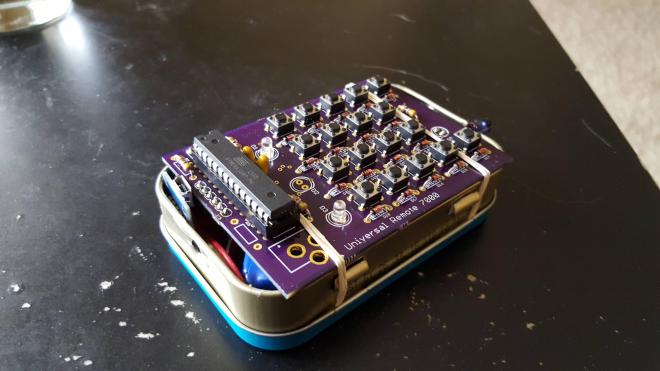
I considered just ordering a cheap replacement remote off of Ebay for a few dollars but part of me wanted to take advantage of the situation and make one from scratch using the atmega328p chip used on the famous Arduino Uno. I had been tinkering with the atmega chip quite a bit at the time and was also exploring the process of designing circuit boards using cad software.
I loved the idea of designing a circuit board from scratch & filling it with circuits. This seemed like the perfect project for me – being able to use my beloved arduino chip, design and populate a circuit board with circuits & fashion some kind of project case (altoids tin) to put it all in. I went for it.
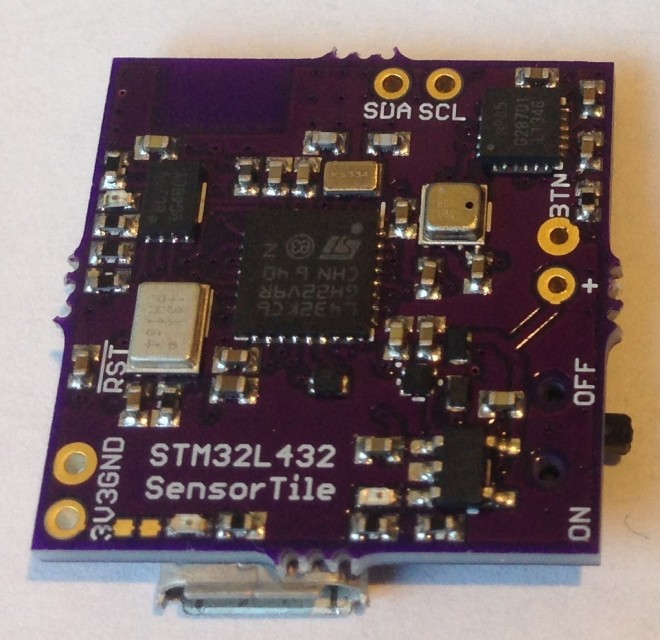
This is a 20 mm x 20 mm four-layer pcb tile full of interesting sensors (ICS43434 I2S Digital Microphone, MPU6500 acclerometer/gyro, BME280 pressure/temperature/humidity, and CCS811 air quality) with a Rigado BMD-350 UART BLE bridge for sending data to a smart phone all managed by a STM32L432 host MCU.
The STM32L432 is programmed using the Arduino IDE via the USB connector and serial data can be displayed on the serial monitor to verify performance and proper function, etc. But it is intended to be powered by a small 150 mAH LiPo battery for wireless sensing applications. The STM32L4 is a very low power MCU and with proper sensor and radio management it is possible to get the average power usage down to the ~100uA level, meaning a 150 mAH LiPo battery can run the device for two months on a charge.
A collection of sketches to run the STM32L432-based (20 mm x 20 mm) sensor tile with an MPU6500 accel/gyro, ICS43434 I2S digital microphone, BME280 temperature/pressure/humidity sensor, and CCS811 air quality sensor. The sensor tile has an on-board MAX1555 LiPo battery charger, an on/off switch, and a Rigado BMD-350 nRF52 BLE module.
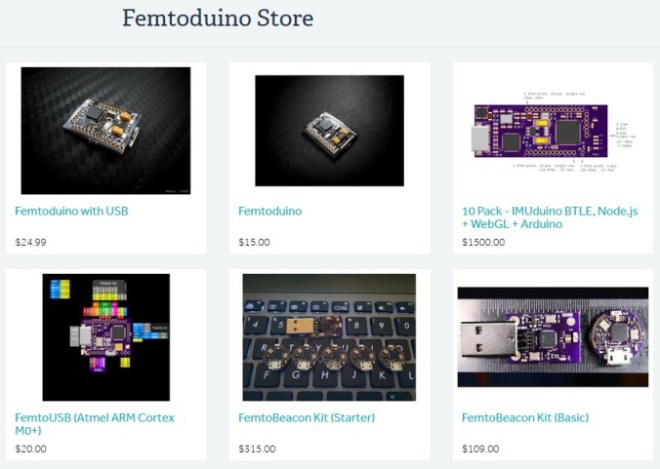
Alex Albino, of the Femtoduino Store, is one of the original sellers on Tindie, with his store officially listed as opening on November 26, 2012. During this time, he’s sold well over 300 of his custom boards, and I was glad to catch up to him to ask a few questions.
Albino, who works as a software and web developer, first got into electronics after his NES was fried in a thunderstorm in junior high, and he got to take it apart. Eventually his interests led him to the Arduino and Fabio Varesano’s work, and multiple hardware platforms over the years.
Albino’s store started with him asking Fabio Varesano if he could sell Femtoduino boards, which have the same outputs as an Arduino Uno in the size of one’s thumb. Since Varesano wasn’t interested in selling them himself, he generously gave Albino permission to run with this design. Albino then went to work assembling and selling these boards, and even made sure to give a portion of the money he made—though he didn’t have to—back to Varesano to promote his open source work.
Of course, these tiny Arduino clones are still for sale, but Albino sells several other items, including the FemtoBeacon wireless IMU (inertial measurement unit) sensor. He even notes his store theme as providing the smallest open source IMU sensors in the world. You can see one in the image above next to a U.S. dime—quite small indeed. He hopes to grow the Femtobeacon business into a full-time job in the future.
Naturally, Albino has bought from other Tindarians in the past, which he says is always fun. He also notes that, “If you sell anything on Tindie, make sure to package carefully, take decent photos, and include videos of stuff in action!” As such, here’s a video of the tiny Femtoduino in action:
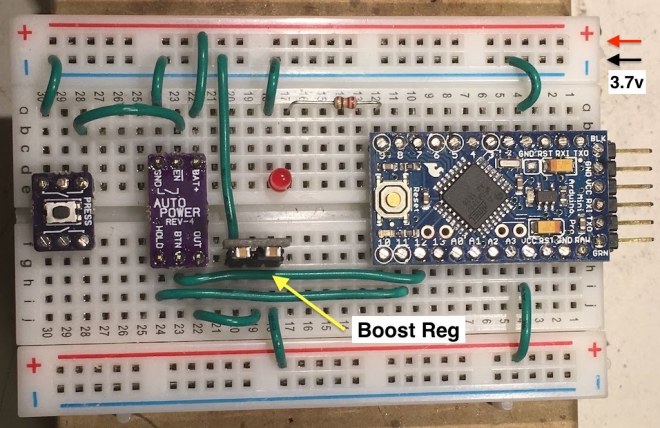
This article shows how you can use a simple, ultra low current pushbutton, an LED and a few I/O lines to implement pushbutton power switch for an Arduino.
Simply press the pushbutton for a few seconds and the Arduino will power on and run code. Then, push and hold the pushbutton until the LED illuminates and then release the button to switch power off.
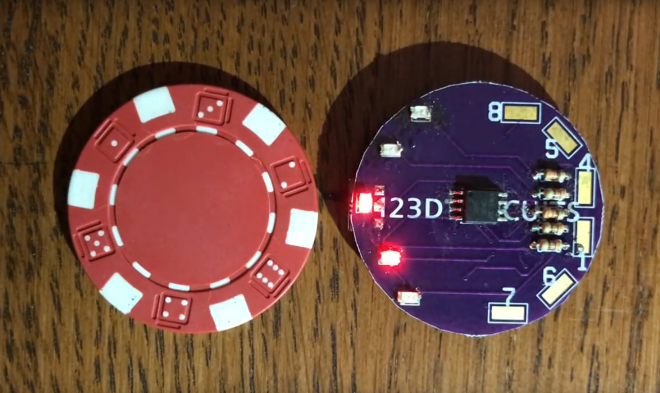
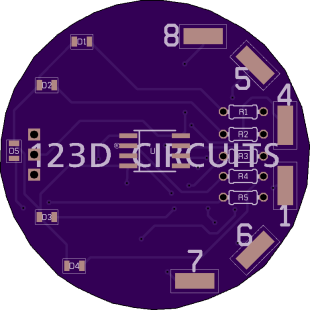
Spice up your poker games with these cool blinking chips. They can be programmed on the fly to have a certain number of the LEDs illuminated to indicate value, or you can have the lights blink in a cool pattern. They make great playing chips for championships or great prizes to hand out to the winners.
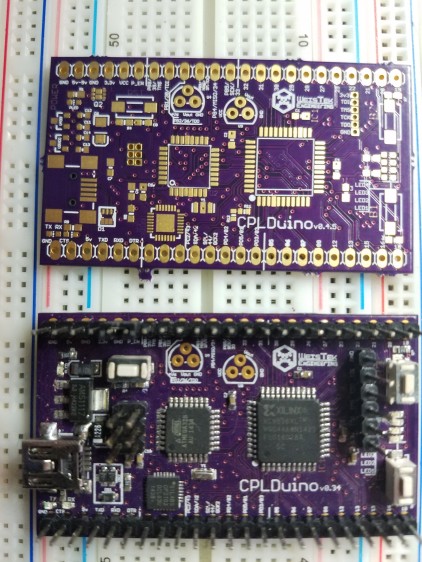
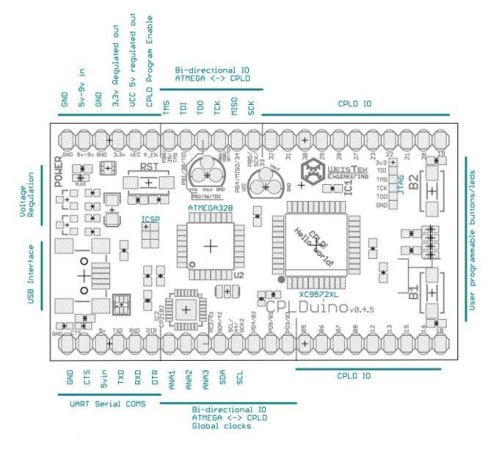
The XCACDV3, CPLDuino is a single board solution to meld Atmels ATmega 328 RISC microcontroller with a Xilinx XC9536XL1 CPLD. Allowing for rapid prototyping of digital circuits without the need for a breadboard. The CPLDuino is capable of passing information from the on board ATMega328 to the CPLD and vice versa, allowing for real-time data monitoring. Thanks to the on-board CP2102 USB to Serial UART, data can be viewed and manipulated via the virtual com port.
There are people of diverse backgrounds selling on Tindie, but as far as I know, Jakub Polonský is the only one here with a PhD in electrochemistry. Though this gave him a good background in testing of electronic quantities for electrochemical systems, as far as designing electronics, he’s self taught. He graduated in 2012, but started with Arduino boards in 2010, allowing him to use this versatile tool for research purposes.
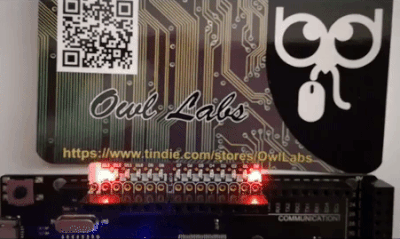
Check out our previous blog post for more information on the project: