Are you a student? Are you part of a hackerspace? We have a contest going on right now where you can win a fancy new Prusa i3 MK3.
We’re looking for functional repairs of items around your house, office, or garage. Did you repair something with a 3D printer? Then you too can get in on the action!
Early Bird tickets for Hackaday Belgrade have just gone on sale, but they will not last long. This is Hackaday’s premier European hardware conference with talks, workshops, great food and drink, entertainment, and a hardware badge for hacking and demos.
Although recent versions of KiCad have made improvements to the way part and footprint libraries are handled, the big upcoming change is that footprint libraries will be installed locally. The Github plugin for library management — a good idea in theory — is no longer the default. Spice simulation is also coming to KiCad. The best demo of the upcoming Spice integration is this relatively old video demonstrating how KiCad turns a schematic into graphs of voltage and current.
The biggest news, however, is the new ability to import Eagle projects. [Wayne] demoed this live on stage, importing an Eagle board and schematic of an Arduino Mega and turning it into a KiCad board and schematic in a matter of seconds. It’s not quite perfect yet, but it’s close and very, very good.
There are, of course, other fancy features that make designing schematics and PCBs easier. Eeschema is getting a better configuration dialog, improved bus and wire dragging, and improved junction handling. Pcbnew is getting rounded rectangle and complex pad shape support, direct export to STEP files, and you’ll soon be able to update the board from the schematic without updating the netlist file. Read that last feature again, slowly. It’s the best news we’ve ever heard.
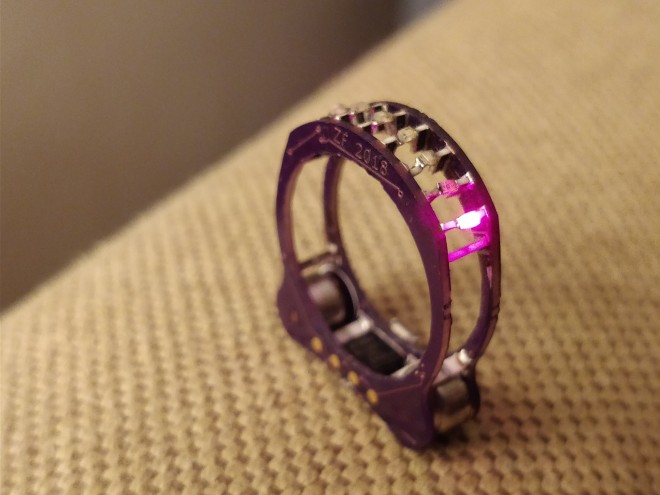
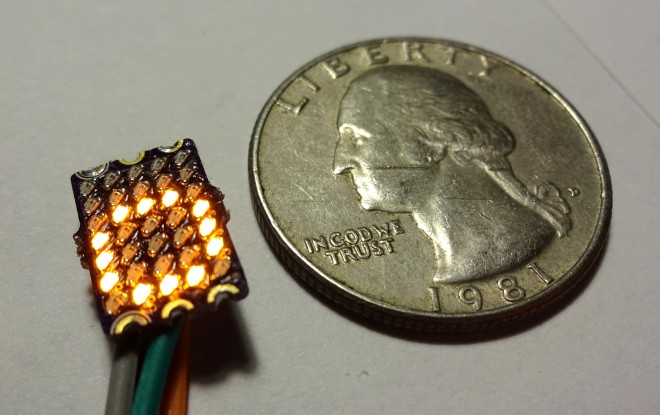
This project evolved from Splinter, the SMT cordwood project I did last summer/fall. The ring is powered by tiny size 10 hearing aide batteries which should give 4-6 weeks of intermittent use, once I come up with a design that doesn’t break after a few days of wear and update the firmware to put the ATtinyx5 to sleep. The first rev (labelled ‘blink-ring’) used deep red 650nm LEDs. Searching for particular component lengths gave me an excuse to use strange 0508 resistors. And somehow, this is my first Charlieplexing project. Yaay novelty soldering!
In one hand you hold the soldering iron, in the other the solder, and in two more hands the parts you’re trying to solder together. Clearly this is a case where helping hands could be useful.
One reason is to take advantage of standardized, open source creativity. Anyone can share a model of their design for all to use as is, or to modify for their needs. A case in point is the ball and socket model which I downloaded for a helping hand. I then drew up and printed a magnifying glass holder with a matching socket, made a variation of the ball and socket joint, and came up with a magnetic holder with matching ball. Let’s take look at what worked well and what didn’t.
Our guests for this week’s Hack Chat are Pete Dokter and Toni Klopfenstein of SparkFun Electronics. Pete is formerly the Director of Engineering at SparkFun and now the Brand Ambassador for SparkFun Electronics.
He hosts the According to Pete video series expounding on various engineering principles and seriously needs a silverburst Les Paul and a Sunn Model T. Toni is currently the product development manager at SparkFun. She’s served on the Open Source Hardware Association Board and participates in the Open Hardware Summit yearly. In her free time, she spends fifty weeks out of the year finding dust in her art and electronics projects.
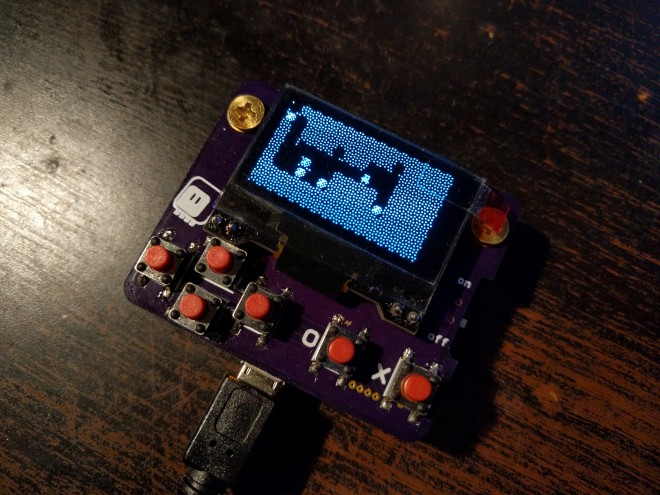
The Micro:bit is a pretty decent platform for teaching kids to program, but you can’t really make arcade-style games for it. You only have two buttons and a 5×5 display. Perhaps enough for a very small snake game, but that’s pretty much it. That’s why I started working on #PewPew FeatherWing as an alternative platform, but at some point I started wondering if it’s really impossible to do it on the micro:bit.
When the most recent version of micropython got the ability to use any pins for I2C, I realized that I can finally connect a display easily. I could use a HT16K33 and a 8×8 LED matrix like on the PewPew, but I decided to try something else — a monochrome OLED display, similar to the one used on many Arduino-based game consoles.
Take a look at Tindie’s thriving sound section and you’ll see there is no shortage of people making their own electronic music. These devices take many forms, and one interesting take on sound creation is the OKAY 2 Synth DIY Kit. At face value it features 2 octaves of keys, a built-in amplifier along with a 1/4″ line out, and knobs to select the octaves that you’d like to play — but it gets more interesting under the hood.
What makes it unique by today’s standards is that it doesn’t use any sort of computer or microcontroller, but instead produces sound using an LM555 timer along with other discreet components for monophonic sound. Given its small size, you could use two at once, perhaps combining them via the line out to be further modified in your synth setup!
In case you’re wondering, the original—or nearly so as it’s version 1.1.1—OKAY is also available. It works largely the same as the OKAY 2, but features only a single octave of keys, and doesn’t have an audio output jack.
This project is based on my #reDOT project. Basicly it is a 5×7 SMD LED Matrix an a microcontroller on one PCB. I started wirh 0201 LEDs (see first project log), but this was not reliable. So a second version with 0402 is in development. 0402 LEDs do have some benefits over 0201:
bigger and you can solder them better
cheaper
more colors availible
The microcontroller (a low coast STM8) drives all LEDs directly with multiplexing. For controlling a UART interface is available. The dimensions are like a DIP-6 package. For easy connection of multiple PCBs, the pads are castellated. Also the supply rails are available on both sides. So multiple of these display can be soldered together to a bigger display without the need of additional wiring.
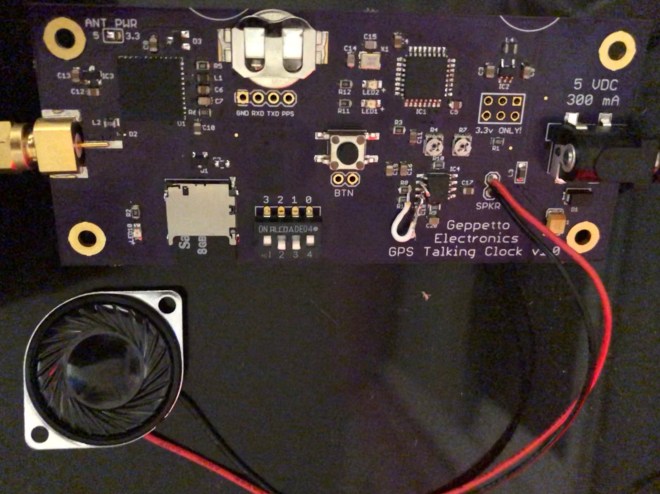
[Nick Sayer] used the USNO Master Clock telephone feed to see in the New Year, but had to make do with a voice from another time zone. It seems that there are no services remaining that provide one in Pacific time. His solution to the problem for a future year? Make his own Talking Clock, one that derives its time reference from GPS.
At its heart is a SkyTraq Venus838LPx miniature GPS module coupled to an ATMega32E5 microcontroller. The speech comes in the form of pre-recorded samples stored on an SD card. There is a small on-board amplifier to drive a single speaker. For extreme authenticity perhaps it could be attached to a GSM mobile phone module to provide a dial-up service, but he’s got everything he needs for a New Years Eve.